If you’d like your spreadsheets to look neat, you possibly can’t have textual content spilling out of cells, making the info exhausting to learn. Happily, Excel comes with the AutoFit characteristic that helps you modify the column width or row peak with a couple of clicks.
On this article, we’ll undergo three strategies of autofitting columns and rows in Excel. This manner, you will discover the one which fits your working fashion. Additionally, we’ll focus on when you possibly can’t use Excel AutoFit and the way to work round it.
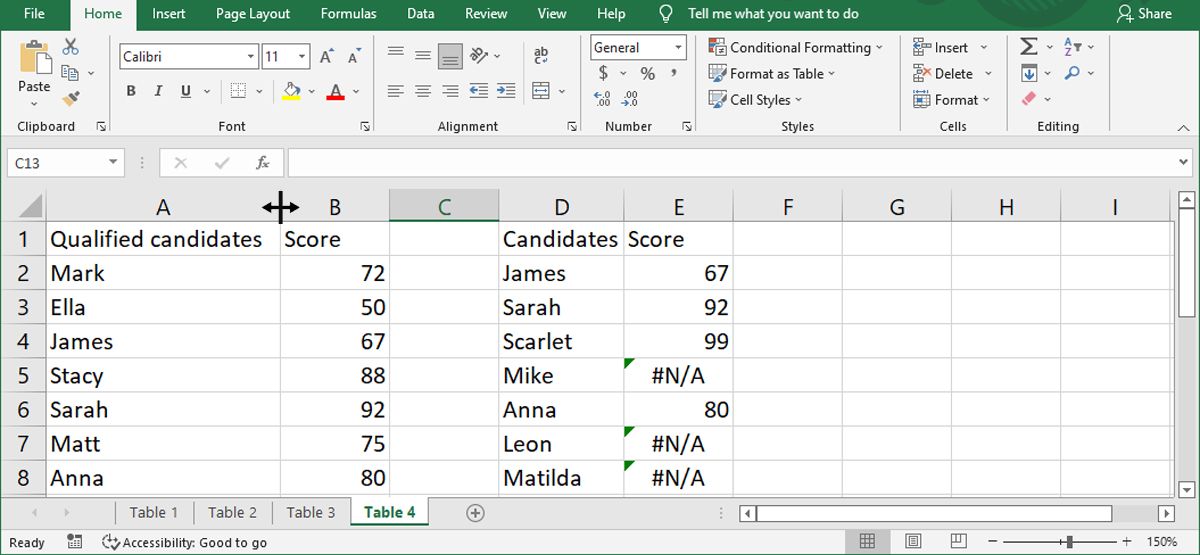
1. Double-Click on to AutoFit
That is the simplest methodology, and it really works nice whenever you’re modifying a small spreadsheet and wish to autofit single columns and rows, so you may get your file able to print.
Merely hover the cursor over the column or row edge. The cursor ought to change right into a double-sided arrow. Now, double-click your mouse or touchpad left-key.
Irrespective of which methodology you utilize, if it’s essential autofit a number of columns or rows, merely choose them by clicking the headers. To autofit the complete spreadsheet, press Ctrl + A or click on the Choose All button and double-click a column or row border.
Notice: Even should you’ve chosen all cells and used the autofit characteristic, Excel is not going to modify the columns or rows as you kind. You would need to autofit the cells once more whenever you’re completed modifying them.
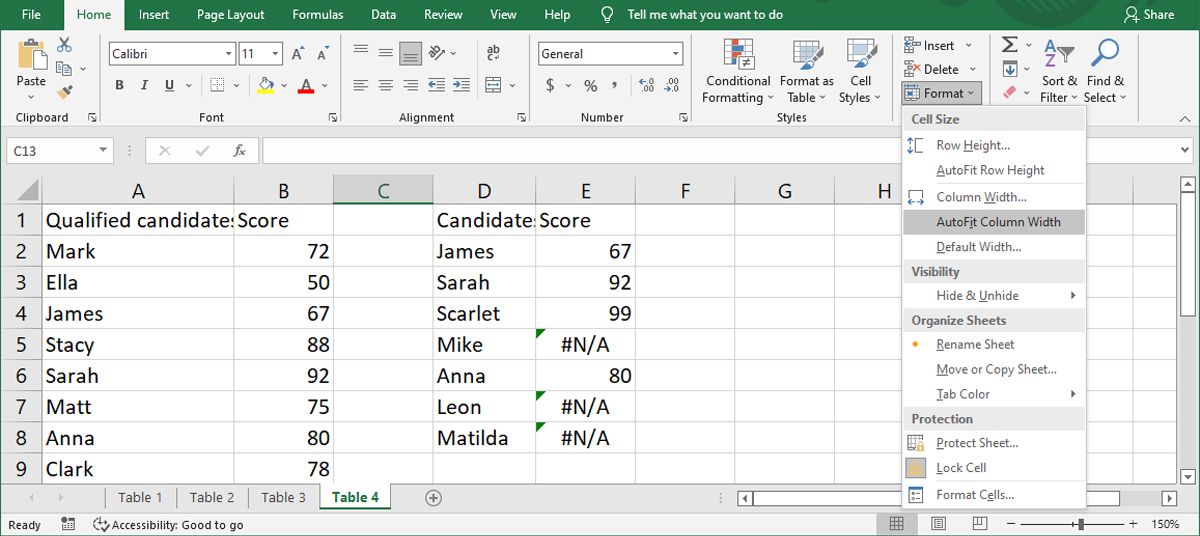
2. Use Excel Ribbon to AutoFit
For those who’re utilizing a multi-display setup, you are in all probability not sitting very near your displays, so that you might need a tough time seeing the double-sided arrow. On this case, it is best to entry the AutoFit characteristic from Excel’s ribbon.
- Choose the rows or columns.
- Open the Dwelling tab.
- From the Cells menu, click on Format.
- There, use the AutoFit Row Peak or AutoFit Column Width choice.
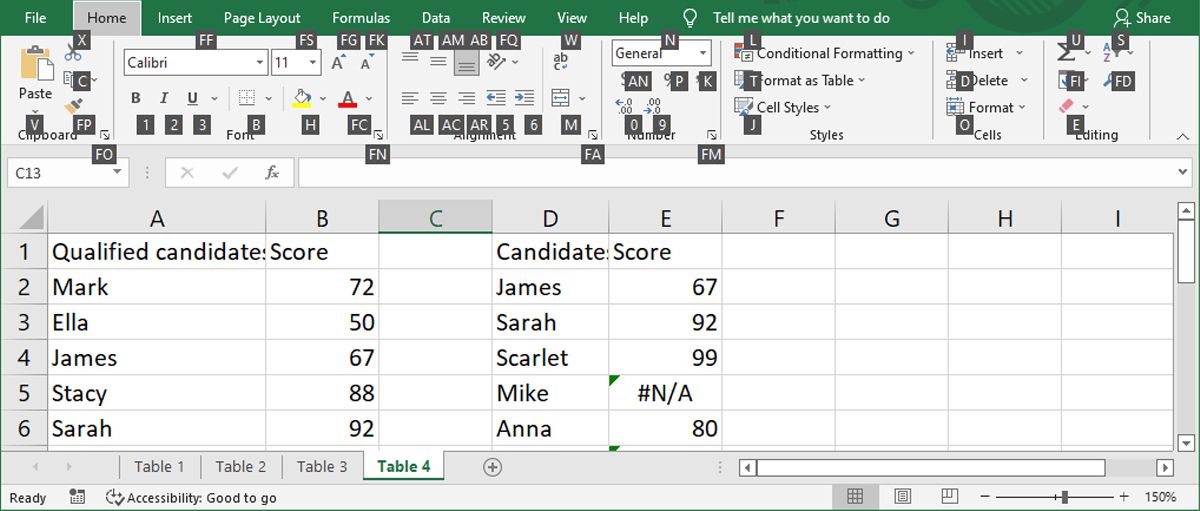
3. Use a Keyboard Shortcut
There’s additionally the chance to make use of a keyboard shortcut to entry Excel Autofit to avoid wasting effort and time. Just like the earlier strategies, choose the rows or columns that you simply wish to autofit. Press Alt + H, then press O. Now, if you wish to autofit a column’s width, press I. To autofit a row’s peak, press A.
For this keyboard shortcut to work, don’t press the keys on the identical time. For those who slowly press them within the right order, you possibly can discover what occurs after you press every key:
- Alt + H choose the Dwelling tab.
- O opens the Format menu.
- I or A choose AutoFit Columns Width or AutoFit Row Peak.
Even should you don’t bear in mind the complete key mixture, you possibly can nonetheless use it, as Excel will present you the keys you need to press to entry the ribbon menus or instruments.
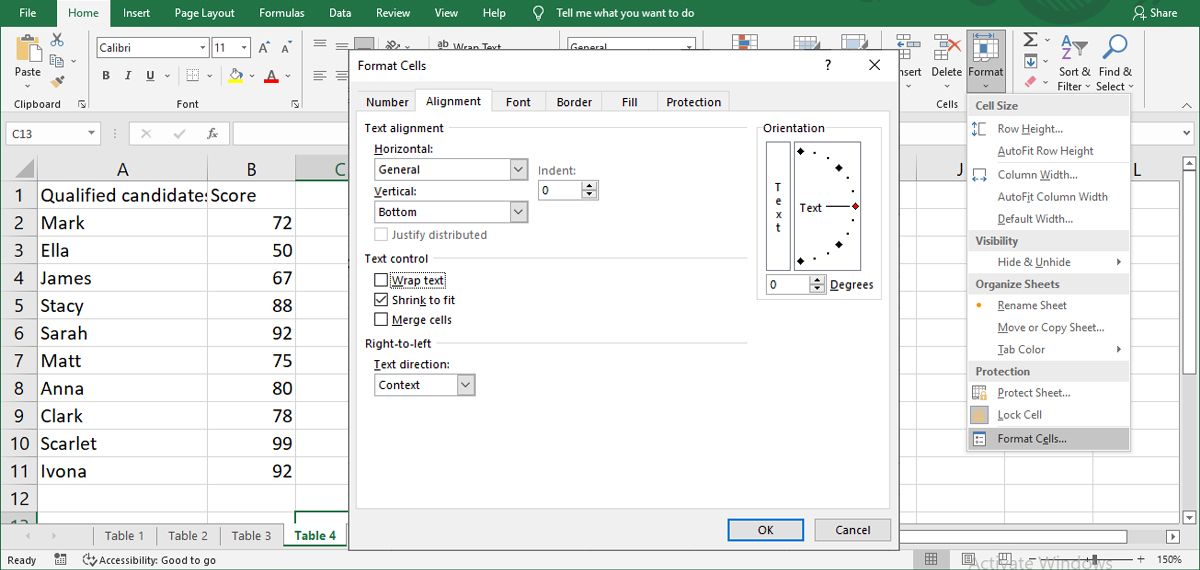
When You Can’t Use AutoFit
In response to Microsoft, you possibly can’t use the AutoFit characteristic for rows or columns with merged cells. A fast workaround is to manually modify the columns’ width and row peak. Nevertheless, should you’re modifying a big spreadsheet, this won’t be one of the best methodology.
A extra environment friendly different is to pick out all cells and use Excel instruments for formatting cells. Within the Dwelling tab, head to the Cells menu and click on Format > Format cells. Then, within the Alignment tab, choose Wrap textual content or Match to shrink and click on OK.
Improve Your Excel Abilities
Understanding the way to autofit columns width and rows peak is among the fundamental Excel abilities that can show you how to preserve information organized.
Happily, Excel has extra instruments and options that can prevent from manually finishing boring and repetitive duties. And a number of the finest Excel programs can be found on-line, so that you’ll develop into a complicated Excel person very quickly.
Learn Subsequent
About The Creator
