
In the event you’re utilizing your Raspberry Pi as a house server or usually must entry it remotely from one other machine, setting a static IP handle for it’s a superb concept. This implies you’ll have the ability to discover the Raspberry Pi on the identical handle each time, somewhat than a brand new handle being set dynamically each time it’s rebooted.
That is additionally helpful to keep away from confusion when you’ve gotten a number of Raspberry Pi gadgets related to your community.
Happily, as soon as you know the way, establishing a static IP handle is a reasonably easy and fast course of.
What Is an IP Deal with?
An Web Protocol (IP) handle is used to uniquely establish every machine on a pc community, or the community itself on the web – extra on that later. The IP handle is often written in ‘dot-decimal’ notation: 4 decimal numbers, every starting from 0 to 255, separated by dots. An instance is 192.168.1.107.
By default in Raspberry Pi OS, which is a Linux-based working system, your Raspberry Pi’s IP handle is reconfigured mechanically every time you reboot it, so it could properly change. Naturally, this isn’t splendid whenever you want a dependable handle at which to connect with the Raspberry Pi from one other machine, resembling when utilizing it as a server.
Non-public vs. Public IP
A public IP handle is used to establish your native community on the broader web. This usually modifications each time your router connects to the web, though you could possibly make it static relying in your web service supplier.
You will discover the general public IP handle on a Linux system resembling Raspberry Pi OS by getting into a particular Terminal command, or just by doing an online seek for ‘What’s my IP?’. It is just required should you intend to connect with a tool from exterior your community, which we gained’t cowl right here.
As a substitute, we’re wanting on the personal IP addresses used to establish every machine by yourself native community. Whereas it could be doable to order a sure handle to your Raspberry Pi in your wi-fi router’s settings for a similar objective, right here we’ll be displaying you the right way to set a static IP from the Raspberry Pi itself.
1. DHCP Configuration
Raspberry Pi OS (previously know as Raspbian) makes use of DHCP (Dynamic Host Configuration Protocol) to assign an IP handle to the Raspberry Pi mechanically each time it’s rebooted.
To vary that habits in order that it makes use of the identical static IP handle every time, you’ll need to switch the configuration file for the DHCP consumer daemon, dhcpcd.conf.
Earlier than that, you’ll need some data in your present community setup so you’ll be able to add the required particulars to the configuration file. You’ll require the next data:
• The kind of community connection. That is both wlan0 in case your Raspberry Pi is related to the router wirelessly, or eth0 if it’s related utilizing an Ethernet cable.
• The Raspberry Pi’s presently assigned IP handle – it’s most secure to reuse this for its static IP so as to be certain the latter hasn’t already been to a different machine on the community. If not, be sure one other machine is not already utilizing it.
To seek out the Raspberry Pi’s present IP handle, enter the next command in a Terminal window:
hostname -I• Your router’s gateway IP handle – the one used to contact it from the native community, not its public IP. It varies relying on the router mannequin, however usually begins with 192.168.
To seek out it, enter the next command and be aware the primary IP handle given:
ip r | grep default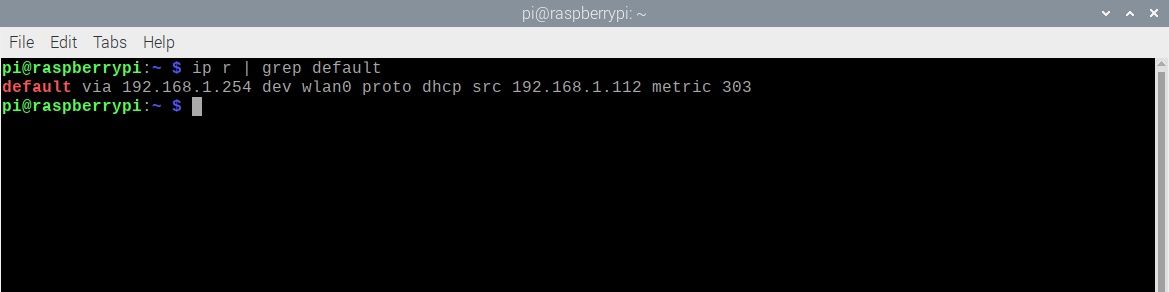
• Your router’s DNS (Area Title System) IP handle. That is usually the identical as its gateway handle, however could also be set to a different worth to make use of another DNS – resembling 8.8.8.8 for Google, or 1.1.1.1 for Cloudflare.
To seek out the present DNS IP handle, enter the command:
sudo nano /and many others/resolv.conf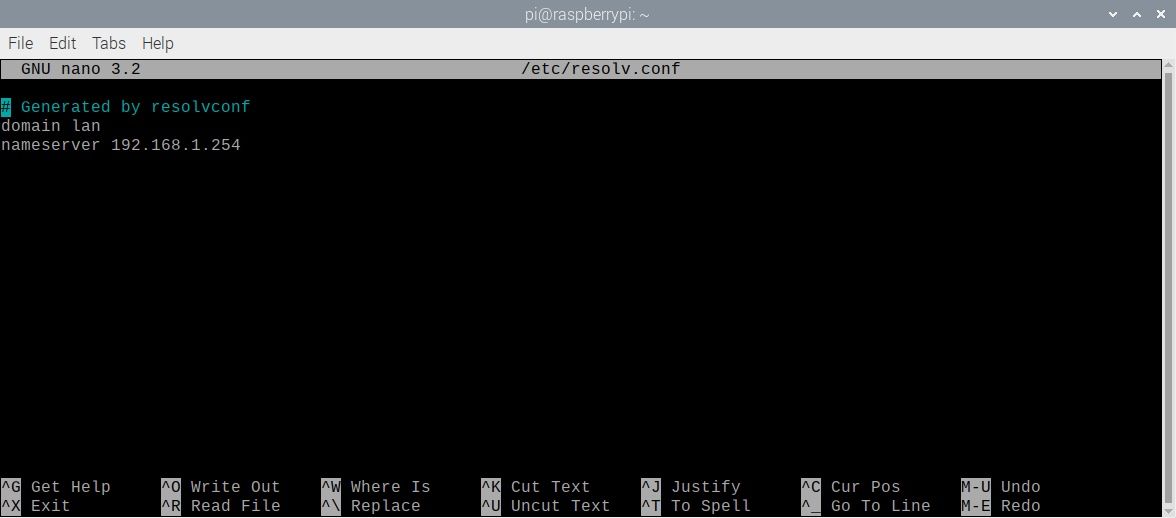
Word the IP handle after nameserver – that is the DNS handle – after which press Ctrl + X to shut the file.
2. Add Static IP Settings
Now you’ve gotten discovered all of your community connection data, it’s time to edit the dhcpcd.conf configuration file so as to add the settings you’ll want to arrange a static IP handle to your Raspberry Pi:
sudo nano /and many others/dhcpcd.confIn the event you haven’t edited the file beforehand, it’s going to primarily comprise varied remark strains preceded by a hash (#) image. On the backside, add the next strains, changing the emboldened names with your individual community particulars:
interface NETWORK
static ip_address=STATIC_IP/24
static routers=ROUTER_IP
static domain_name_servers=DNS_IP
Substitute the emboldened names as follows:
• NETWORK – your community connection kind: eth0 (Ethernet) or wlan0 (wi-fi).
• STATIC_IP – the static IP handle you wish to set for the Raspberry Pi.
• ROUTER_IP – the gateway IP handle to your router on the native community.
• DNS_IP – the DNS IP handle (usually the identical as your router’s gateway handle).
Right here is an instance configuration to set the static IP to 192.168.1.120 with a wi-fi connection to a router at 192.168.1.254:
interface wlan0
static ip_address=192.168.1.120/24
static routers=192.168.1.254
static domain_name_servers=192.168.1.254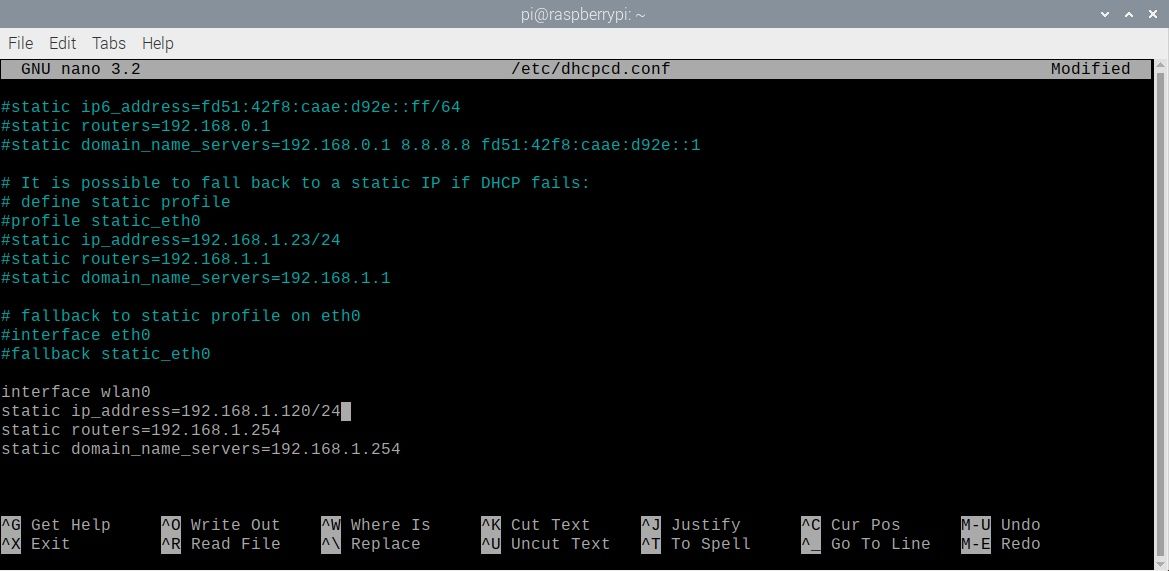
After getting entered the settings, press Ctrl + X after which Y and ENTER to shut and save the modified configuration file.
3. Reboot the Raspberry Pi
With the dhcpcd.conf configuration file modified, restart your Raspberry Pi to impact the modifications and set the static IP handle for it:
sudo rebootReasonably than utilizing an handle assigned mechanically by DHCP, the Raspberry Pi will now try to connect with the router utilizing the brand new static IP handle that you simply set within the dhcpcd.conf file.
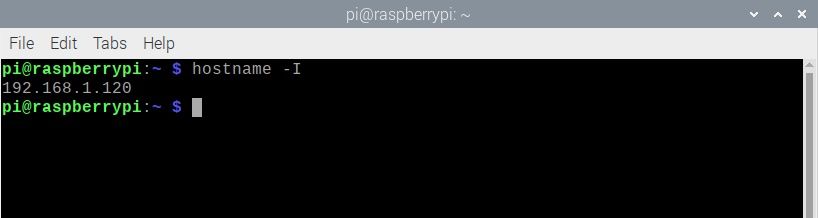
To verify that it’s working appropriately, enter the next command:
hostname -IYou must now see the static IP handle that you simply set within the dhcpcd.conf configuration file.
Set a Static IP Deal with: Success
Congratulations: you’ve gotten arrange a static IP handle in your Raspberry Pi and it ought to now retain that handle mechanically each time it boots up. Now you’ll be able to go forward and use your Raspberry Pi as a NAS, media or recreation server, and hook up with it reliably on the identical handle each time.
Learn Subsequent
About The Writer
