
Once you run into an issue with file permissions on Linux, very often the supply of your frustration could have one thing to do with settings pertaining to both the file’s proprietor or group. It’s just about inevitable that should you use Linux commonly, at one level or one other, you will have to alter a file or listing’s proprietor or group setting to repair an issue.
On this article, we’re going to demystify the ideas of Linux file homeowners and teams and present you ways they have an effect on who can entry and manipulate the info in your system.
Easy methods to Discover a File’s Proprietor and Group in Linux
On the Linux command line, you’ll be able to view each the proprietor and group permission settings by utilizing the ls -l (that’s a touch with a lowercase L) command. The -l swap will format the itemizing in columns that provide you with extra particulars about your information than the usual ls command output.

The primary column exhibits the kind of file and its permission settings. The second column exhibits the variety of hyperlinks to the file (normally 1). The third and fourth present the proprietor and group respectively. They’re typically (however not all the time) the identical.

The settings displayed within the first column signify the bits that decide file permissions in Linux. The primary character represents the file kind. For instance, a “-” signifies an everyday file, and a “d” represents a listing. The three following bits (highlighted above) signify the file proprietor’s permissions—r for learn, w for write, and x for execute.
Any permission that isn’t enabled will present as a touch. Then, within the third column of the listing itemizing, you see the person that owns the file.

The second set of three bits in that first column (highlighted above) represents the permissions for the group that has entry to this file. They work the identical as above. They are going to be both a touch or one in all r, w, and x.
Easy methods to Change the Proprietor of a File on Linux
With most Linux distributions, you will want to be the foundation person or a person with administrative privileges (i.e. you should use sudo) to alter the proprietor of a file or listing.
Giving possession of a file or listing to any person will give that person full freedom to do no matter they need with the file. They’ll be capable to learn it, modify it, delete it, and alter permissions that dictate what different system customers can do with it.
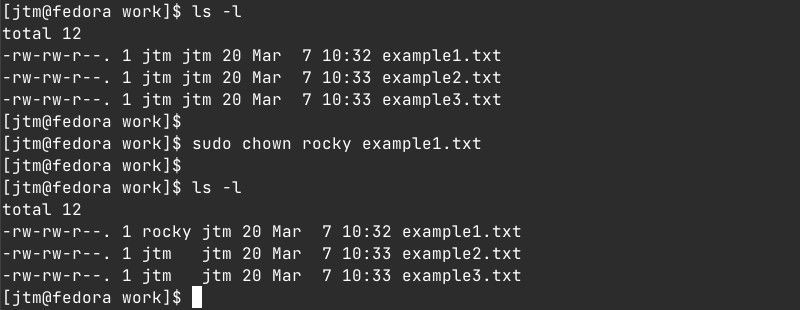
To vary the proprietor of a file or listing, use the chown command with the next format:
sudo chown <person> <file or listing>Altering the proprietor of a file won’t have an effect on the group settings or permissions of that file.
Easy methods to Change a File’s Group Setting on Linux
In case you are the proprietor of a file, you’ll be able to change its group settings to any current group. In case you are not the proprietor, you will want root or sudo privileges.
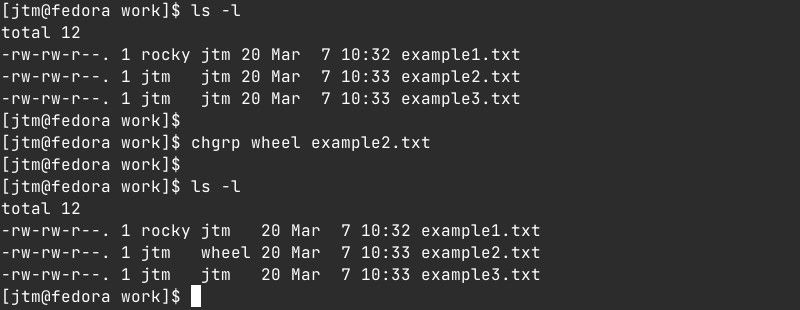
To vary group entry to a file or listing, use the chgrp command with the next format:
chgrp <groupname> <file or listing>This may give all members of the chosen group entry to the file or listing in line with the merchandise’s group permission settings.
Easy methods to Change a File’s Proprietor and Group on the Similar Time
If you have to modify each the proprietor and group settings of a file or listing, you are able to do so with a single command. Because it includes altering the proprietor, you will want to have superuser privileges.
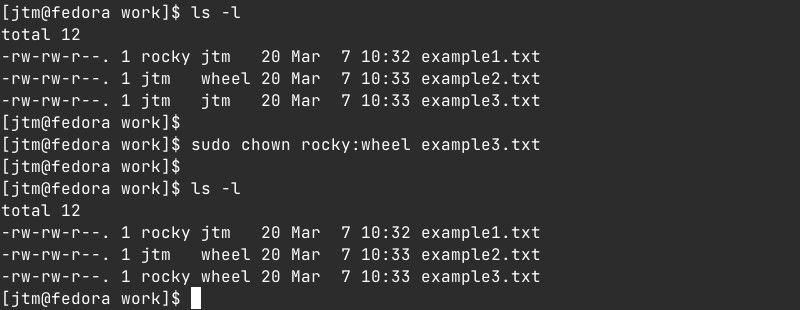
To perform this, use the chown command as above however specify each the brand new proprietor and new group separated by a colon, with no areas.
sudo chown <newowner>:<newgroup> <file or listing>Easy methods to Create a Group Utilizing the Linux Terminal
Teams permit you to assign entry privileges to a number of customers rapidly and simply. Customers on a Linux system could be members of multiple group at a time. You will want to be the foundation person or have sudo privileges to create teams.
So as to add a brand new group to the system, use the groupadd command.
sudo groupadd <groupname>To verify your group has been created, you should use the getent command to listing all teams or mix it with grep to search for a particular group.
getent group
getent group | grep <groupname>
If the output from the command exhibits the title of the group you had been attempting to create, this means that it was efficiently created and you’ll add customers to it. You too can take a look at our information to managing teams on Linux for extra detailed details about establishing new teams.
Easy methods to Add a Person to a Group on Linux
Including a person to a bunch is achieved with the usermod command. Once more, you will want superuser privileges, and each the person and the group should exist already. The next command will add a person to a bunch:
sudo usermod -a -G <groupname> <username>The -a swap within the command above stands for append and is essential. If you happen to add a person to a bunch with out utilizing the -a flag, the person will probably be faraway from every other teams that they might already be a part of. The -G flag signifies that you just need to add the person to the group title following the swap.
Easy methods to Take away a Person From a Group
Eradicating a person from a bunch is finished with the gpasswd command. Enter the command (utilizing sudo) within the following format.
sudo gpasswd -d <username> <groupname>
This may delete the required person from the required group, leaving every other group memberships intact.
Easy methods to Take away a Group Utilizing the Linux Terminal
Lastly, the very last thing you’ll have to know to handle teams in your system is to take away a bunch. First, it’s essential to notice {that a} group have to be empty. If the group you need to take away is small, you should use the command above to manually take away every member.
If the group has greater than only a handful of members and you have to take away them earlier than deleting the group, you’ll be able to take away them abruptly with the groupmems command. Enter the command with the next format to take away all customers from a particular group:
sudo groupmems -p -g <groupname>As soon as all members have been faraway from the group, you’ll be able to delete the group from the system with the groupdel command, as follows.
sudo groupdel <groupname>Linux Person Teams Give You Better Management
With the instructions above you’ll be capable to handle the proprietor and group entry settings for any file or listing in your Linux system.
If you happen to, or a person in your system, are having hassle accessing one thing, ensuring the proprietor and group permissions are correctly set is usually an excellent first step to discovering the answer.
Learn Subsequent
About The Creator
