Tailwind CSS is a utility first CSS framework that permits builders to design customized internet elements with out switching to a CSS file. On this tutorial, you’ll learn to set up Tailwind CSS in React and the way you need to use it to construct a easy React web page.
Why Use Tailwind CSS?
There are already loads of CSS frameworks that simplify how builders design internet pages. So why do you have to use Tailwind CSS?
CSS frameworks akin to Bootstrap and Basis are opinionated frameworks, which means they supply builders with pre-defined elements which have default types. This limits each customization and creativity, and you find yourself with web sites that look moderately generic.
Tailwind CSS, nonetheless, is a utility-first framework that provides you the inventive management to create dynamic elements. And in contrast to Bootstrap, you’ll be able to simply customise designs as you please.
One other benefit of utilizing Tailwind CSS is that you find yourself with a small CSS bundle dimension because it removes the entire unused CSS throughout the construct course of (which is totally different from Bootstrap, because it consists of all CSS information within the construct).
Be taught extra in regards to the variations between Tailwind CSS and Bootstrap from our article on the subject.
Disadvantages of UsingTailwind CSS
Tailwind CSS has a steep studying curve even for skilled builders. It takes a while to learn to totally use the utility lessons, and also you may must confer with the documentation typically. Nevertheless, after getting acquainted with the lessons, you will discover it simpler and speedier in comparison with plain CSS.
Most builders wish to observe the separation of considerations precept such that the CSS and HTML information are written in numerous information. With Tailwind CSS, you write the CSS instantly within the HTML markup—a disadvantage for some.
Even with these disadvantages, Tailwind CSS is a framework that it’s best to severely contemplate in the event you’re already comfy with CSS and need to construct designs sooner.
Getting Began: Create a React Mission
Run the next command within the terminal to scaffold a React utility utilizing create-react-app.
npx create-react-app react-tailwindcreate-react-app gives a simple approach to create a React app with out configuring construct instruments like webpack, babel, or linters. This implies you find yourself with a working React setting inside minutes.
The above command creates a brand new folder named react-tailwind. Navigate to the folder and open it utilizing your most popular textual content editor.
cd react-tailwindSubsequent, set up Tailwind CSS and configure it to work with the React utility.
Use Tailwind CSS in React
Set up Tailwind CSS and its dependencies with this command:
npm set up tailwindcss postcss autoprefixerPostCSS makes use of JavaScript plugins to make CSS suitable with most browsers. It checks the browser the appliance is operating in and determines the polyfills wanted to make your CSS work seamlessly. Autoprefixer is a PostCSS plugin that makes use of values from caniuse.com to robotically add vendor prefixes to CSS guidelines.
Initialize Tailwind CSS
Run the tailwind init command to generate Tailwind CSS default configuration information.
npx tailwindcss initThis creates tailwind.config.js within the root folder which shops all of Tailwind’s configuration information and incorporates the next:
module.exports = {
content material: [],
theme: {
prolong: {},
},
plugins: [],
}
Configure Template Paths
It’s essential inform Tailwind CSS the information it ought to verify to see what CSS lessons are getting used. This enables Tailwind to determine and take away the unused lessons and due to this fact reduces the scale of the CSS generated.
In tailwind.config.js, add the template paths below the content material key.
module.exports = {
content material: [
"./src/**/*.{js,jsx,ts,tsx}",
],
theme: {
prolong: {},
},
plugins: [],
}
Inject Tailwind CSS Into React
The following step is to incorporate Tailwind CSS within the utility utilizing @tailwind directives.
Delete every thing in index.css and add the next to import the bottom types, elements, and utilities.
@tailwind base;
@tailwind elements;
@tailwind utilities;
Lastly, ensure that index.css is imported in index.js and Tailwind CSS shall be prepared to be used.
Utilizing Tailwind CSS to Type a React Element
You’ll create the straightforward internet web page beneath and magnificence it utilizing Tailwind’s utility lessons.
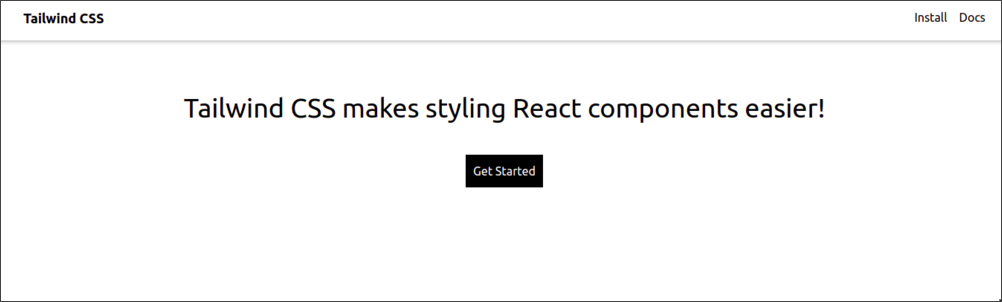
This web page incorporates two primary sections: a navigation bar, and the hero part (which has a heading and a button).
As an example how Tailwind CSS makes writing CSS simpler, strive styling the net web page utilizing plain CSS and Tailwind CSS.
Get began by modifying the App.js within the src folder to take away the pointless code.
import './App.css'
perform App() {
return (
<div className='app'>
</div>
);
}
export default App;
Subsequent, add the net web page content material to App.js.
import "./App.css";
perform App() {
return (
<div className="wrapper">
<nav>
<div className="brand">Tailwind CSS</div>
<ul>
<li>Set up</li>
<li>Docs</li>
</ul>
</nav>
<div className="hero">
<h1 className="header">
Tailwind CSS makes styling React elements simpler!
</h1>
<button className="btn">Get Began</button>
</div>
</div>
);
}
To make use of plain CSS, add the CSS to App.css.
nav {
show: flex;
justify-content: space-between;
padding: 16px 36px;
colour: #000;
box-shadow: 0px 2px 5px 0px rgba(168, 168, 168, 0.75);
}
.brand {
font-size: 18px;
font-weight: daring;
}
ul {
list-style: none;
show: inline-flex;
}
ul li {
margin-left: 16px;
cursor: pointer;
}
.hero {
show: flex;
flex-direction: column;
align-items: heart;
margin-top: 64px;
}
h1 {
font-size: 36px;
text-align: heart;
}
.btn {
background-color: #000000;
colour: #fff;
padding: 10px;
width: fit-content;
margin-top: 36px;
}
With Tailwind CSS, you don’t want to put in writing the CSS guidelines for every class. As an alternative, you employ utility lessons. These are lessons scoped to a single CSS property. As an illustration, if you wish to create a button with a black background and white textual content colour, it’s essential use the bg-black and text-white utility lessons.
App.js ought to appear to be this.
perform App() {
return (
<div>
<Navbar />
<div className="flex flex-col items-center mt-16">
<h1 className="text-4xl text-center">
Tailwind CSS makes styling React elements simpler!
</h1>
<button className="bg-black text-white p-2.5 w-fit mt-9 ">
Get Began
</button>
</div>
</div>
);
}
You don’t must import App.css for the reason that types generated by Tailwind CSS are saved in index.css which you imported in index.js earlier.
In comparison with plain CSS, this strategy ends in much less code that’s simple to grasp.
Code in Type With Tailwind CSS
On this article, you realized about Tailwind CSS, its strengths, disadvantages, and the way you need to use its utility lessons in React functions. Aside from lessons, Tailwind CSS additionally provides different further options together with the power to create responsive layouts and reusable elements.
However, as we talked about earlier, Tailwind is much from the one CSS framework in the marketplace. Which can you employ to your subsequent venture?
Learn Subsequent
About The Creator
