
BSOD errors in Home windows are by no means a welcome sight. One notably notorious bluescreen crash is the dxgmms2.sys error, which normally happens whereas gaming. Accompanied by a message comparable to SYSTEM_THREAD_EXCEPTION_NOT_HANDLED or DRIVER_IRQL_NOT_LESS_OR_EQUAL, the error is generally the results of a malfunction of your graphics drivers or {hardware}.
Nonetheless, it will also be as a consequence of different underlying points. Fortunately, you’ll be able to troubleshoot the error proper at dwelling, utilizing the fixes listed under.
1. Handle the Graphics Drivers
The primary route of motion you need to take when coping with the dxgmms2.sys bluescreen is to make adjustments to your graphics drivers. If you happen to do not bear in mind when the show drivers had been final up to date, replace them. The error may additionally seem after just lately putting in a brand new driver replace. Wherein case, you need to attempt rolling them again to a earlier replace.
There are two major methods to handle your graphics drivers. If you happen to use a devoted graphics card, it is advisable to make use of companion software program such because the NVIDIA GeForce Expertise or AMD Radeon Software program, relying in your GPU. You may as well handle all of your drivers utilizing the Machine Supervisor in Home windows.
Find out how to Replace Graphics Drivers through Machine Supervisor
If you wish to replace your drivers utilizing Home windows, this is how to do this:
- Press Win + R to open the Run software.
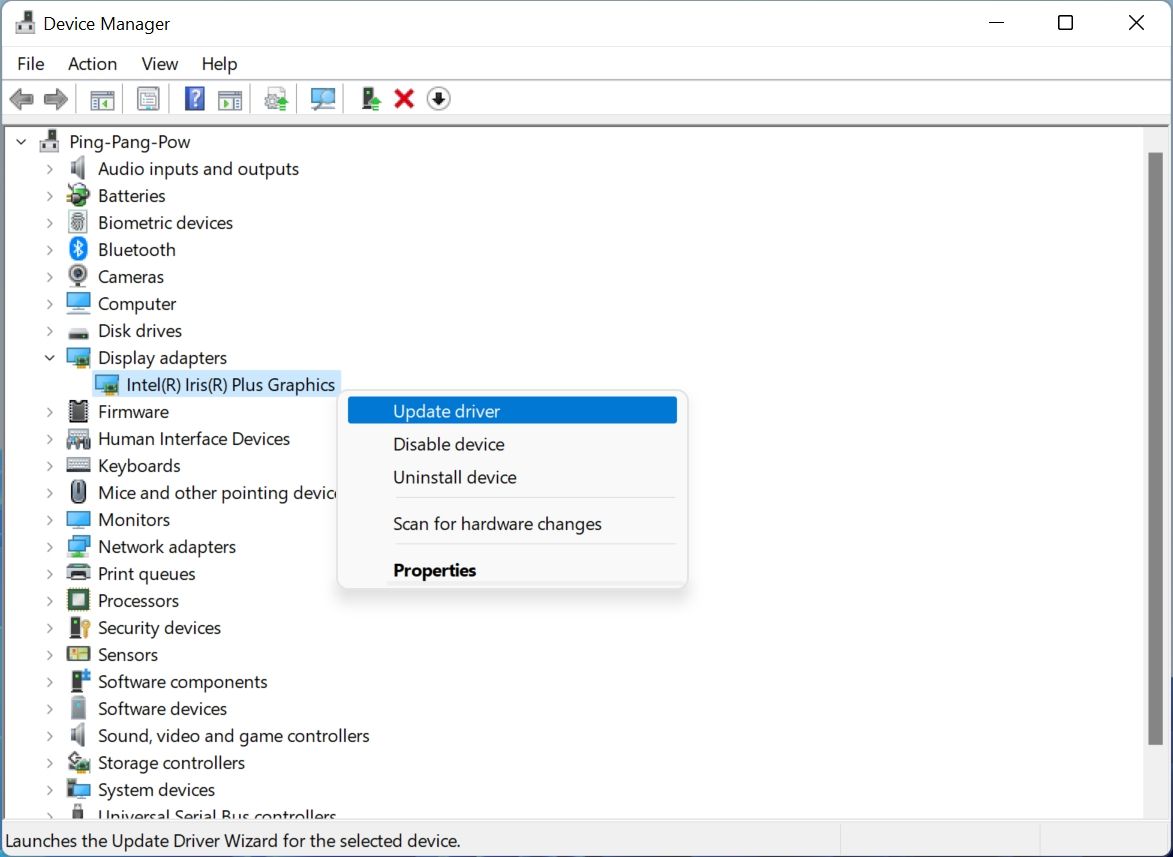
- Right here, sort devmgmt.msc within the textual content subject, and press Enter. It will open the Machine Supervisor window.
- Search for the Show adapters part, and broaden it.
- Proper-click on the graphics driver, normally denoted by the identify of your GPU or producer, and click on on Replace driver.
- On the following display screen, choose the Search mechanically for drivers possibility.
- Watch for Home windows to obtain and set up the most recent driver.
- Click on on End.
- Reboot your laptop.
Find out how to Roll Again to a Earlier Driver Model
Alternatively, if you happen to suppose a current driver replace is inflicting you grief, this is how to return to the previous drivers:
- Open the Run command (Win + R).
- Enter devmgmt.msc within the textual content field and press Enter to launch Machine Supervisor.
- Once more, broaden the Show adapters menu.
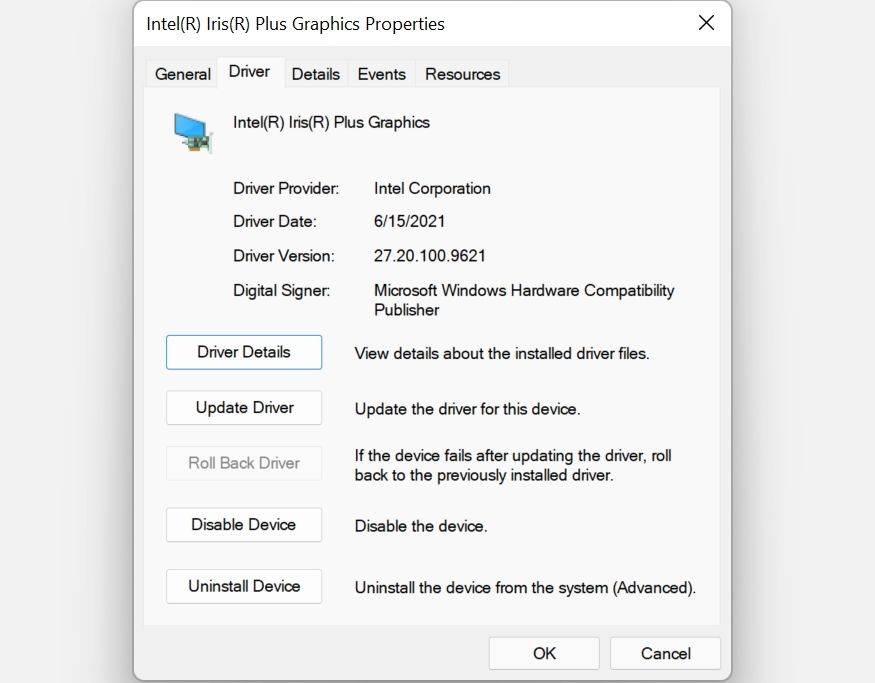
- Proper-click on the show driver and click on on Properties.
- Within the Properties window, click on on the Driver tab.
- Click on on the Roll Again Driver button.
- Watch for Home windows to put in the earlier model of the driving force.
- Click on on OK.
- Reboot your PC.
2. Disable {Hardware} Acceleration
One other frequent motive for the dxgmms2.sys error is the {hardware} acceleration characteristic in Home windows 10 and 11. The {hardware} acceleration characteristic helps enhance the efficiency of your laptop, however you’ll be able to disable it to see whether or not the dxgmms2.sys error nonetheless persists.
You’ll have to edit the Registry settings to disable {hardware} acceleration, so make sure you create a System Restore Level earlier than continuing additional.

- Press Win + R to open the Run app.
- Sort regedit within the textual content field and press Enter. You may want administrator privileges to make adjustments to the Home windows Registry.
- Within the Registry, navigate to HKEY_CURRENT_USER > Software program > Microsoft > Avalon.Graphics utilizing the navigation pane within the left.
- Right here, right-click on the clean house in the fitting pane, and go to New > DWORD (32-bit) Worth.
- Title the entry DisableHWAcceleration.
- Now, double-click the newly created entry and underneath Worth information, sort 1.
- Click on on OK.
- Exit the Registry Editor and restart your laptop.
If you happen to nonetheless get the bluescreen error after this technique, make sure you activate {hardware} acceleration once more by altering the worth information within the DisableHWAcceleration entry to 0.
The dxgmms2.sys error is instantly associated to DirectX on Home windows. Actually, the filename itself is the shortened type of DirectX Graphics MMS.
Subsequently, top-of-the-line methods to successfully diagnose the issue is to open the built-in DirectX Diagnostic Instrument in Home windows:
- Launch the Run command by utilizing the Home windows Key + R shortcut.
- Sort dxdiag within the dialog field and press Enter. It will open the DirectX Diagnostic utility.
- Watch for the DirectX Diagnostic Instrument to complete troubleshooting.
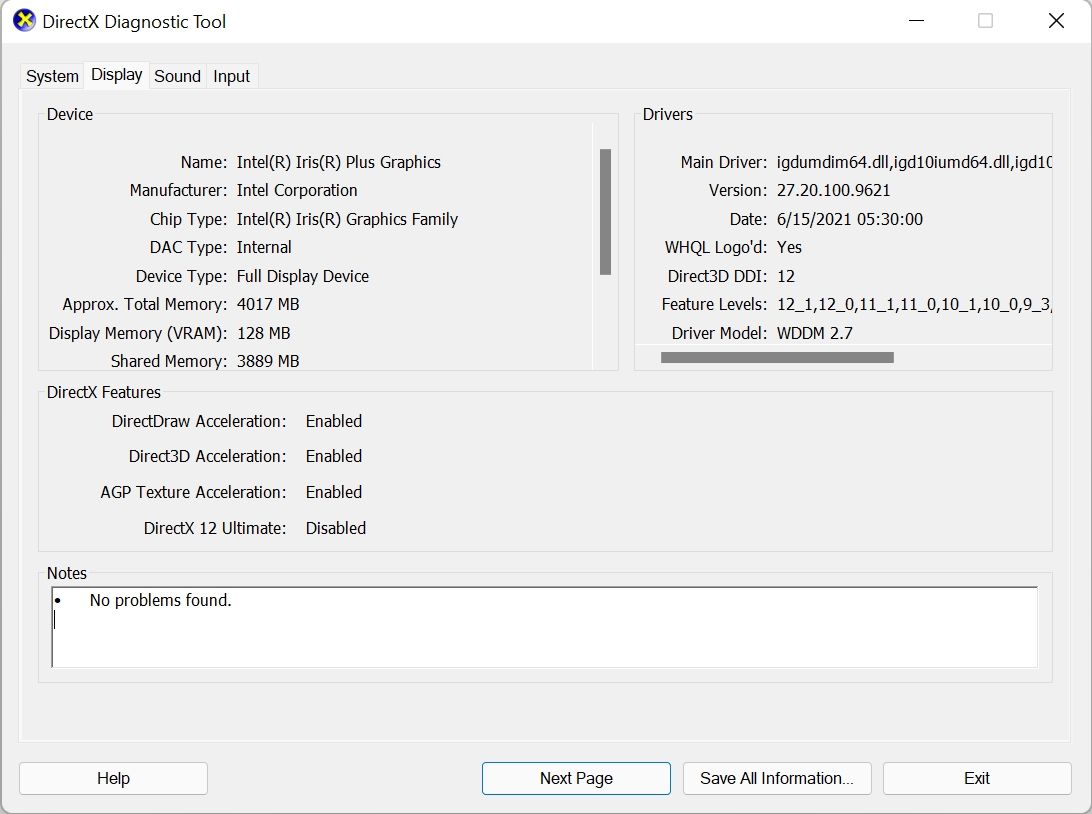
- Now, click on on the Show tab within the window.
- Verify the Notes part for any errors or conflicts.
- If you happen to see an error within the part, download the DirectX Web Installer to re-install the required parts.
This could resolve the dxgmms2.sys error for lots of customers. If it does not, transfer on to the following step.
4. Run the Home windows Reminiscence Diagnostic Utility
In uncommon cases, malfunctioning or defective reminiscence also can outcome within the dxgmms2.sys bluescreen. On this case, too, Home windows has an in-built utility that may diagnose and repair the problems successfully. The software is named Home windows Reminiscence Diagnostic.
- Within the Begin menu search bar, seek for Home windows Reminiscence Diagnostic.
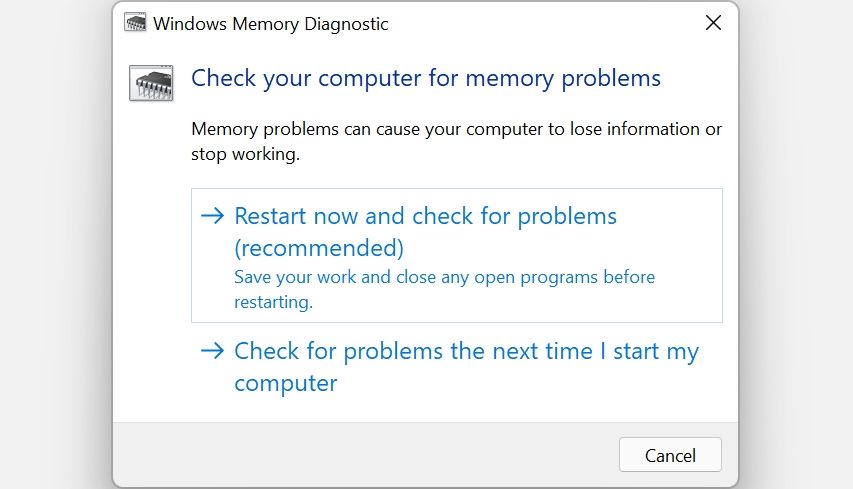
- A immediate will likely be displayed.
- Click on on the Restart now and verify for issues possibility to instantly reboot your laptop.
- You may as well select the Verify for issues the following time I begin my laptop possibility when you’ve got unsaved work open in your laptop.
- Home windows will scan for memory-related points when your laptop boots.
5. Replace the BIOS
An outdated BIOS can lead to quite a few errors in your PC, one among them is the dxgmms2.sys BSOD. It’s a good suggestion to at all times maintain the BIOS up to date to the most recent model.
Whereas the strategies for updating your PC’s BIOS might differ throughout completely different producers, the final course of seems like this:
- Go to the downloads part of your motherboard producer’s web site and obtain the most recent model of the related BIOS. Double-check the motherboard mannequin in your laptop earlier than doing so.
- If the replace comes within the type of a ZIP or RAR file, extract its contents to a USB drive. Guarantee that there’s nothing else on the USB drive.
- Now, click on on Begin button, then click on on the Energy possibility.
- Whereas holding Shift, click on on Restart.
- On the following display screen, go to Troubleshoot > Superior choices > UEFI Firmware Settings > Restart.
- You’ll now need to navigate the BIOS menu of your motherboard till you discover the choice for Replace. Plenty of motherboards permit you to flash the BIOS replace utilizing a USB drive, so be sure the USB drive is inserted.
Whereas the steps above provides you with a common define, it is at all times finest to consult with your motherboard’s guide for particular directions. Some producers additionally present a companion app that can replace the BIOS mechanically.
The DXGMMS2.SYS Error, Now Fastened
The strategies listed above will resolve the dxgmms2.sys error for many customers. Nonetheless, {hardware} fault also can trigger the error, through which case you’ll have to change your GPU or RAM. There are various different indicators that may inform you whether or not it is time for a GPU improve.
Learn Subsequent
About The Writer
