Gradients usually give a dated look to designs—assume tie-dye. However with Adobe Illustrator’s Gradient Mesh device and Freeform Gradient choice, you possibly can create gradients with a contemporary new look. Let’s present you find out how to do it.
What Is a Gradient?
You’ve in all probability come throughout gradients earlier than, however should you haven’t, we’ll provide the rundown. A gradient is a mixture of colours, any colours, that merge collectively in a pure or unnatural manner.
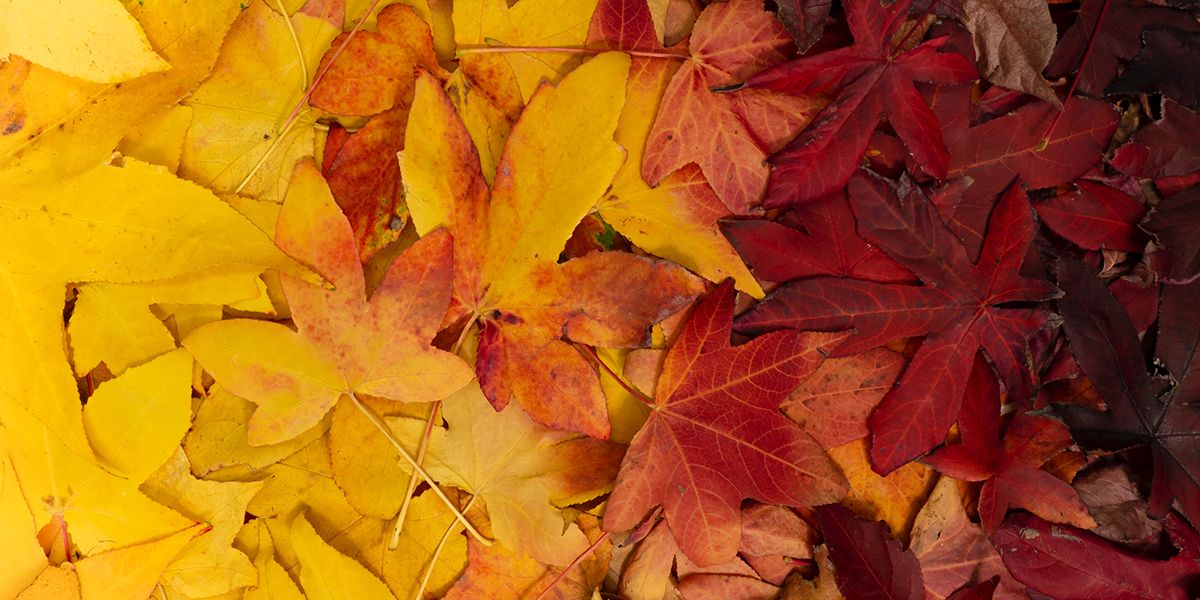
You discover gradients in nature: the dawn and sundown, autumn leaves altering their colours, and the aurora borealis. Nature is a superb place to search out inspiration in your gradient experiments. Gradients are additionally usually present in design, such because the Instagram or Adobe Inventive Cloud brand. Gradients carry a vibrant vitality to what’s usually a company look.
Whereas gradients can look fairly dated, they appear to be making a comeback into fashionable design. Gone are the times of utilizing one gradient transitional sweep as a background. With new design instruments, shade tendencies, and enjoyable methods to implement gradients, they now not look misplaced.
Why Ought to You Use a Gradient?
As seen with the Instagram and Inventive Cloud logos, a gradient can be utilized to brighten up a boring background. Sometimes, gradients are used as background colours fairly than the primary topic itself, however nothing is stopping you from making use of a gradient to the primary topic. You may even add gradients in CSS programming.
Gradients don’t all the time must be vibrant and in your face; they are often delicate too. You may even merely add a lightweight contact of gradient fairly than filling a complete background with it.
With infinite scrolling webpages gaining reputation, gradients are a delicate manner for the design or shade to alter all through the web site, with out an excessive amount of of a stark shade swap. You may even animate the gradient to maneuver, resembling the sleek actions of an 80s lava lamp.
The principle purpose for utilizing gradients is to include a number of colours into your design with out them trying starkly totally different. You may add a delicate change in your shade scheme or select to make a daring gradient assertion.
What Are the Gradient Choices in Adobe Illustrator?

To entry any gradients in Illustrator, it is advisable open the Gradient window. Click on Window > Gradient or you possibly can click on the Gradient Device button within the device panel. That is how one can entry the Linear, Radial, and Freeform Gradient instruments.
With conventional gradient instruments in Illustrator, there are solely linear and radial gradient choices. These choices are fairly fundamental and don’t permit for a lot customization apart from shade selection and path. Conventional gradient instruments are good for a easy background with a gradient sweep.
The Freeform Gradient device is nice for including a random assortment of colours to your gradient designs. The Freeform device can be utilized for much less exact gradients; it permits for a extra pure, random use of shade.
The Gradient Mesh device in Illustrator is nice for bringing illustrations to life. The Mesh device permits you to place, angle, and transfer gradient tones in a manner they may fall realistically on a 3D object. This takes working with gradients to an entire new stage.
Adobe affords some ways to make gradients, together with customized gradients in Photoshop.
The best way to Use Freeform Gradient in Illustrator
Though it’s discovered inside the conventional gradient instruments, the Freeform Gradient device in Illustrator works a bit in another way. Let’s get began.
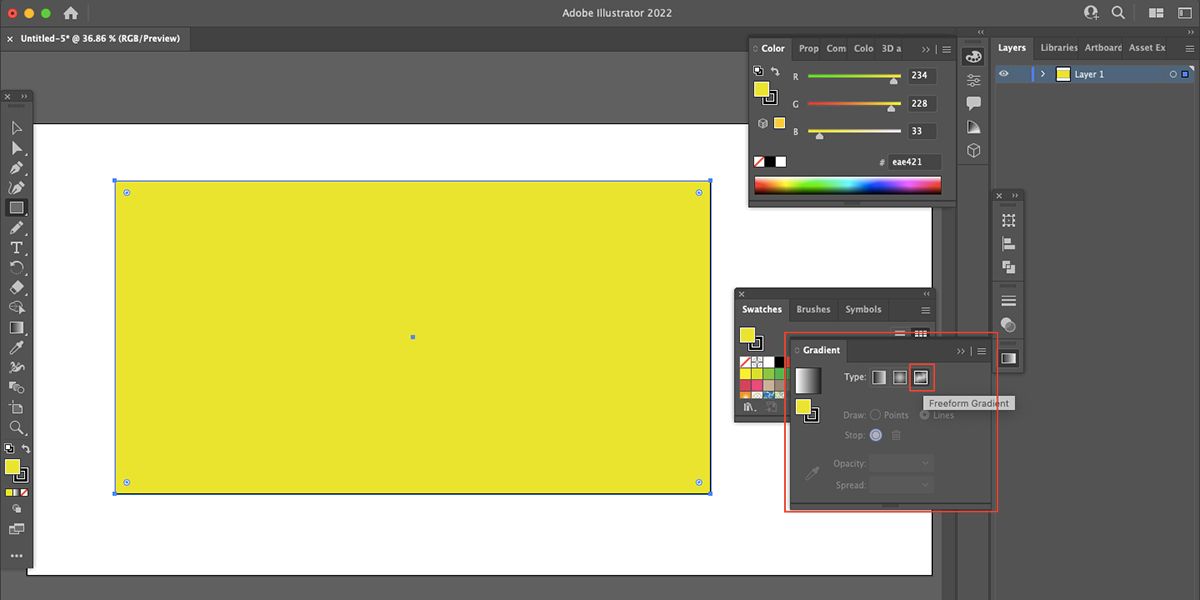
Create a form with a plain fill shade first. Then, with the Gradient window open, click on the right-most gradient button to open the Freeform device.
When you’ve chosen the Freeform device, your beforehand plain-filled form will now present a gradient with 4 stops (or factors of shade). The 4 stops will likely be random colours, and never essentially according to the unique fill shade. Should you click on any of the present stops, you possibly can change the colour. So as to add extra stops, click on anyplace else in your form.

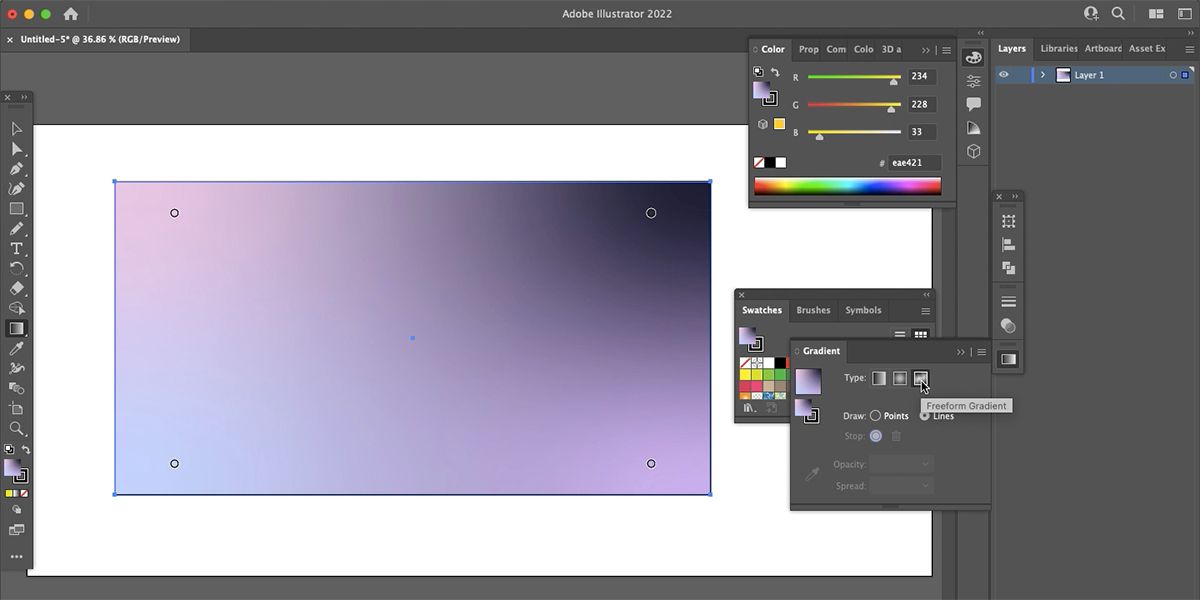
The wonderful thing about Illustrator’s Freeform Gradient device is you can simply drag the colours anyplace in your form. Should you resolve you need the blue on the left as a substitute of the correct, simply drag the cease to the left. Or place two pink stops subsequent to one another. Add some white to see how the colours mix. Transferring the colour stops round adjustments how they work together with one another.
The liberty of the Freeform device is you can add as many colours as you want and place them anyplace you need. The colours act like particular person orbs that flippantly mix collectively on the edges. To delete a shade cease, drag it outdoors your form.
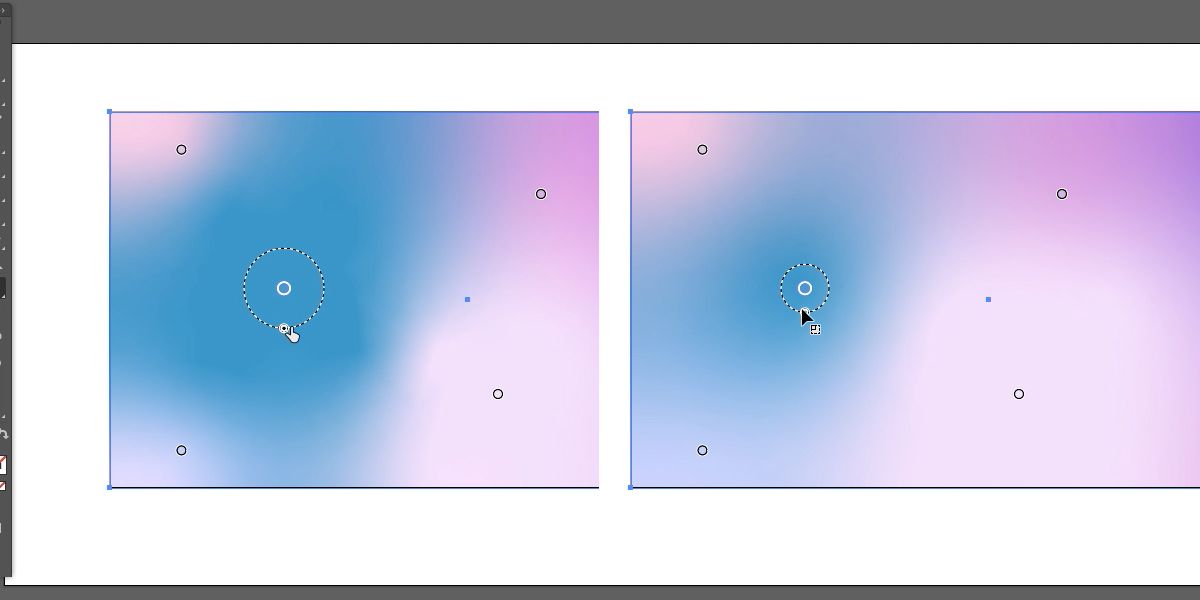
You may improve or lower the dimensions and unfold of every shade cease. Click on your chosen cease and transfer the cursor to the dotted circle that surrounds it. The circle may have an oval on the sting of it. Click on and drag the oval to extend or lower your orb and the unfold of shade.
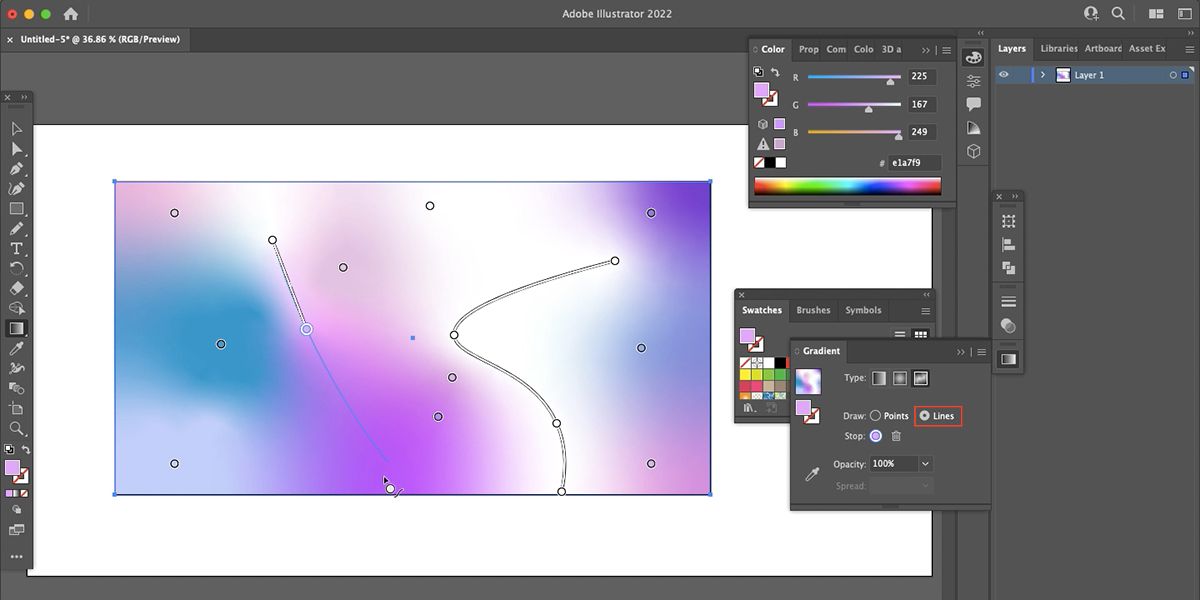
You may even draw traces of gradients by clicking the Strains choices within the Gradient toolbar. With Strains chosen, you possibly can add a brand new shade cease, after which the subsequent chosen cease will likely be linked with a line, straight or curved, that teams the gradient colours collectively. Every cease can nonetheless be a special shade, or you need to use the identical shade for the whole line with a number of stops included.
The best way to Use Gradient Mesh in Illustrator
Gradient Mesh additionally works in another way from the opposite gradient instruments. Let’s present you find out how to use it.
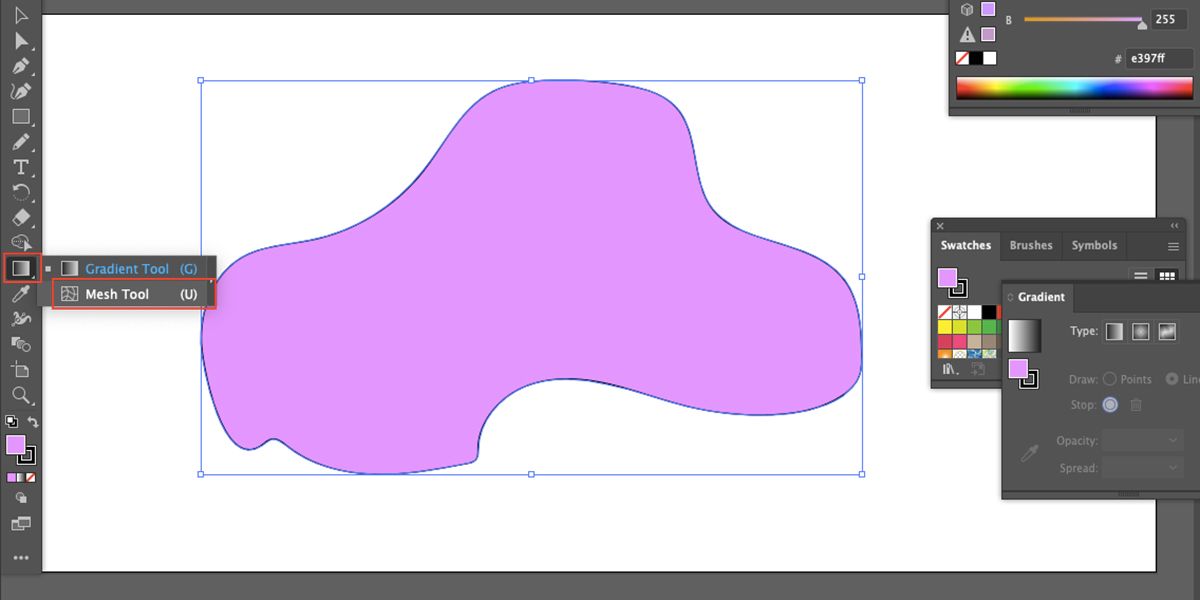
Gradient Mesh might be utilized to any form created with a fill shade. After getting drawn and crammed your form, click on the Gradient Mesh device. Should you can not see the Gradient Mesh button, it could be hidden beneath the Gradient Device button on the toolbar; click on and maintain the highest button to disclose any hidden buttons beneath it.
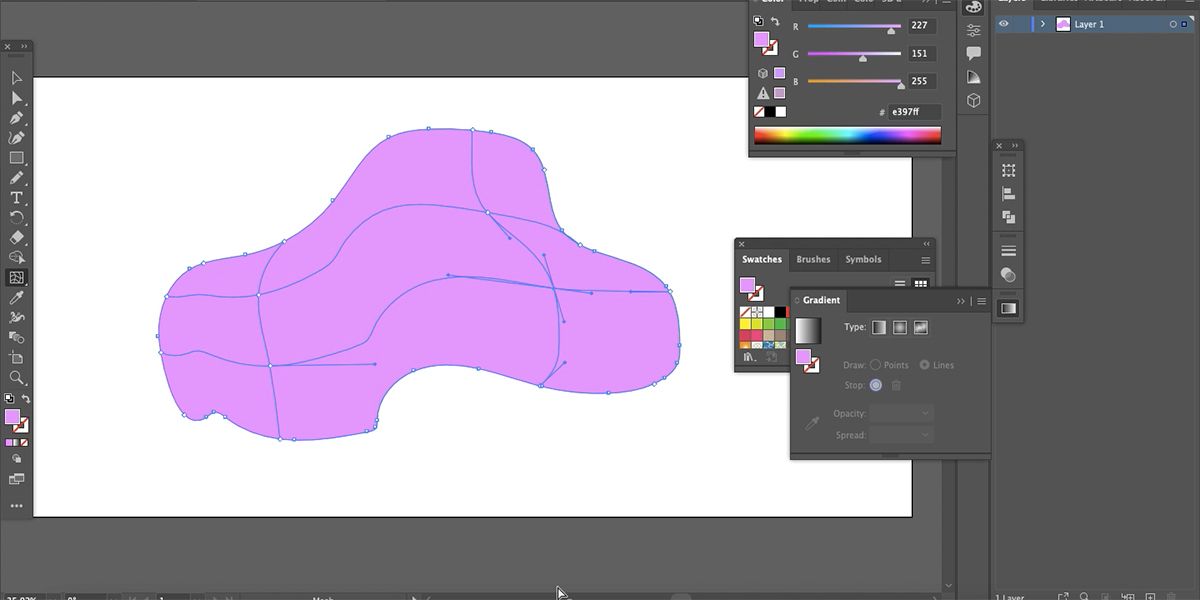
With the Gradient Mesh device chosen, click on anyplace in your crammed form to begin making use of the mesh. Relying on the variety of desired colours and the dimensions of your form, you in all probability solely want two clicks; though, there is no such thing as a most. You may add or delete anchor factors at any level within the course of. Not like the Freeform Gradient device, the beginning shade of your object works as the bottom shade of your gradient.
Inside your mesh, you possibly can click on on any anchor level utilizing the Direct Choice device (A), and select a shade from the swatch panel. This produces a blur of the chosen shade surrounding the anchor. Do that for any and all anchors inside your form and experiment with how the colours mix.
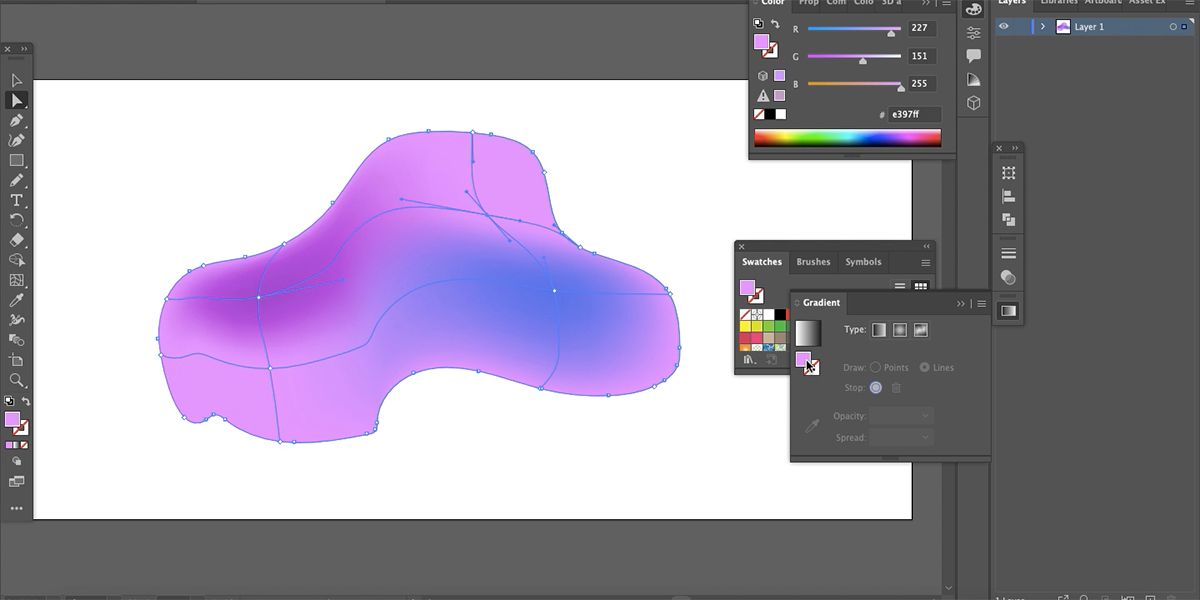
Together with your chosen colours in your form, this appears much like the Freeform device. So how will you stage up with the Gradient Mesh? Transfer the anchor factors and handles to see how the colours transfer and react with each other.
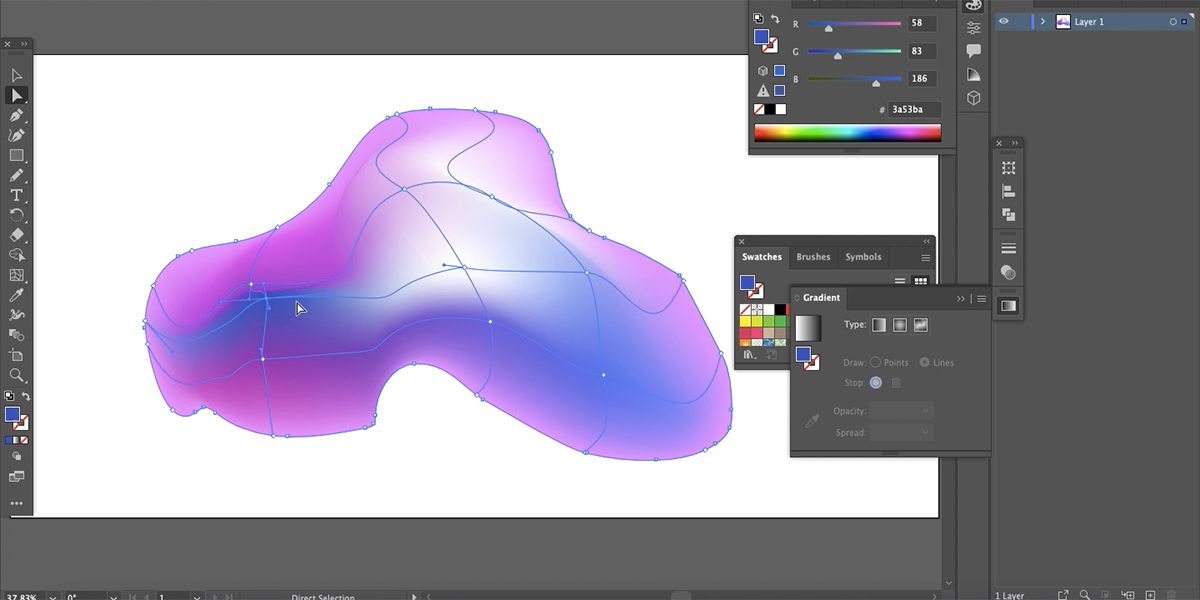
Not solely are you able to reposition any of the anchor factors in your mesh, however utilizing the handles to alter the angles additionally creates nice outcomes. The truth is, transferring anchor factors can create harsh traces between the colours. These harsh traces can replicate 3D shapes and produce lighting in your object. Including lighter or darker colours will add to the 3D impact. You may even create your individual 3D shapes as a substitute of getting to seek for pre-existing 3D shapes on-line.
A Distinctive Solution to Create Gradients
The Freeform Gradient device and the Gradient Mesh device in Illustrator can help you add gradients to your designs in new and distinctive methods. There may be much more you are able to do with gradients now than only a gradient shade sweep in a linear or radial path. Experiment with these instruments and see what kind of funky gradients you possibly can create.
Learn Subsequent
About The Writer
