Pop!_OS COSMIC is so well-packaged that it simply works proper out of the field with none tuning. Nonetheless, if it is a contemporary set up, you’d wish to examine off just a few beneficial post-installation to-dos.
On this article, we checklist out the ten issues you must do after putting in Pop!_OS to take it to stellar heights and set it up for the lengthy haul. This checklist contains finest practices, so do not miss out in the event you’re a beginner!
1. Replace and Improve Your System
To get essentially the most out of your Pop!_OS desktop and to keep away from being uncovered to safety flaws or software program incompatibility, you must at all times examine for updates and when out there, improve your system.
Just lately disclosed vulnerabilities just like the Soiled Pipe exploit are harsh reminders as to what may doubtlessly occur in the event you sleep on updating your system.
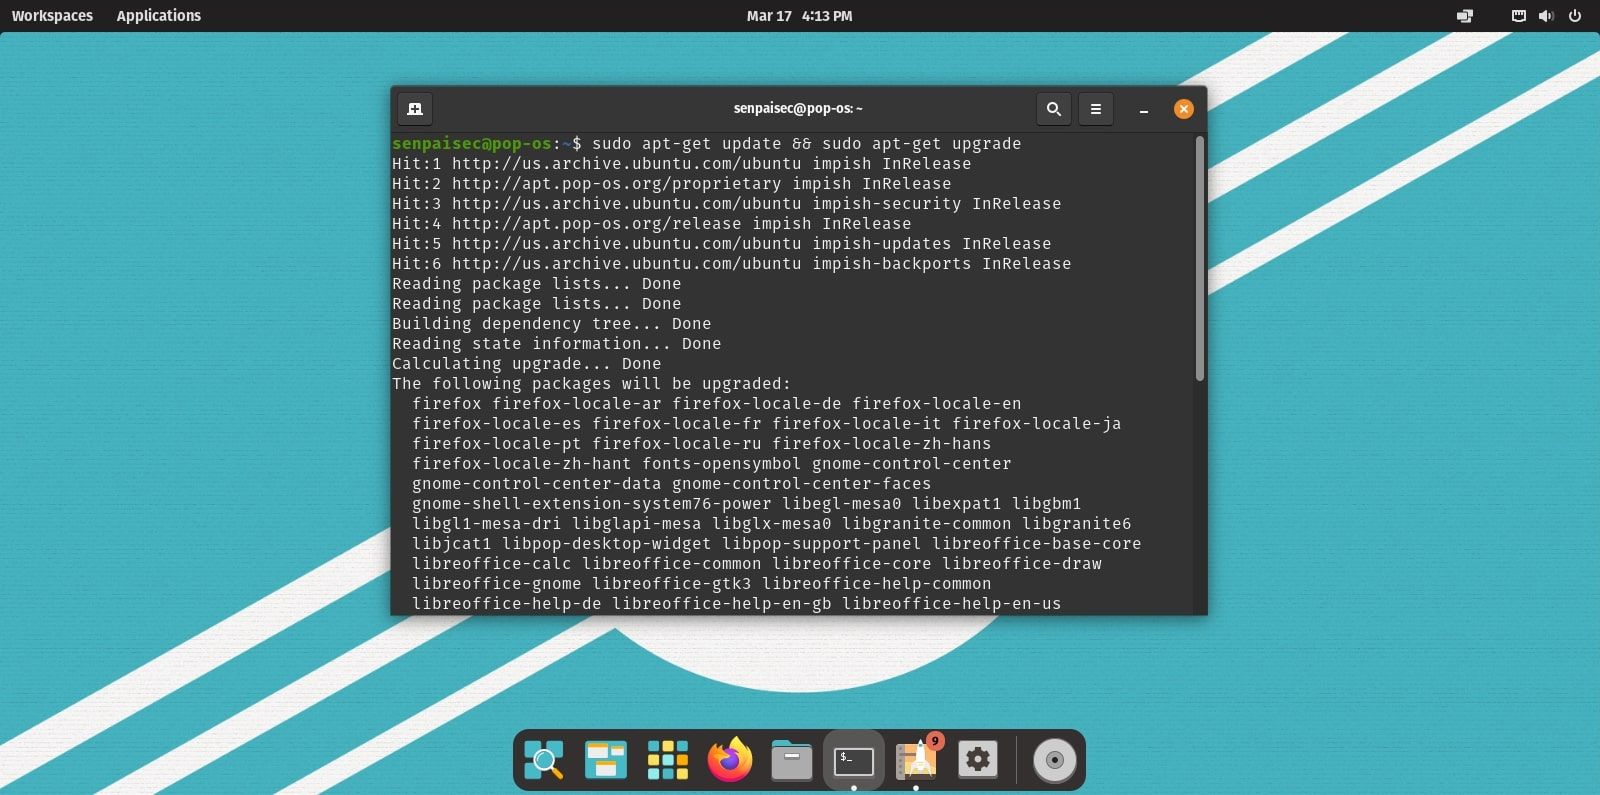
Listed here are the steps to replace your Pop!_OS desktop:
- Hearth up a terminal.
- Verify for out there updates and improve the packages utilizing APT:
sudo apt replace && sudo apt improve - Hit Enter and kind in “Y” when prompted for affirmation.
APT will robotically replace the repositories and obtain and set up the required upgrades for you.
2. Allow the Maximize Button
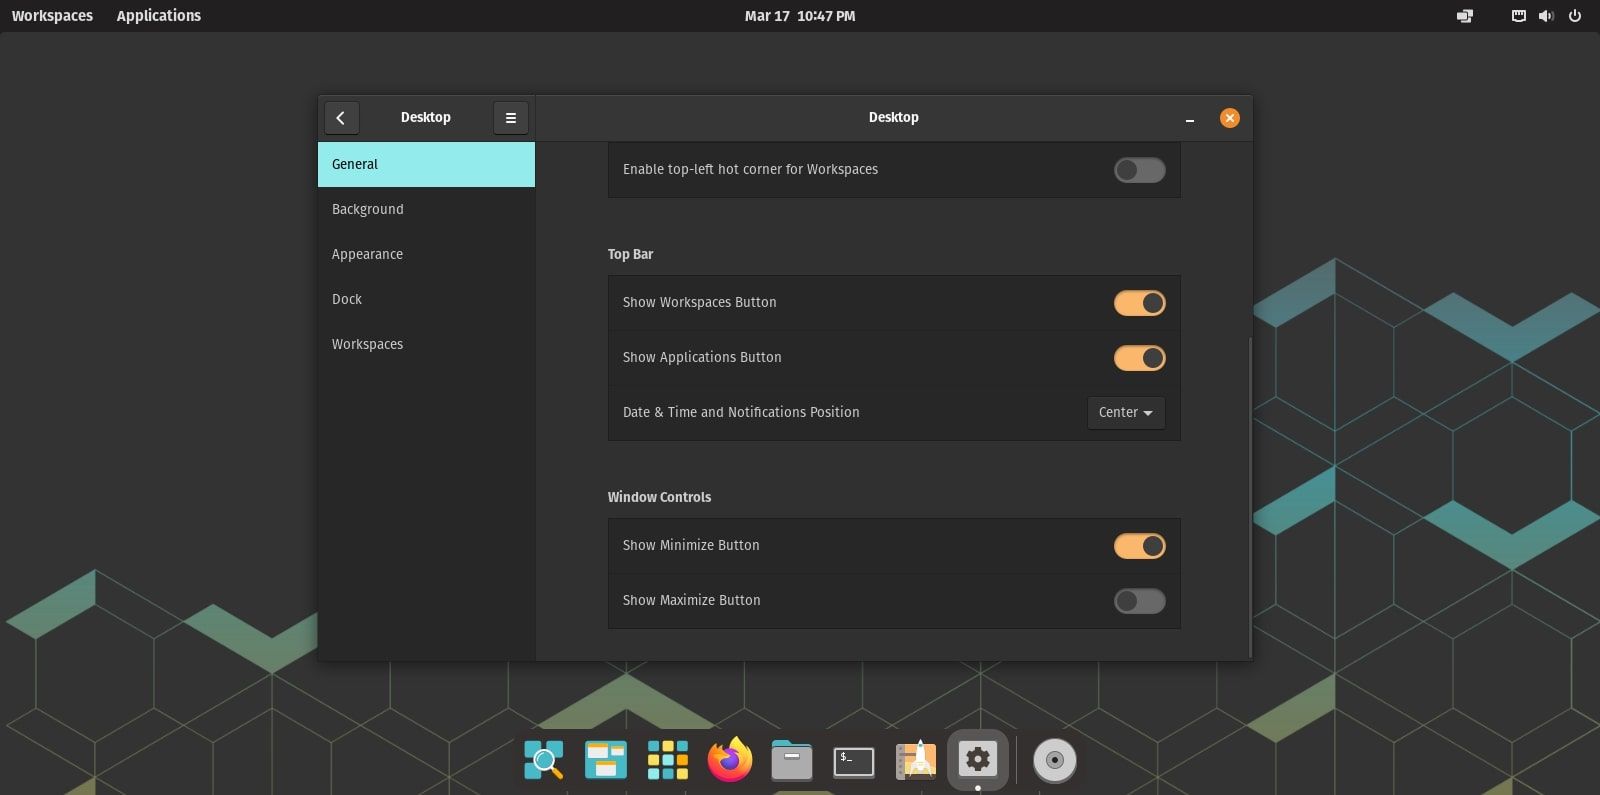
For those who’re migrating from Home windows, macOS, and even one other Linux distro, say, Ubuntu, you have to have already caught on a minuscule however noticeable distinction between them and Pop!_OS.
For causes unknown, Pop!_OS home windows, by default, wouldn’t have a maximize button on the title bar. Though not daunting, it will possibly nonetheless really feel uneasy to settle with after getting used to having three title bar buttons.
This is easy methods to allow the maximize button on the title bar in Pop!_OS:
- Open Settings.
- Navigate to the Desktop setting.
- Scroll down and below Window Controls, one can find the choice to toggle on or off title bar buttons.
3. Set Up System Restore Factors
An important “finest follow” that freshmen usually neglect is creating backups of their system. Pop!_OS is a reasonably secure distribution that will not offer you any bother. However with Linux, all it takes is one misconfiguration in your total system to collapse.
Most of the time, these mishaps are launched into your system by incompatible packages and even by you your self while tinkering with system recordsdata.
To make sure that you may shortly rewind every time your system breaks, you can also make use of utilities like Timeshift to create automated, scheduled snapshots of Pop!_OS.
Must you want it, you’ll be able to select from any of the most effective file backup apps for Linux.
4. Set up VirtualBox Visitor Additions
For the VirtualBox installations of Pop!_OS, the VirtualBox Visitor Additions is a must have add-on to streamline your virtualized Linux expertise. It’s a assortment of system drivers and software program which facilitate nearer integration between the visitor and host.
Putting in the add-on unlocks options like bidirectional “drag and drop” and shared clipboard. It additionally opens up an array of show resolutions for the visitor field. You’ll find an entire checklist of options in the official documentation.
Observe these steps to put in VirtualBox Visitor Additions on Pop!_OS:
- Set up the VirtualBox Visitor extensions on the host system.
- Hearth up the Pop!_OS digital machine.
- Underneath the Units tab, click on on Insert Visitor Additions CD Picture.
- Click on on Run and watch for the method to complete.
- Restart your digital machine and modifications needs to be in impact.
Obtain: VirtualBox Guest Extensions (Free)
In Pop!_OS, proprietary multimedia codecs like MP3, DVD decoder, and fonts aren’t included by default. Nonetheless, Pop!_OS encompasses a package deal that may set up all out there proprietary multimedia codecs and fonts together with the Microsoft TrueType font.
Listed here are the steps to put in Microsoft fonts and media codecs on Pop!_OS:
- Hearth up a terminal and set up the “ubuntu-restricted-extras” package deal utilizing APT.
sudo apt set up ubuntu-restricted-extras - Hit Enter and kind in “Y” when prompted for permission.
APT will obtain and set up all of the media codecs and fonts. Nonetheless, you may need to conform to EULA phrases and situations to put in the Microsoft fonts.
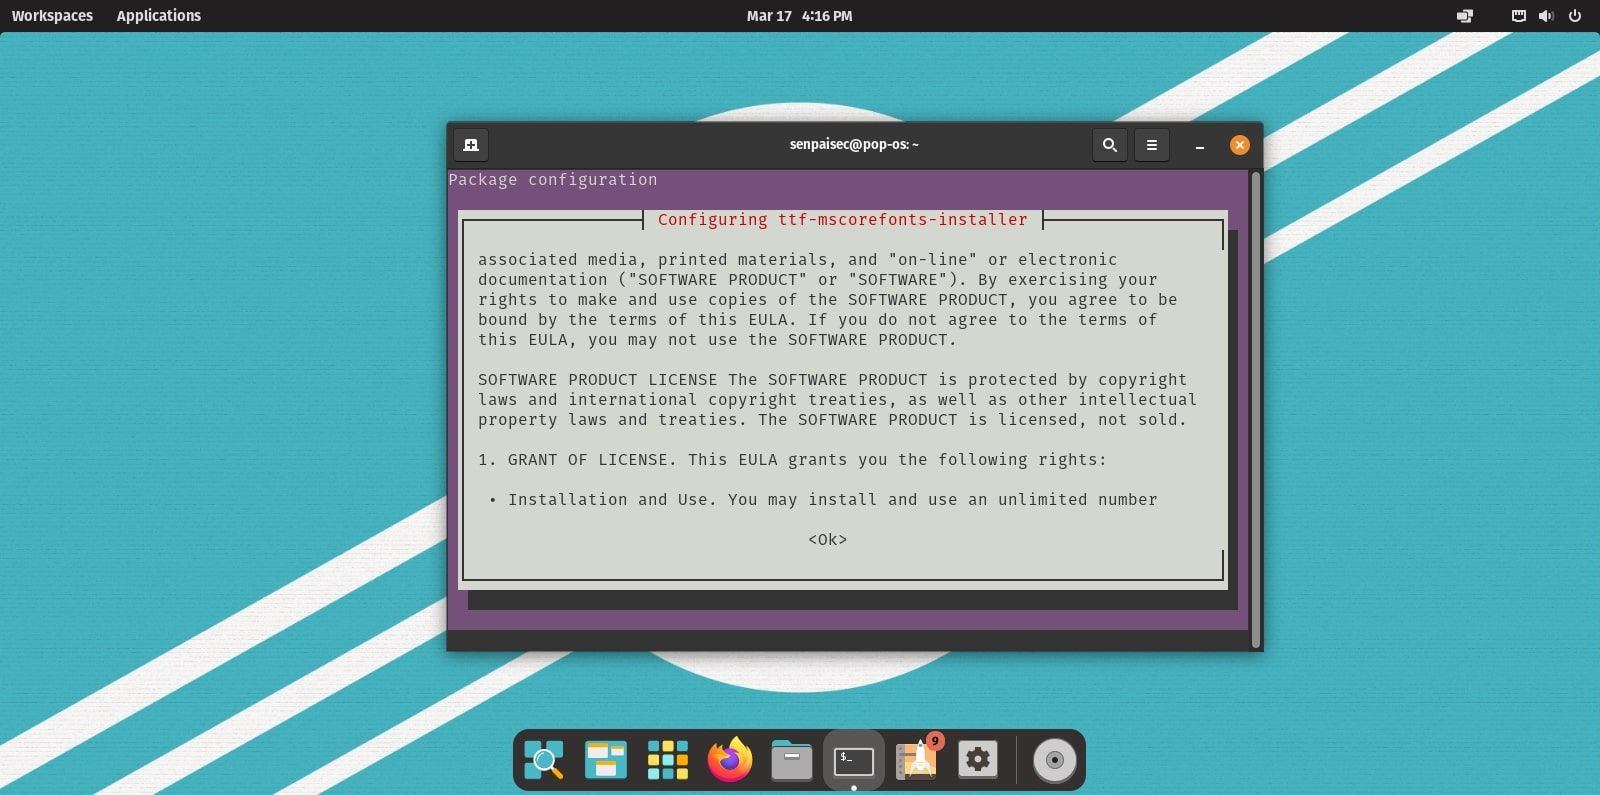
For those who see a pop-up in your display screen similar to this picture, observe these steps:
- Press Tab in your keyboard.
- OK will now be highlighted.
- Press Enter to proceed with the set up.
6. Allow Snap Help
Pop!_OS inherently helps Flatpak and DEB packages. To put in and run snap packages in your Pop!_OS machine, you’ll need to manually set up and arrange the Snap daemon service or, snapd.
To allow snap assist in Pop!_OS, enter the next command within the terminal:
sudo apt set up snapdAs soon as the obtain is full, restart your system. It is best to now be capable of set up and use snap packages.
To check if the whole lot’s so as, you’ll be able to run this command:
snap set up hello-world && hello-worldIf the output returns “Howdy World!”, you are good to go.
7. Theme Your Desktop With GNOME Tweaks
The default theme of Pop!_OS is pretty much as good because it will get. However why not personalize it and take it a step additional? Since Pop!_OS encompasses a refreshed iteration of the GNOME desktop setting, you’ll be able to customise it to fit your style by altering themes and including extensions with the useful GNOME Tweaks software.
To get you began, this is a information on easy methods to theme Pop!_OS with GNOME Tweaks and an inventory of the most effective GNOME shell extensions.
8. Play With the Configurations
Earlier than the appearance of Pop!_OS COSMIC, you’d need to undergo the trouble of putting in extensions and add-ons to make fundamental modifications to your system, say, altering or customizing the dock, switching colour scheme, and so on. Now, you are able to do way more with out including any exterior plugins.
You possibly can edit your dock, change the colour scheme, edit the window and title bar, and so forth instantly from the settings. Linux provides you a freehand at customization. Ensure to discover the configurations and tweak your Pop!_OS desktop to your liking.
9. Discover Pop!_Shop
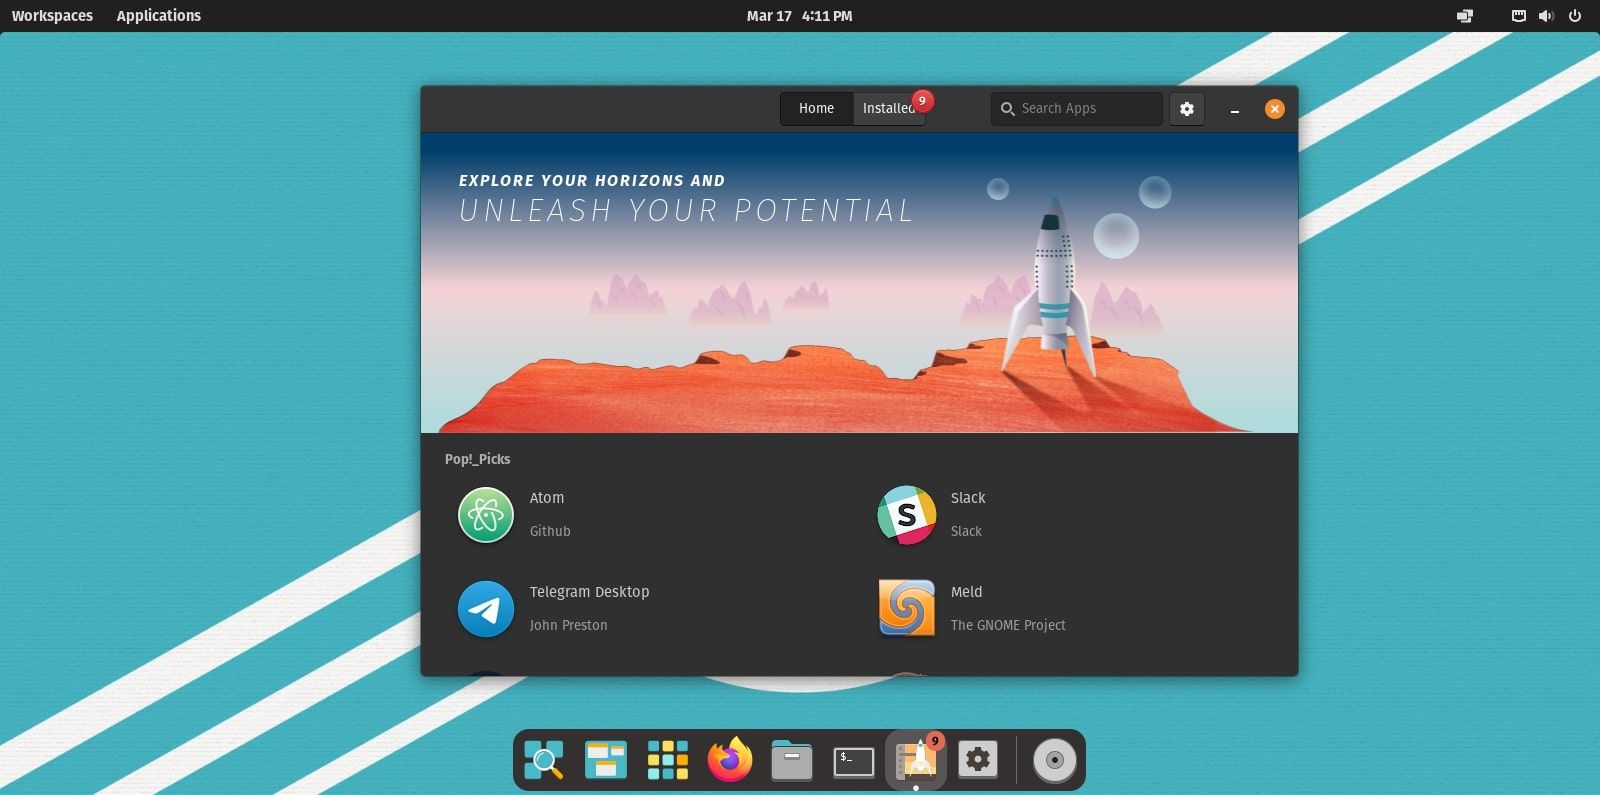
An ordinary Pop!_OS set up comes free from any bloatware. Though it might really feel barren, that is intentional since Pop!_OS ships with the motive of retaining the desktop clear and minimal.
If you wish to add purposes to your system, you can also make use of Pop!_Shop. It’s the flagship software program middle of Pop!_OS that gives a variety of apps to select from within the format of Flatpak or DEB packages.
It options its very personal suggestion web page, Pop!_Picks. Underneath this part, one can find an array of purposes focused at builders and scientists. In any case, Pop!_OS is meant for STEM practices.
10. Set up Google Chrome
You may discover Firefox put in because the default browser on most Linux distros, and Pop!_OS is not any stranger to this. Nonetheless, if you’re a longtime consumer of Google Chrome, it is pure that you’d choose it over Firefox.
Though you will not discover it on the Pop!_Shop, you’ll be able to nonetheless manually set up Chrome by Pop!_OS’s Debian package deal installer, Eddy.
First, you may need to obtain the Chrome DEB package deal from the official web site. As soon as downloaded, right-click on the file and click on on Open with Eddy to put in it.
Obtain: Google Chrome
Getting the Most Out of Your Linux Desktop
With Linux, there isn’t any finish to revving up your desktop expertise with just a few hacks and tweaks. Now that you just’re conscious of all of the issues you must do after putting in Pop!_OS, you must be capable of max out its efficiency and performance.
It is essential to keep in mind that whichever distro you utilize, you have to be certain to set your self up after putting in it.
Learn Subsequent
About The Writer
