Distant video monitoring is crucial in lots of situations, however shopping for a digicam outright may be fairly costly. Fortunately, you’ll find various options.
Do you want a fast, cheap solution to investigate cross-check issues out of your smartphone? We are going to see how we are able to use the cheap ESP32-CAM module to arrange a distant, web-enabled digicam for monitoring, surveillance, or video doorbell functions!
Gathering Provides for This Venture
For this venture, you have to:
- An ESP32-CAM board with both a programming daughter board or a built-in USB port
- A micro USB cable
- A USB charger
- The community identify and password to your wi-fi entry level
- A smartphone or pill
Selecting a Appropriate ESP32-CAM Board
For this venture, you have to a solution to program the ESP32-CAM board out of your pc and a solution to energy it when it’s now not linked to your pc. Each of those features are simply completed in case your board has a USB connector.
For that reason, you can purchase both an ESP32-CAM with an ESP32-CAM-MB daughter board or a more recent ESP32-CAM-CH340. Each include the mandatory USB port for programming and energy. Keep away from buying a naked ESP32-CAM board, as this can require further elements it’s possible you’ll not have.
Setting Up the Arduino IDE
To program the ESP32-CAM, you have to the Arduino IDE from the Arduino website. On the time this text was written, 1.8.19 was the present model.
As soon as the obtain is full, launch the applying. The primary time you run it, you would possibly get an unrecognized software warning from Home windows. It’s protected to click on Extra data, adopted by Run Anyway.
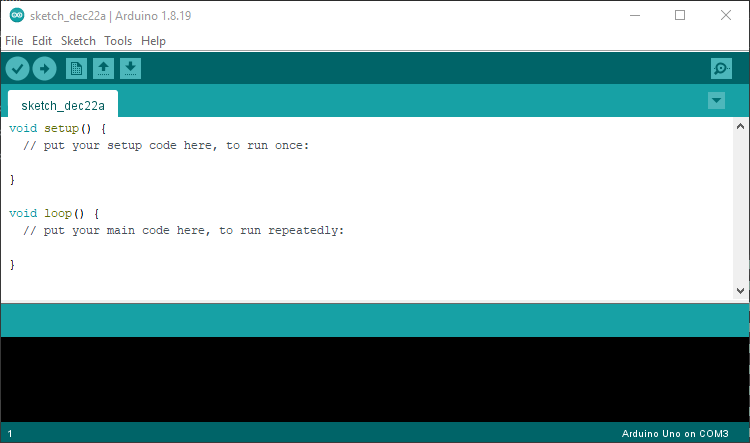
As soon as the Arduino IDE begins up, it is going to appear to be this:
You will have to make some adjustments to permit the Arduino IDE to acknowledge the ESP32-CAM. First, open Preferences from the File menu. The place it says Further Boards Supervisor URLs, paste within the following line:
https://dl.espressif.com/dl/package_esp32_index.jsonThen, click on OK.
Now, open the Instruments menu and hover your mouse over the menu merchandise that begins with Board: (it might be one thing like Board: Arduino Uno). From the submenu that seems, choose Boards Supervisor. This may deliver up a brand new window with a search bar on the high. Sort ESP32 within the search bar. Doing so ought to help you choose esp32 by Espressif Programs. Click on Set up. When the obtain finishes, click on OK to exit the Boards Supervisor.
Now, return to the Instruments menu and once more open the submenu that begins with the phrase Board. This time, you need to see an ESP32 Arduino merchandise that was not there earlier than. This can be a submenu with a protracted checklist of board names. Discover AI Thinker ESP32-CAM and choose that.
That is it; the Arduino IDE is now configured for the ESP32-CAM!
Compiling and Loading the CameraWebServer
The Arduino IDE comes with an important instance known as CameraWebServer that reveals the total capabilities of the ESP32-CAM. Let’s attempt it out! From the File menu, choose Examples and discover the part known as Examples for the AI Tinker ESP32-CAM.
Beneath that, choose ESP32, then Digicam—and at last CameraWebServer.
We might want to do a pair modifications to get this to run along with your ESP32-CAM. Discover the traces that appear to be this:
// Choose digicam mannequin
#outline CAMERA_MODEL_WROVER_KIT // Has PSRAM
//#outline CAMERA_MODEL_ESP_EYE // Has PSRAM
//#outline CAMERA_MODEL_M5STACK_PSRAM // Has PSRAM
//#outline CAMERA_MODEL_M5STACK_V2_PSRAM // M5Camera model B Has PSRAM
//#outline CAMERA_MODEL_M5STACK_WIDE // Has PSRAM
//#outline CAMERA_MODEL_M5STACK_ESP32CAM // No PSRAM
//#outline CAMERA_MODEL_AI_THINKER // Has PSRAM
//#outline CAMERA_MODEL_TTGO_T_JOURNAL // No PSRAM
This can be a checklist of a number of digicam board names, every preceded with #outline. One in every of these traces is lively, whereas the others are inactive. The traces that begin with // are inactive, whereas any with out the slashes are lively. We need to modify it so solely the road for CAMERA_MODEL_AI_THINKER is lively. To take action, make it appear to be this:
// Choose digicam mannequin
//#outline CAMERA_MODEL_WROVER_KIT // Has PSRAM
//#outline CAMERA_MODEL_ESP_EYE // Has PSRAM
//#outline CAMERA_MODEL_M5STACK_PSRAM // Has PSRAM
//#outline CAMERA_MODEL_M5STACK_V2_PSRAM // M5Camera model B Has PSRAM
//#outline CAMERA_MODEL_M5STACK_WIDE // Has PSRAM
//#outline CAMERA_MODEL_M5STACK_ESP32CAM // No PSRAM
#outline CAMERA_MODEL_AI_THINKER // Has PSRAM
//#outline CAMERA_MODEL_TTGO_T_JOURNAL // No PSRAM
Subsequent, we have to inform the ESP32-CAM about our wi-fi community. Discover the next traces:
const char* ssid = "*********";
const char* password = "*********";
Now change the asterisks along with your community identify (SSID) and the community password to your wi-fi entry level. Change solely the asterisks and hold the double quotes.
Now, click on the spherical checkmark button within the Arduino IDE toolbar (alternatively, choose Confirm/Compile from the Sketch menu). The Arduino IDE will say Compiling sketch. After a while, it is going to say Achieved compiling. If as an alternative of seeing that, you get an error, it means you mistyped one thing. Confirm your adjustments rigorously, appropriate any errors and take a look at once more!
As soon as the compilation succeeds, the final step is to add this system to the board. Join the ESP32-CAM to your pc utilizing a USB cable. Then, go to the Instruments menu and search for an merchandise that begins with “Port:” and select a serial port from the submenu. Then click on the button that appears like an arrow in a circle from the Arduino toolbar (alternatively, choose Add from the Instruments menu). The Arduino IDE will recompile, say Importing for some time, after which lastly say Achieved Importing.
For those who get an error that claims your board is just not linked, go to the Instruments menu and choose a unique serial port from the submenu. Attempt every till you discover one which works!
Now, click on the button that appears like a magnifying glass in a field on the proper facet of the Arduino toolbar (alternatively, choose Serial Monitor from the Instruments menu). This may deliver up a brand new window in your pc for output from the ESP32-CAM.
After finishing the above steps, push the small reset button on the proper facet of the ESP32-CAM-MB. This button must be labeled RST. As quickly as you do that, you need to see textual content within the Serial Monitor window. Search for the traces that appear to be this:
WiFi linked
Beginning net server on port: '80'
Beginning stream server on port: '81'
Digicam Prepared! Use 'http://192.168.1.9' to attach
In your smartphone, sort the HTTP net tackle into an online browser. You’ll get an online web page with numerous completely different configuration choices. Scroll down till you see the Begin Stream button. Click on that to get a dwell view of regardless of the ESP32-CAM is seeing. Bookmark this net web page so to return to it later!
After you have verified that it really works, you possibly can disconnect the ESP32-CAM out of your pc and take it anyplace you need to monitor and energy it utilizing a daily USB charger. Out of your smartphone, hook up with the web page you bookmarked to see the dwell view!
Now It is Time to Apply What You have Discovered
So, there you will have it—a easy means to make use of the ESP32-CAM as a smartphone-accessible net digicam! Use this to watch your own home, as a child monitor or as a wise doorbell! Remember that if you happen to want to monitor your ESP32-CAM from outdoors your own home community, you have to to configure port forwarding in your Web router.
Learn Subsequent
About The Writer
