The common energy consumed by a 3D printer varies from 120 to 300 watts per hour, primarily relying on the dimensions of the heated mattress. The remaining parts, such because the mainboard, show, stepper motors, and followers, normally draw lower than 50 watts per hour. The inherent energy effectivity of those parts leaves no scope for enchancment, sadly.
Nevertheless, modifying the heated mattress for effectivity has the potential to yield vital discount in energy consumption. Right here’s how one can cut back your 3D printer’s carbon footprint with a easy, cheap mattress modification.
Why Is Your 3D Printer Horrible at Energy Effectivity?
Whereas 3D printing is undoubtedly subtle on the business stage, shopper 3D printers are comparatively easier designs cobbled along with off-the-shelf parts. Most of those parts contain electronics and stepper motors which can be inherently optimized for low energy consumption. Nothing flawed in that division.
Sadly, the 3D printer beds are a unique matter altogether. To save lots of prices and cut back manufacturing complexity, almost all shopper 3D printers lack mattress thermal insulation. That’s a nasty concept as a result of an uninsulated mattress will radiate warmth from the highest in addition to the underside surfaces. In different phrases, almost half of the radiated warmth is wasted from the underside of a heated mattress.
The better the quantity of wasted warmth, the longer the mattress heater should function on the most energy stage to take care of the preset mattress temperature. The heated mattress of a typical 3D printer, such because the Creality Ender-3, consumes greater than 250 watts of energy at full tilt, so that you’d ideally wish to insulate the mattress to forestall the heater from kicking in typically. Right here’s easy methods to go about doing that the correct approach.
Thermally insulating a 3D printer mattress includes partially disassembling the printer to extract the mattress. That’s not an enormous concern as a result of almost all shopper 3D printers ship in knocked-down kits replete with consumer manuals and the instruments required to place all the things collectively. The identical instruments might be reused for this objective.
Getting the insulation materials alternative proper is our main concern. The heated beds in most shopper 3D printers are good as much as 250°F. That’s nicely under the ignition temperature of most supplies, which makes commonest insulation supplies secure sufficient for our objective.
Nevertheless, such excessive temperatures nonetheless introduce the issues of warping, melting, and off-gassing. Plastics equivalent to acrylics and foam insulation supplies will start to deform on the form of mattress temperatures advisable for ABS printing. In actual fact, some foam supplies may even emit probably dangerous gases. Check out our 3D printing meals security information to study extra.
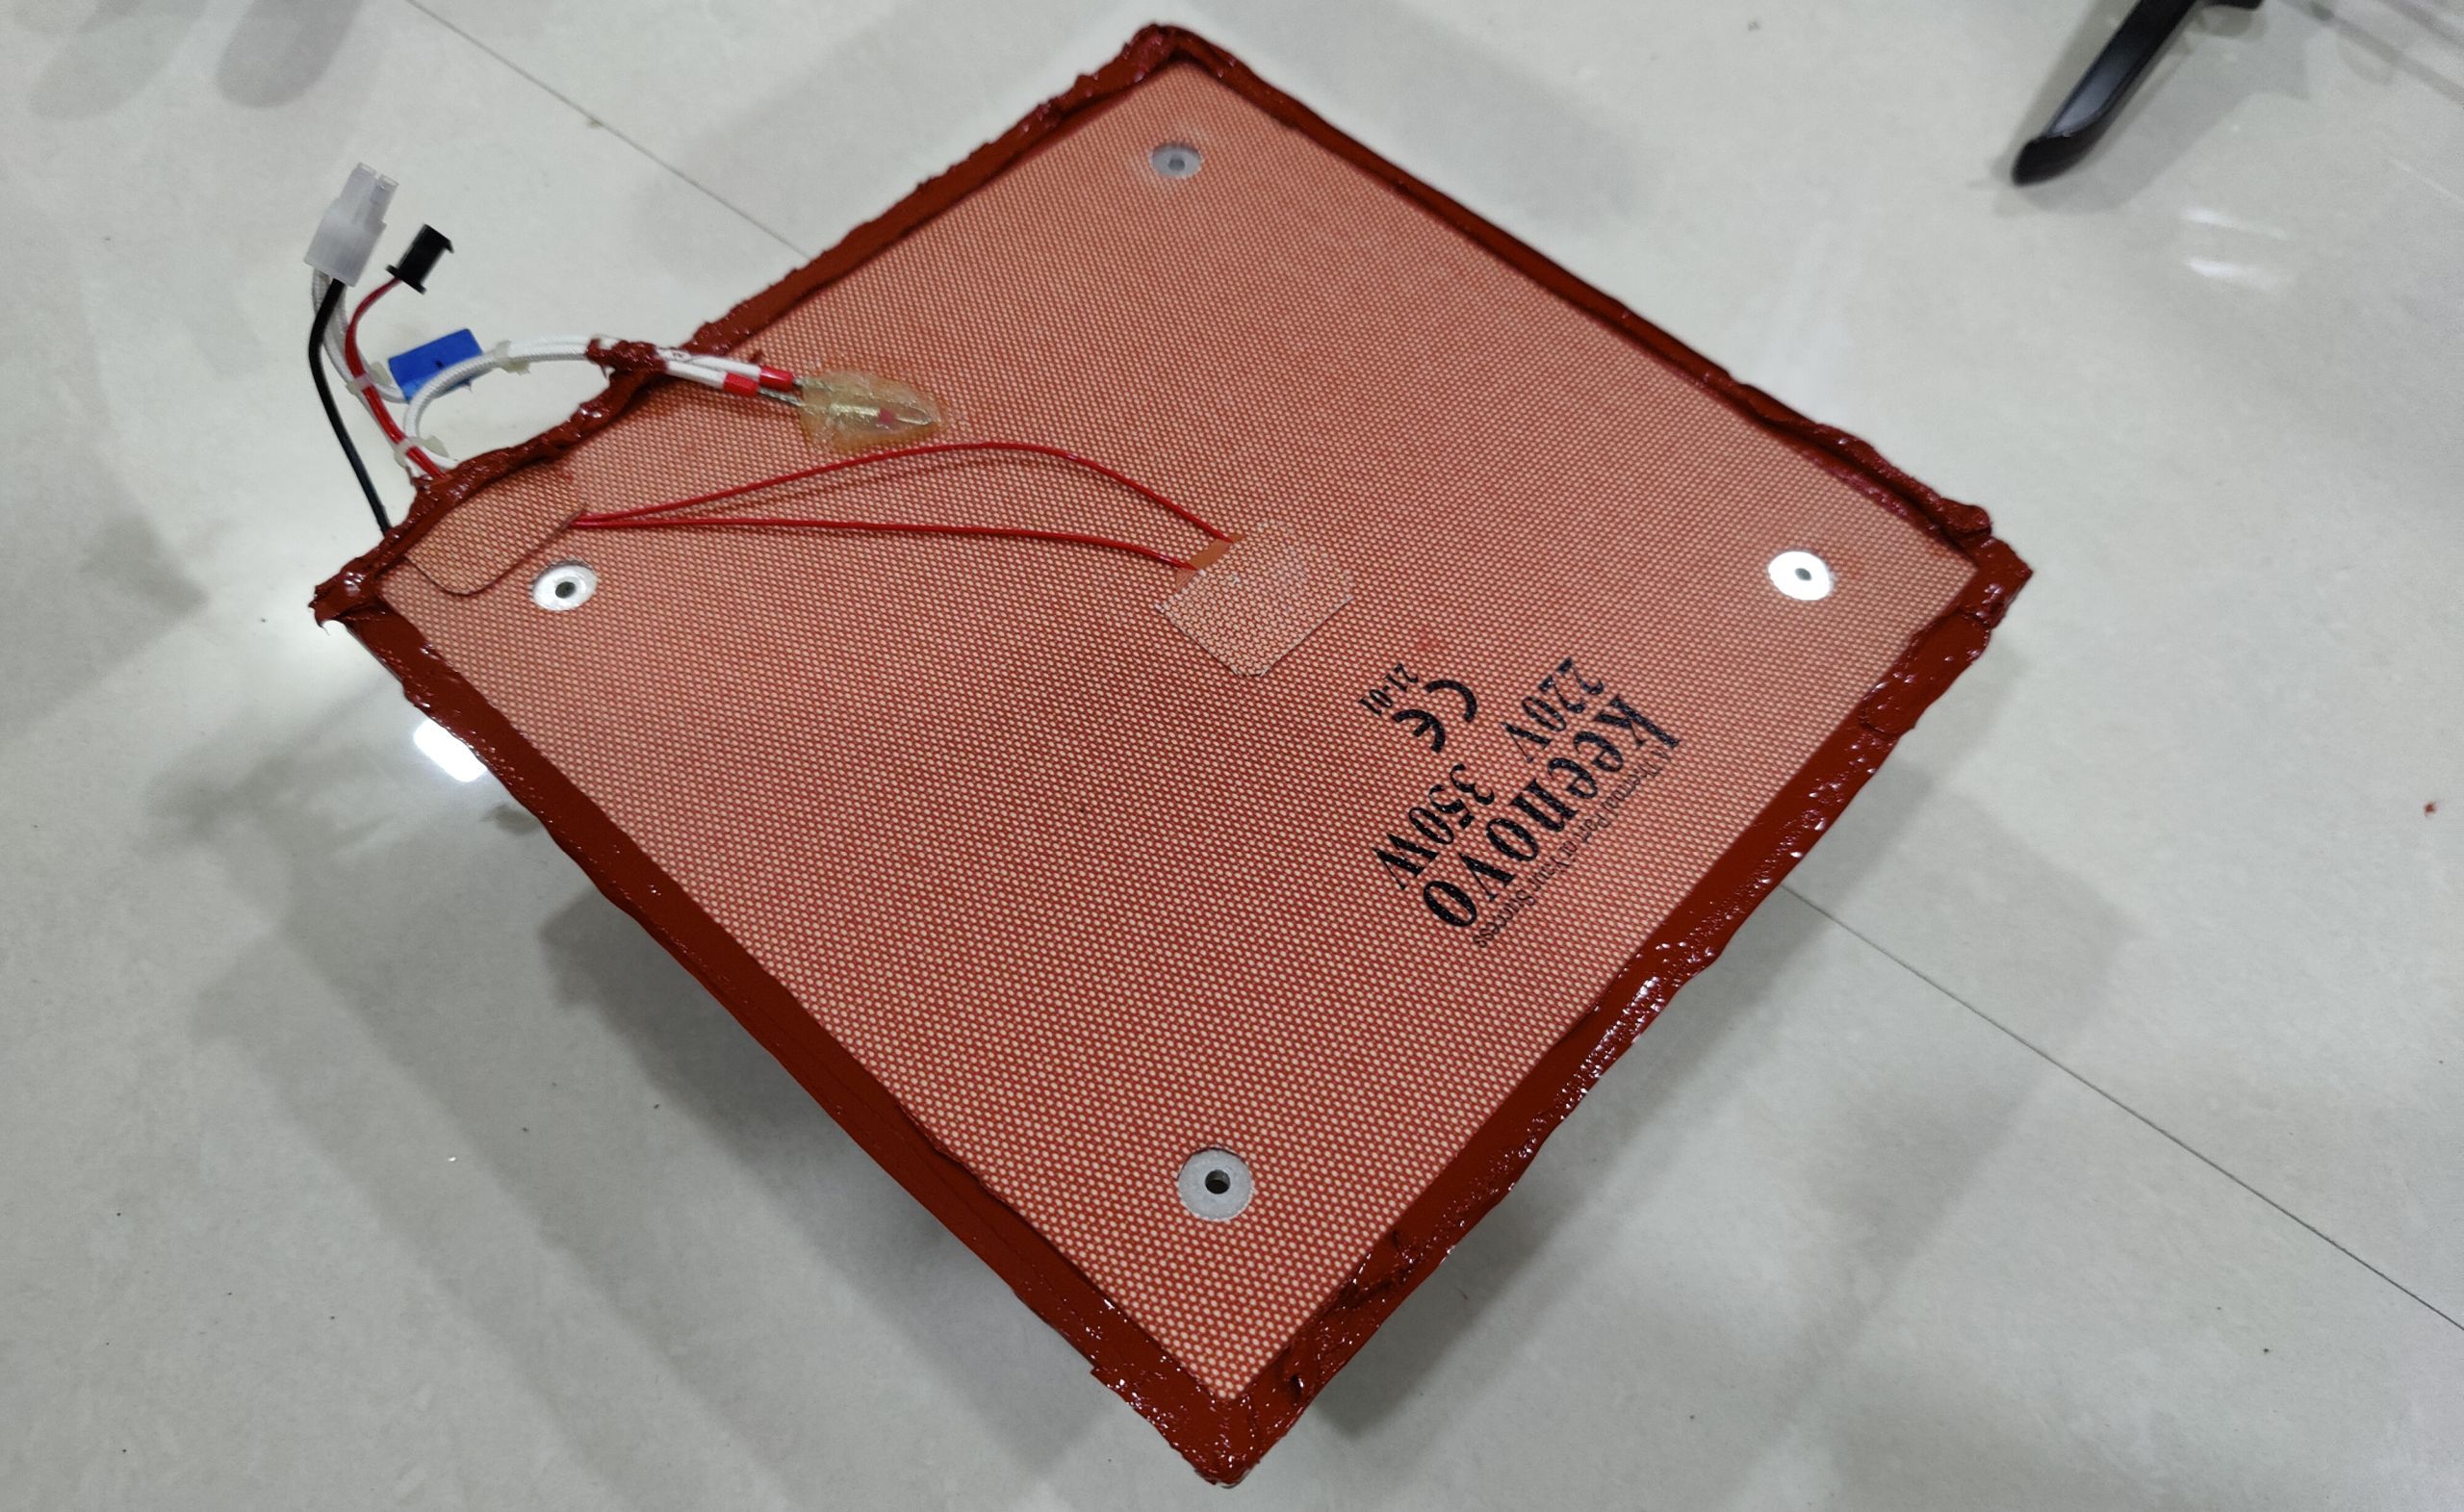
One of the best supplies subsequently are cork (rubberized cork works as nicely) and silicone. Cork sheets are low cost and simply obtainable, whereas additionally being able to withstanding temperatures nicely past what most shopper 3D printer beds can attain.
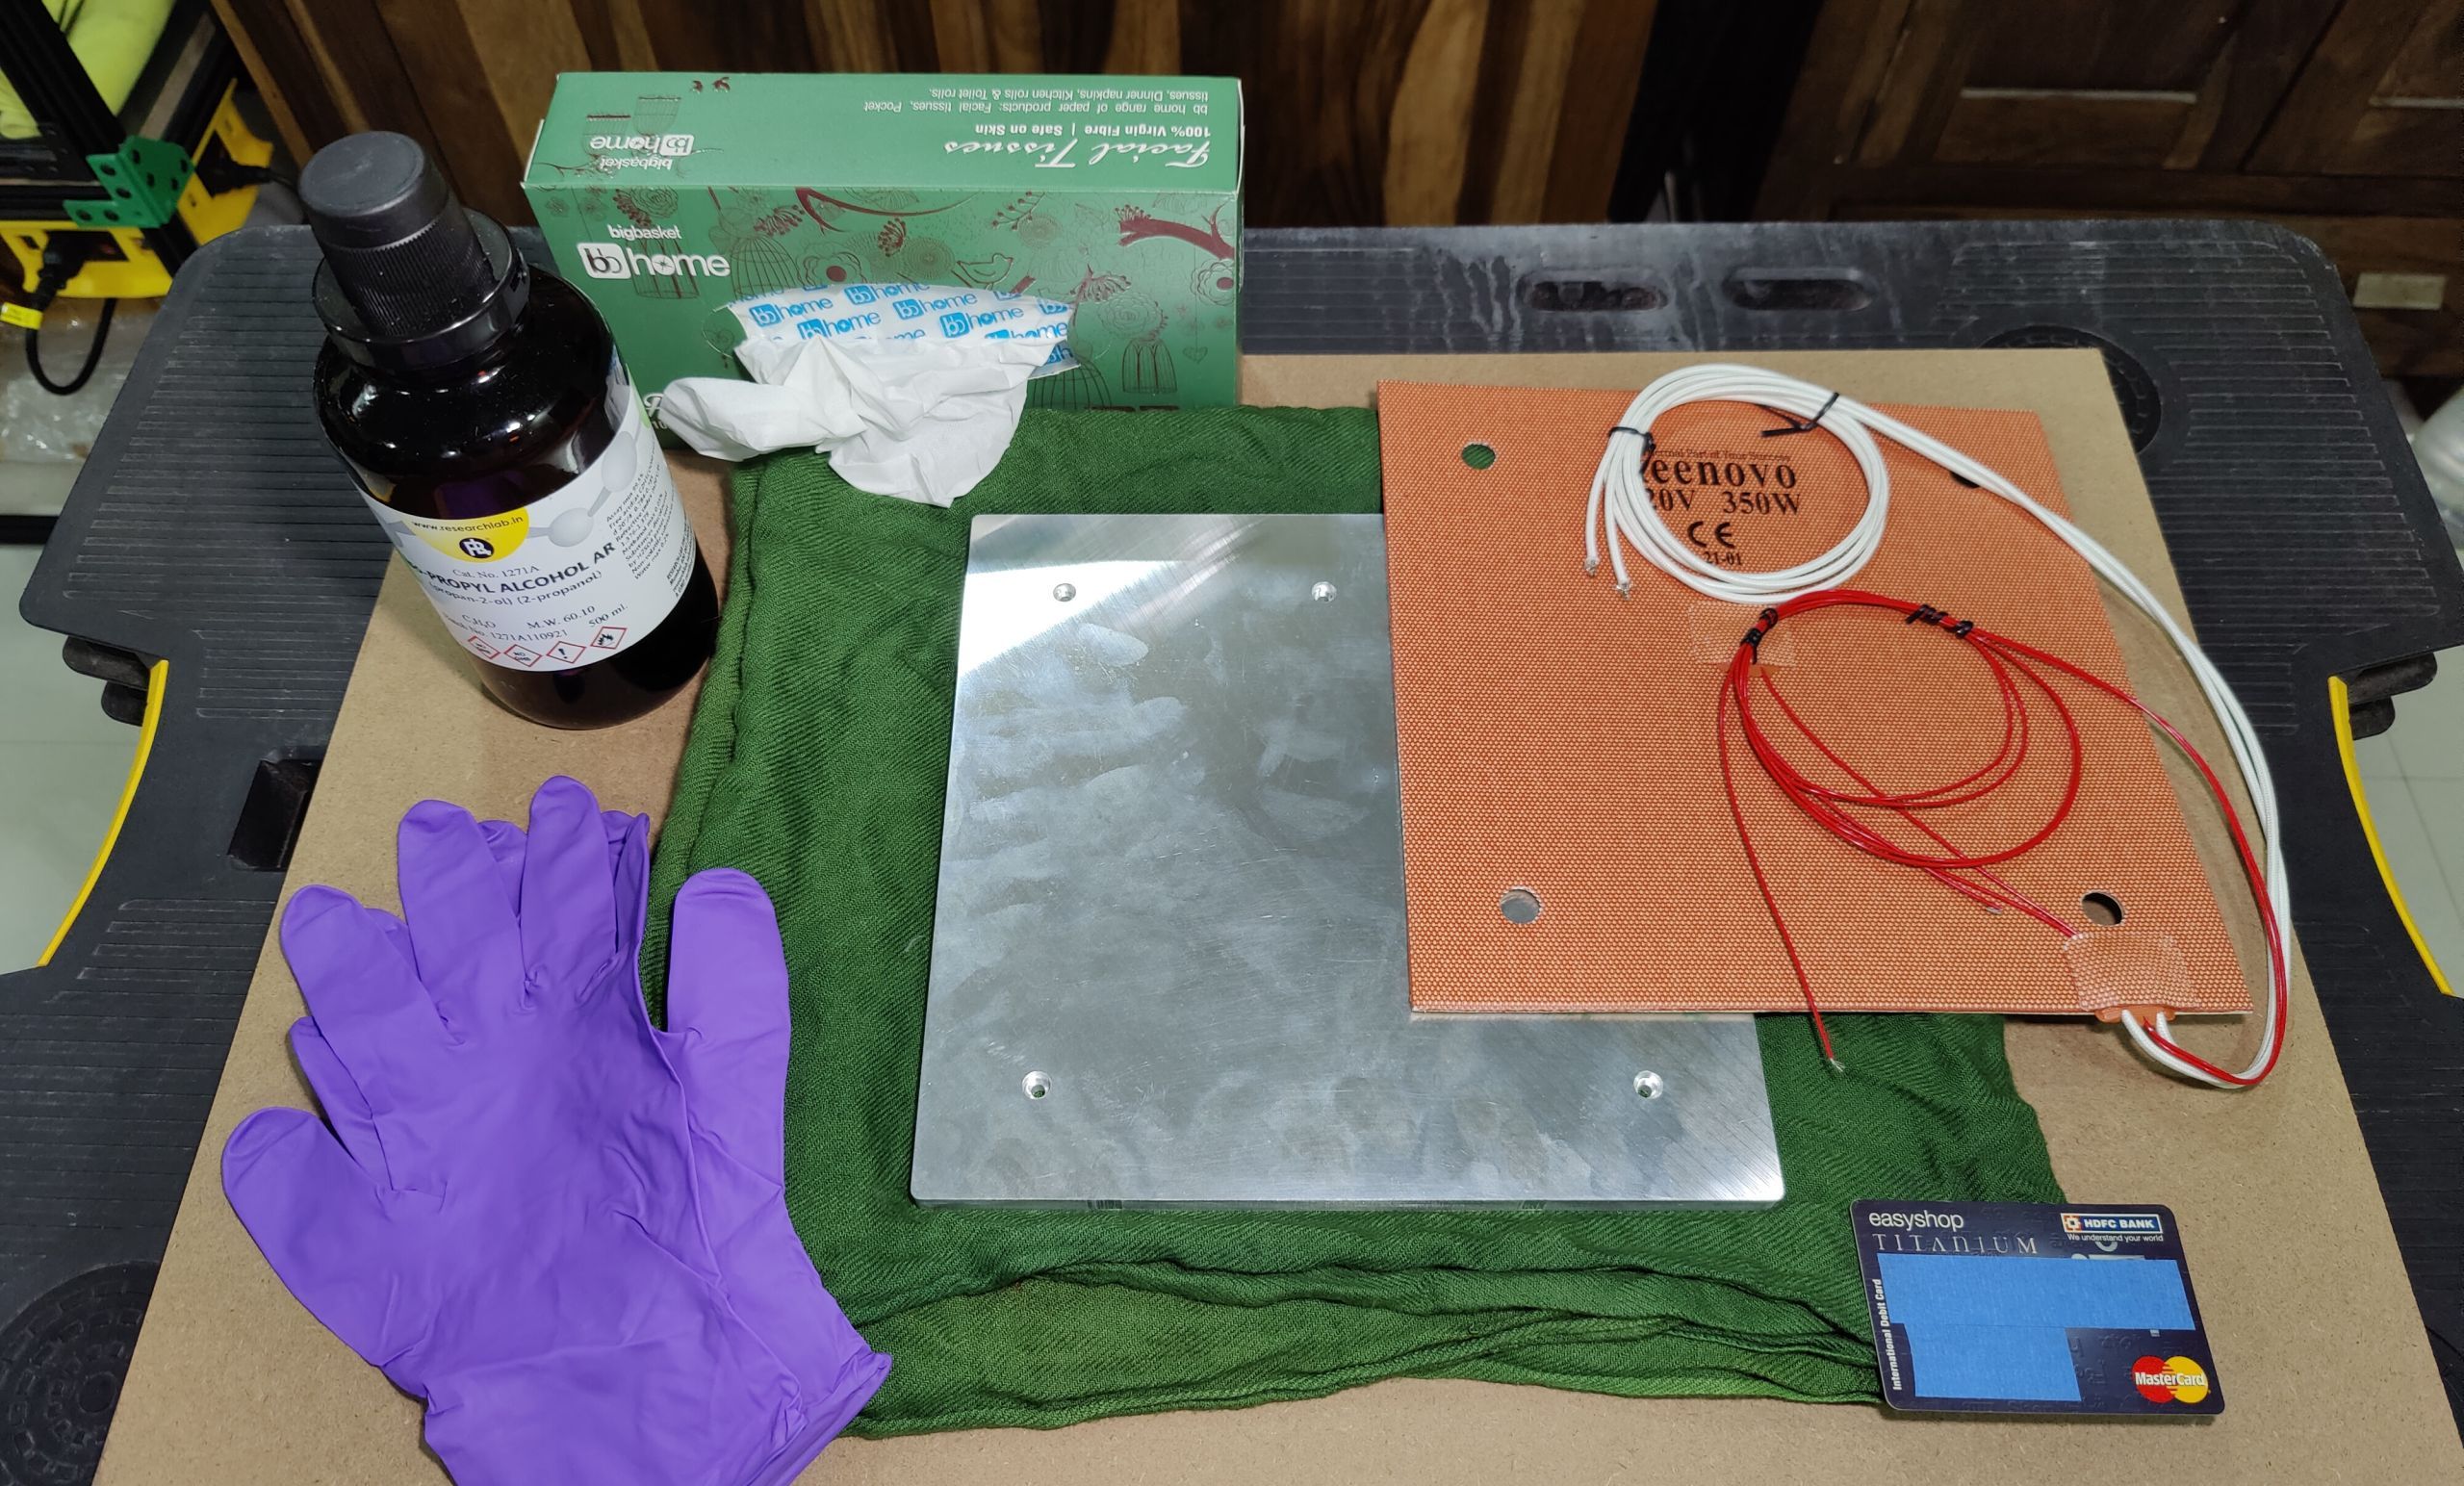
Silicone sheets are the only option merely because of their considerably increased thermal threshold. Select the choice that matches your funds. What isn’t elective, nevertheless, are these instruments:
- Ruler for measurement
- Appropriate cutting surface
- Utility knife, or another type of blade
- High temperature RTV silicone sealant
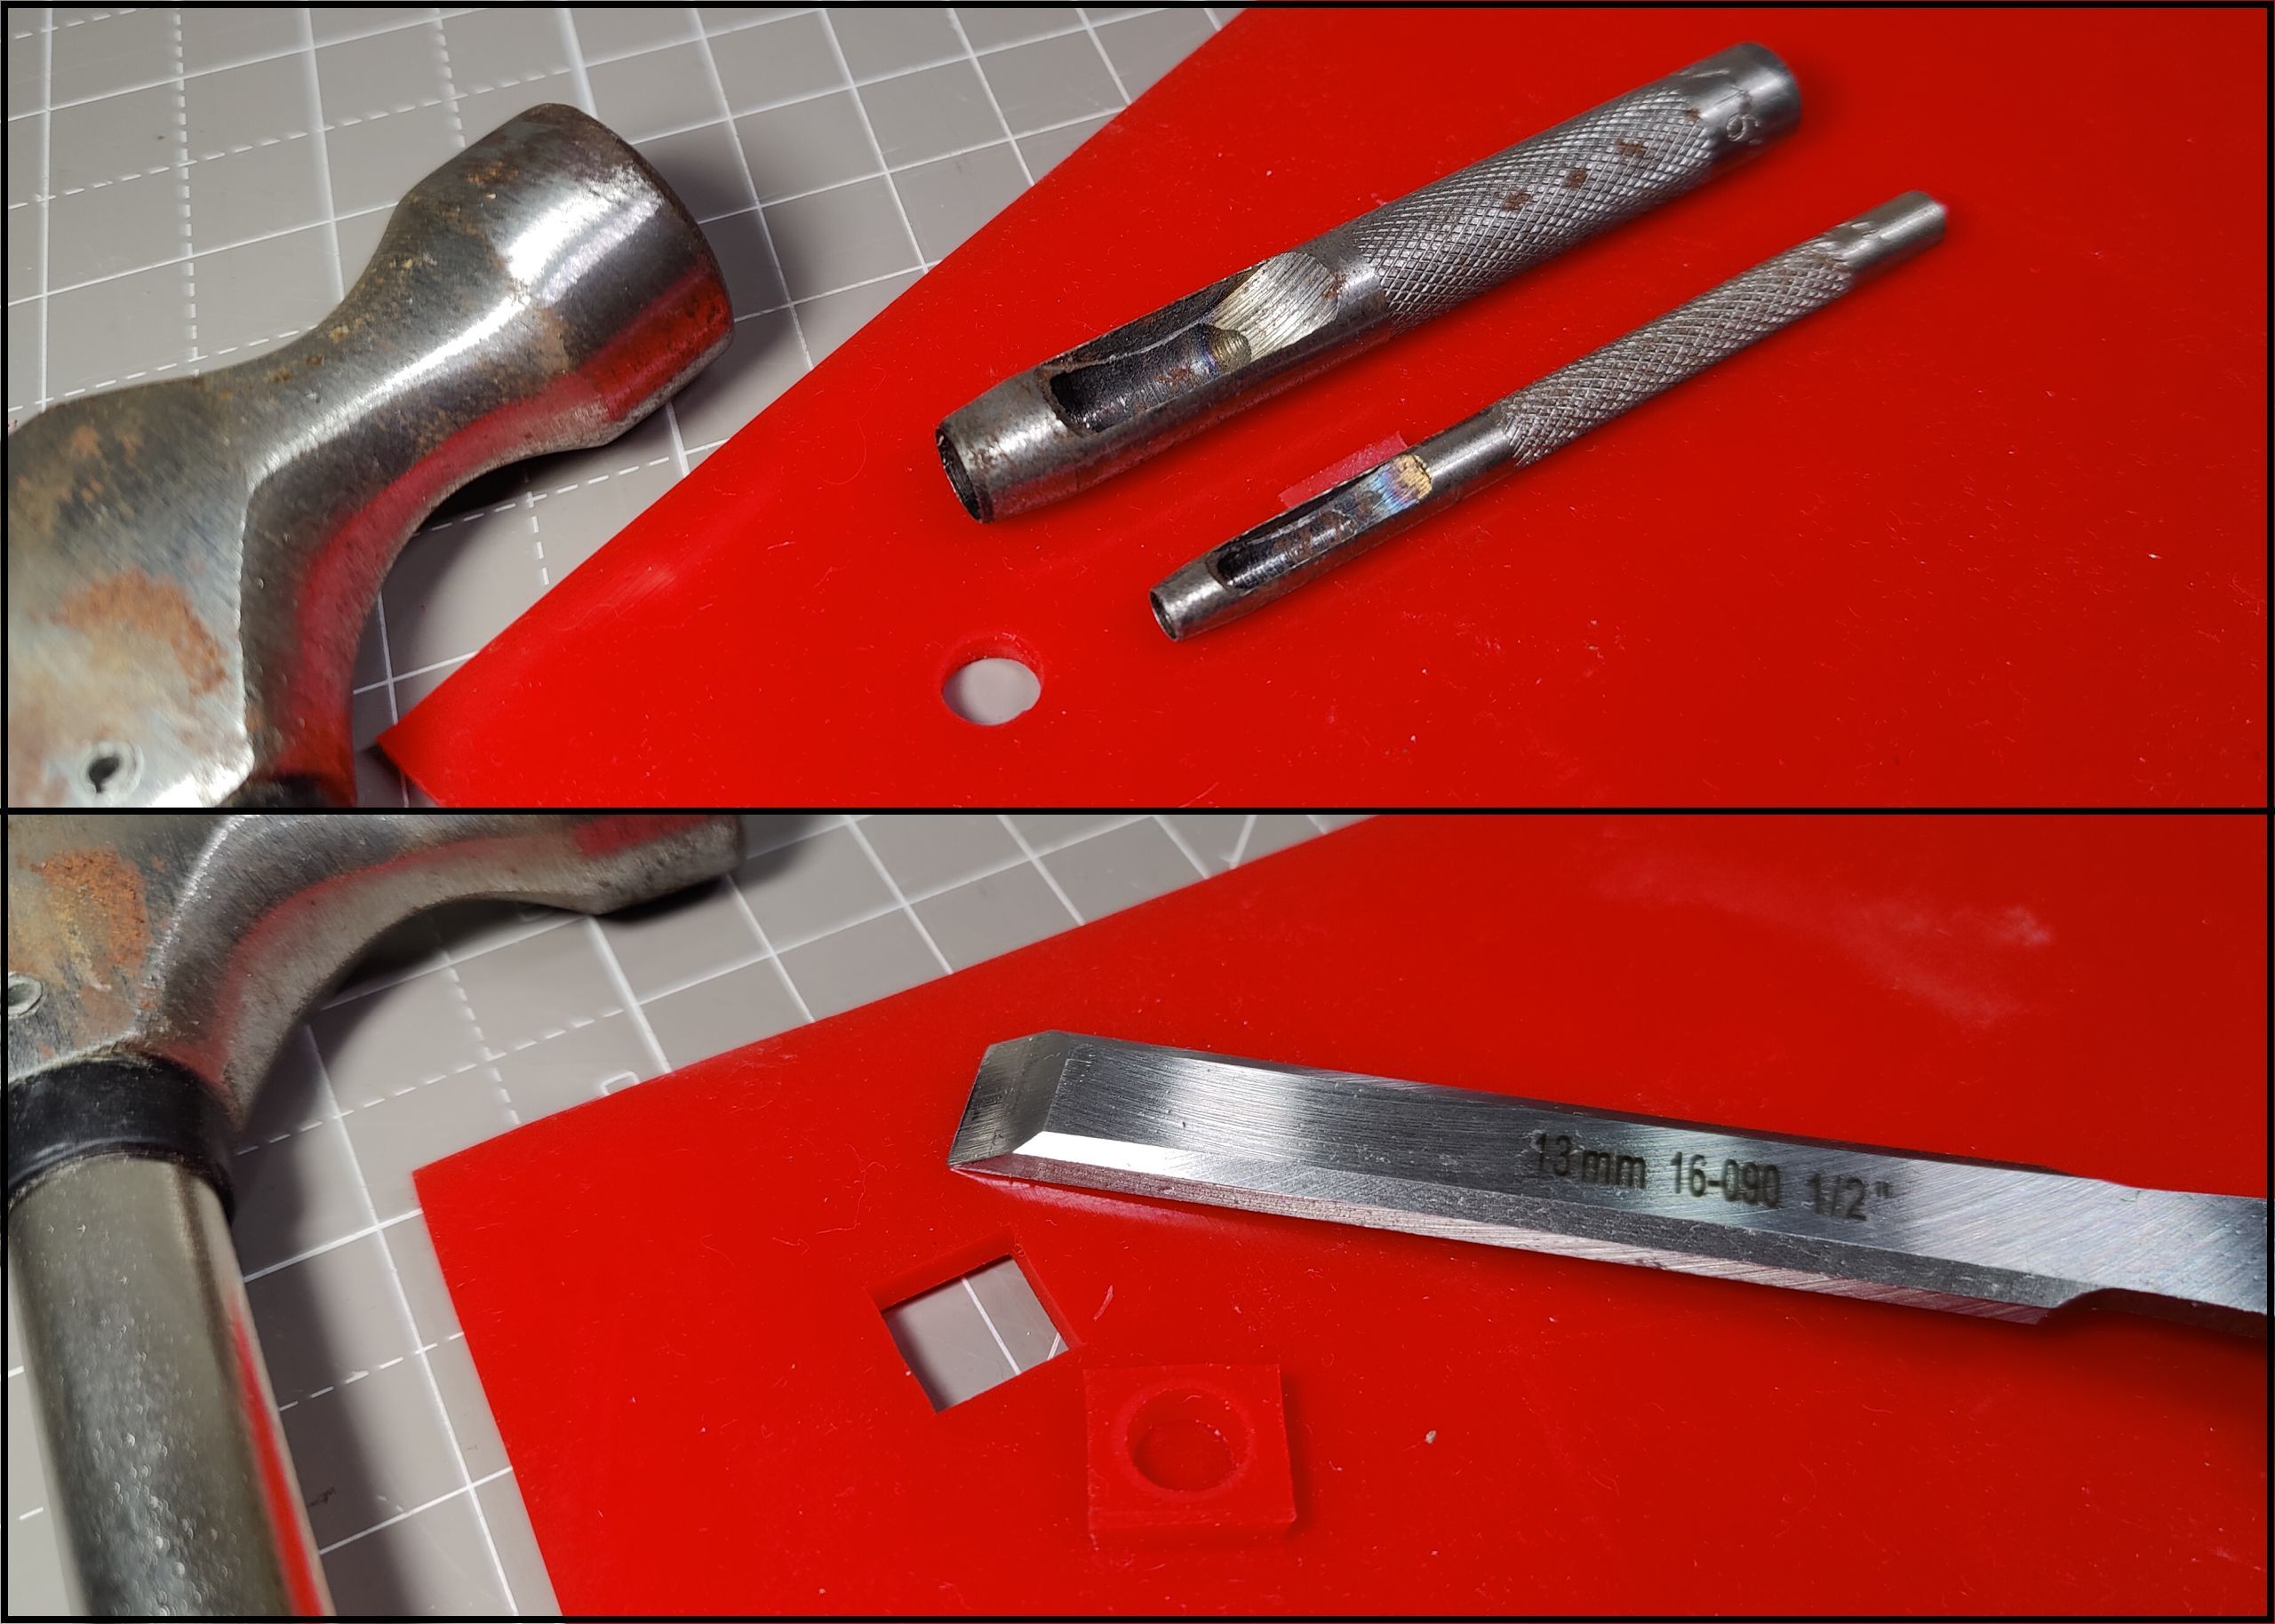
- Hole punch tool, or chisel
- Hammer
- Latex or nitrile rubber gloves (non-powdered)
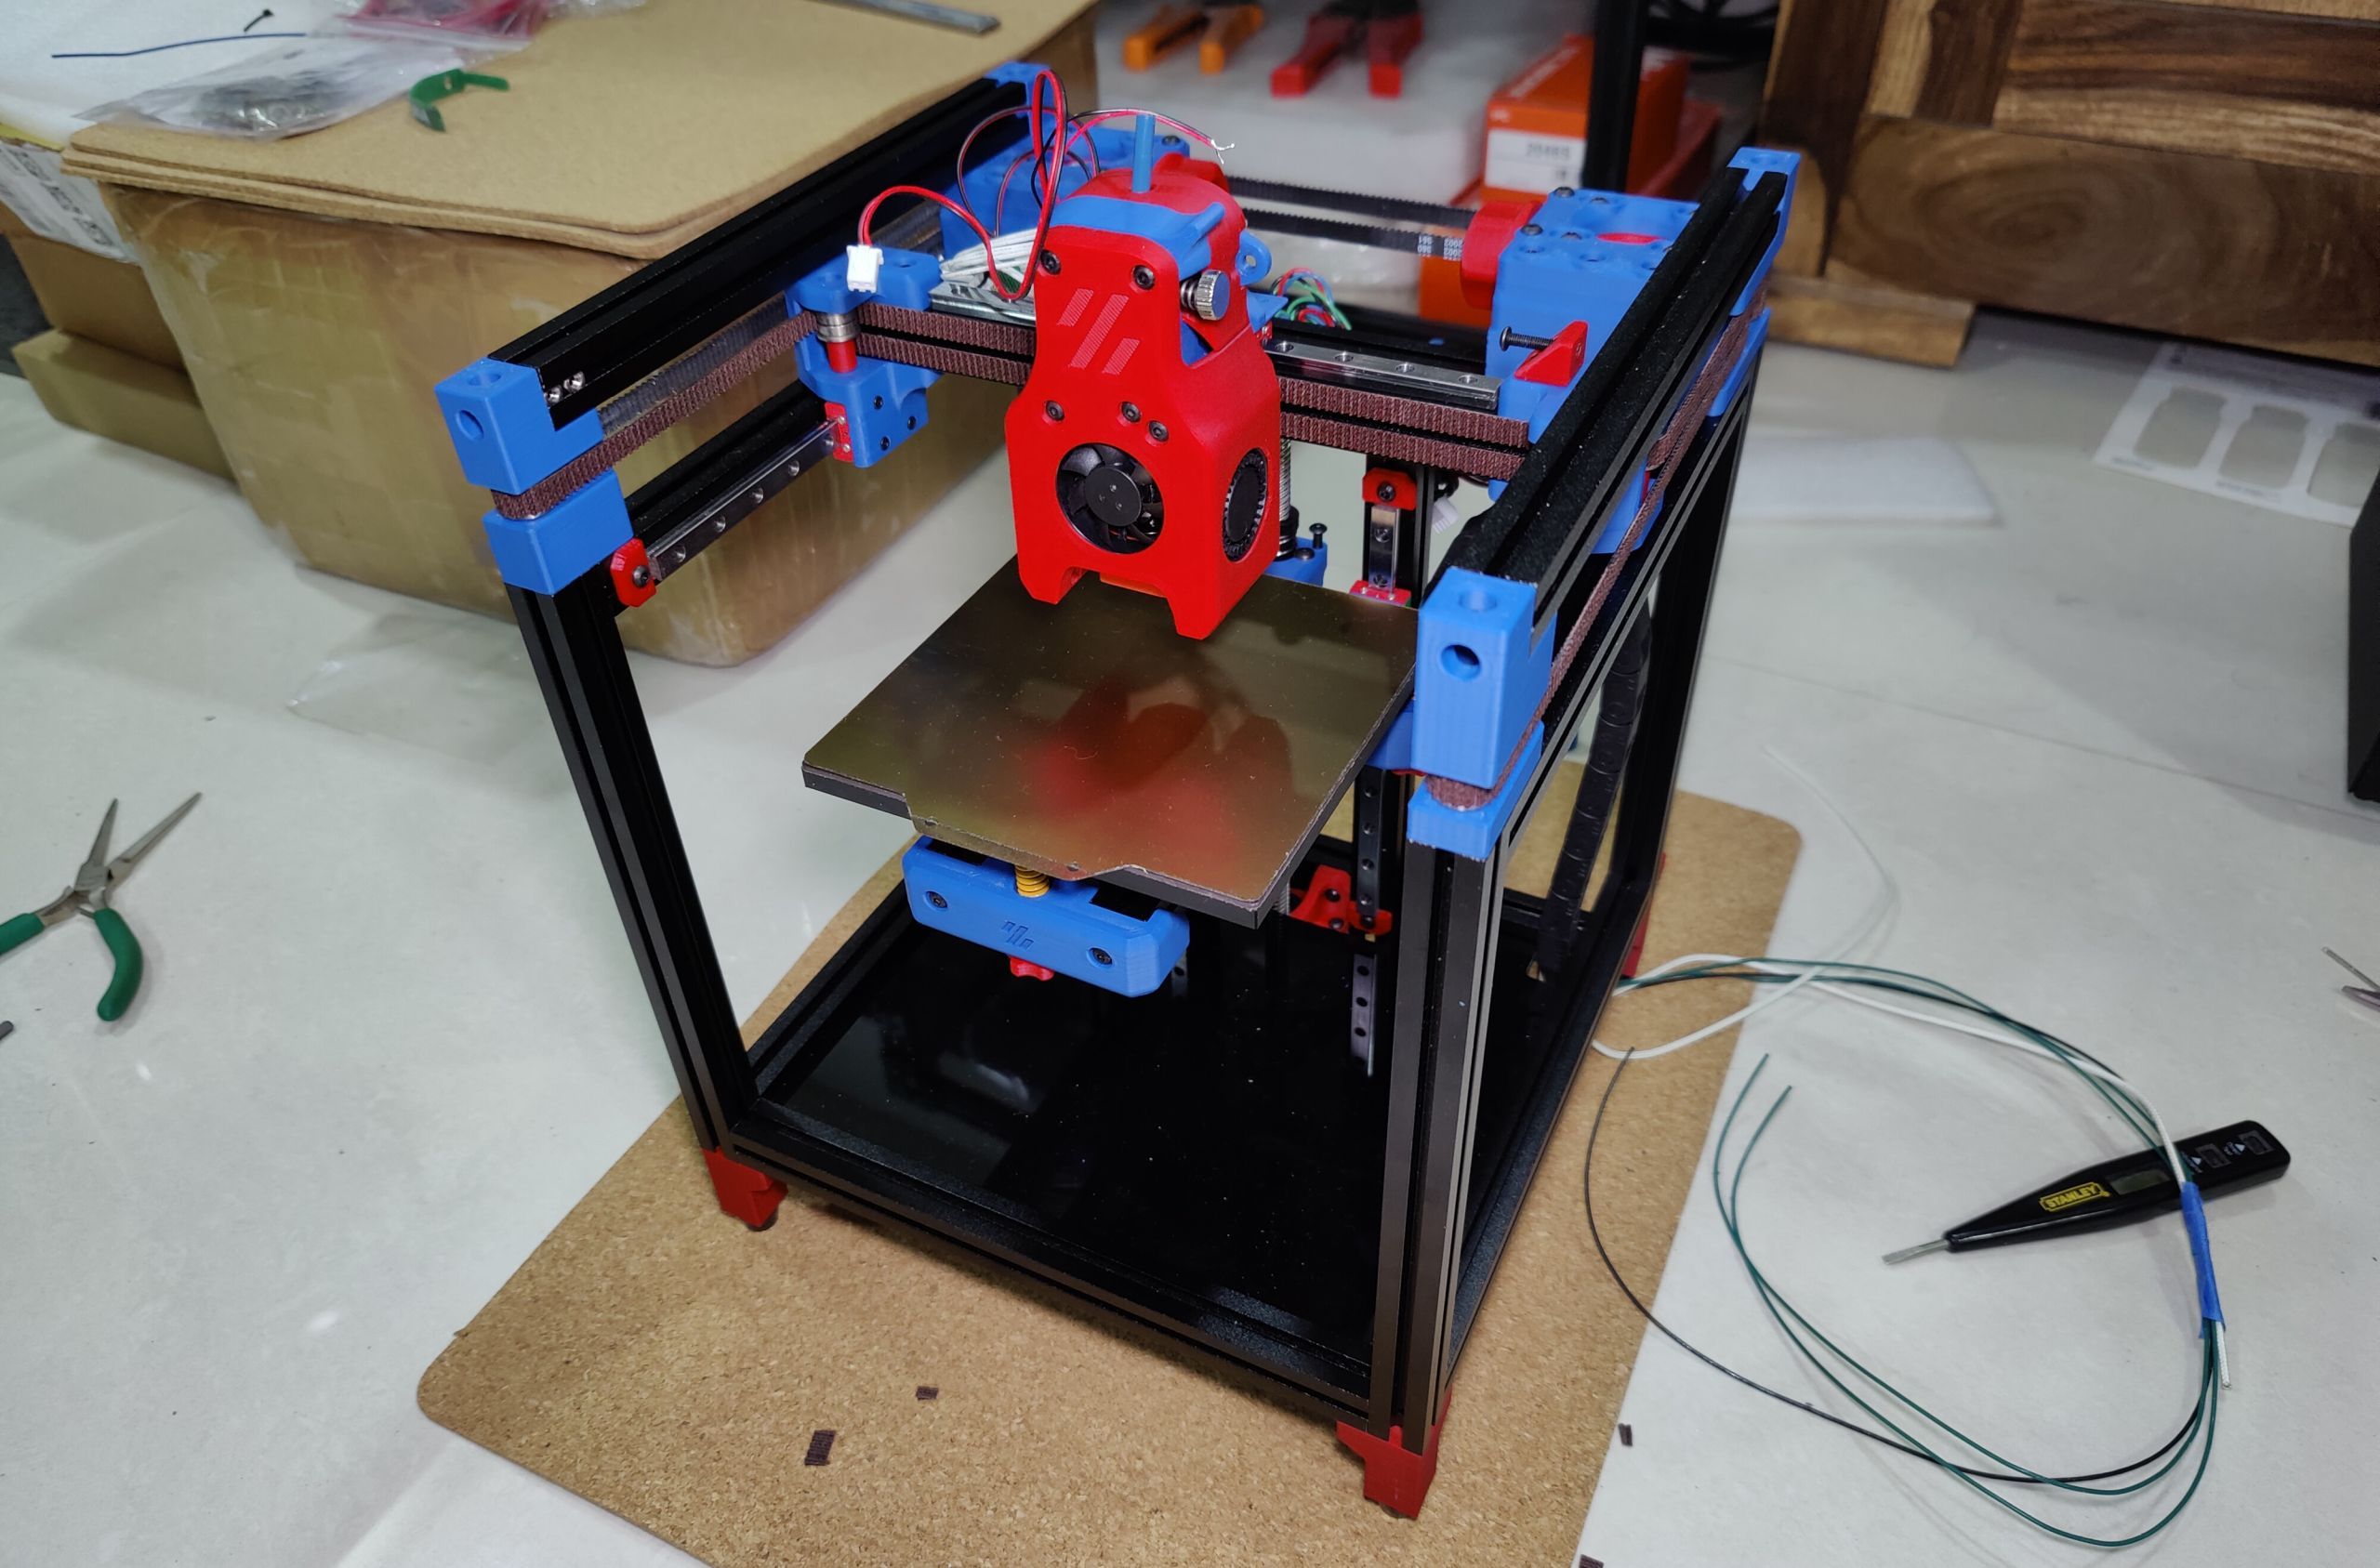
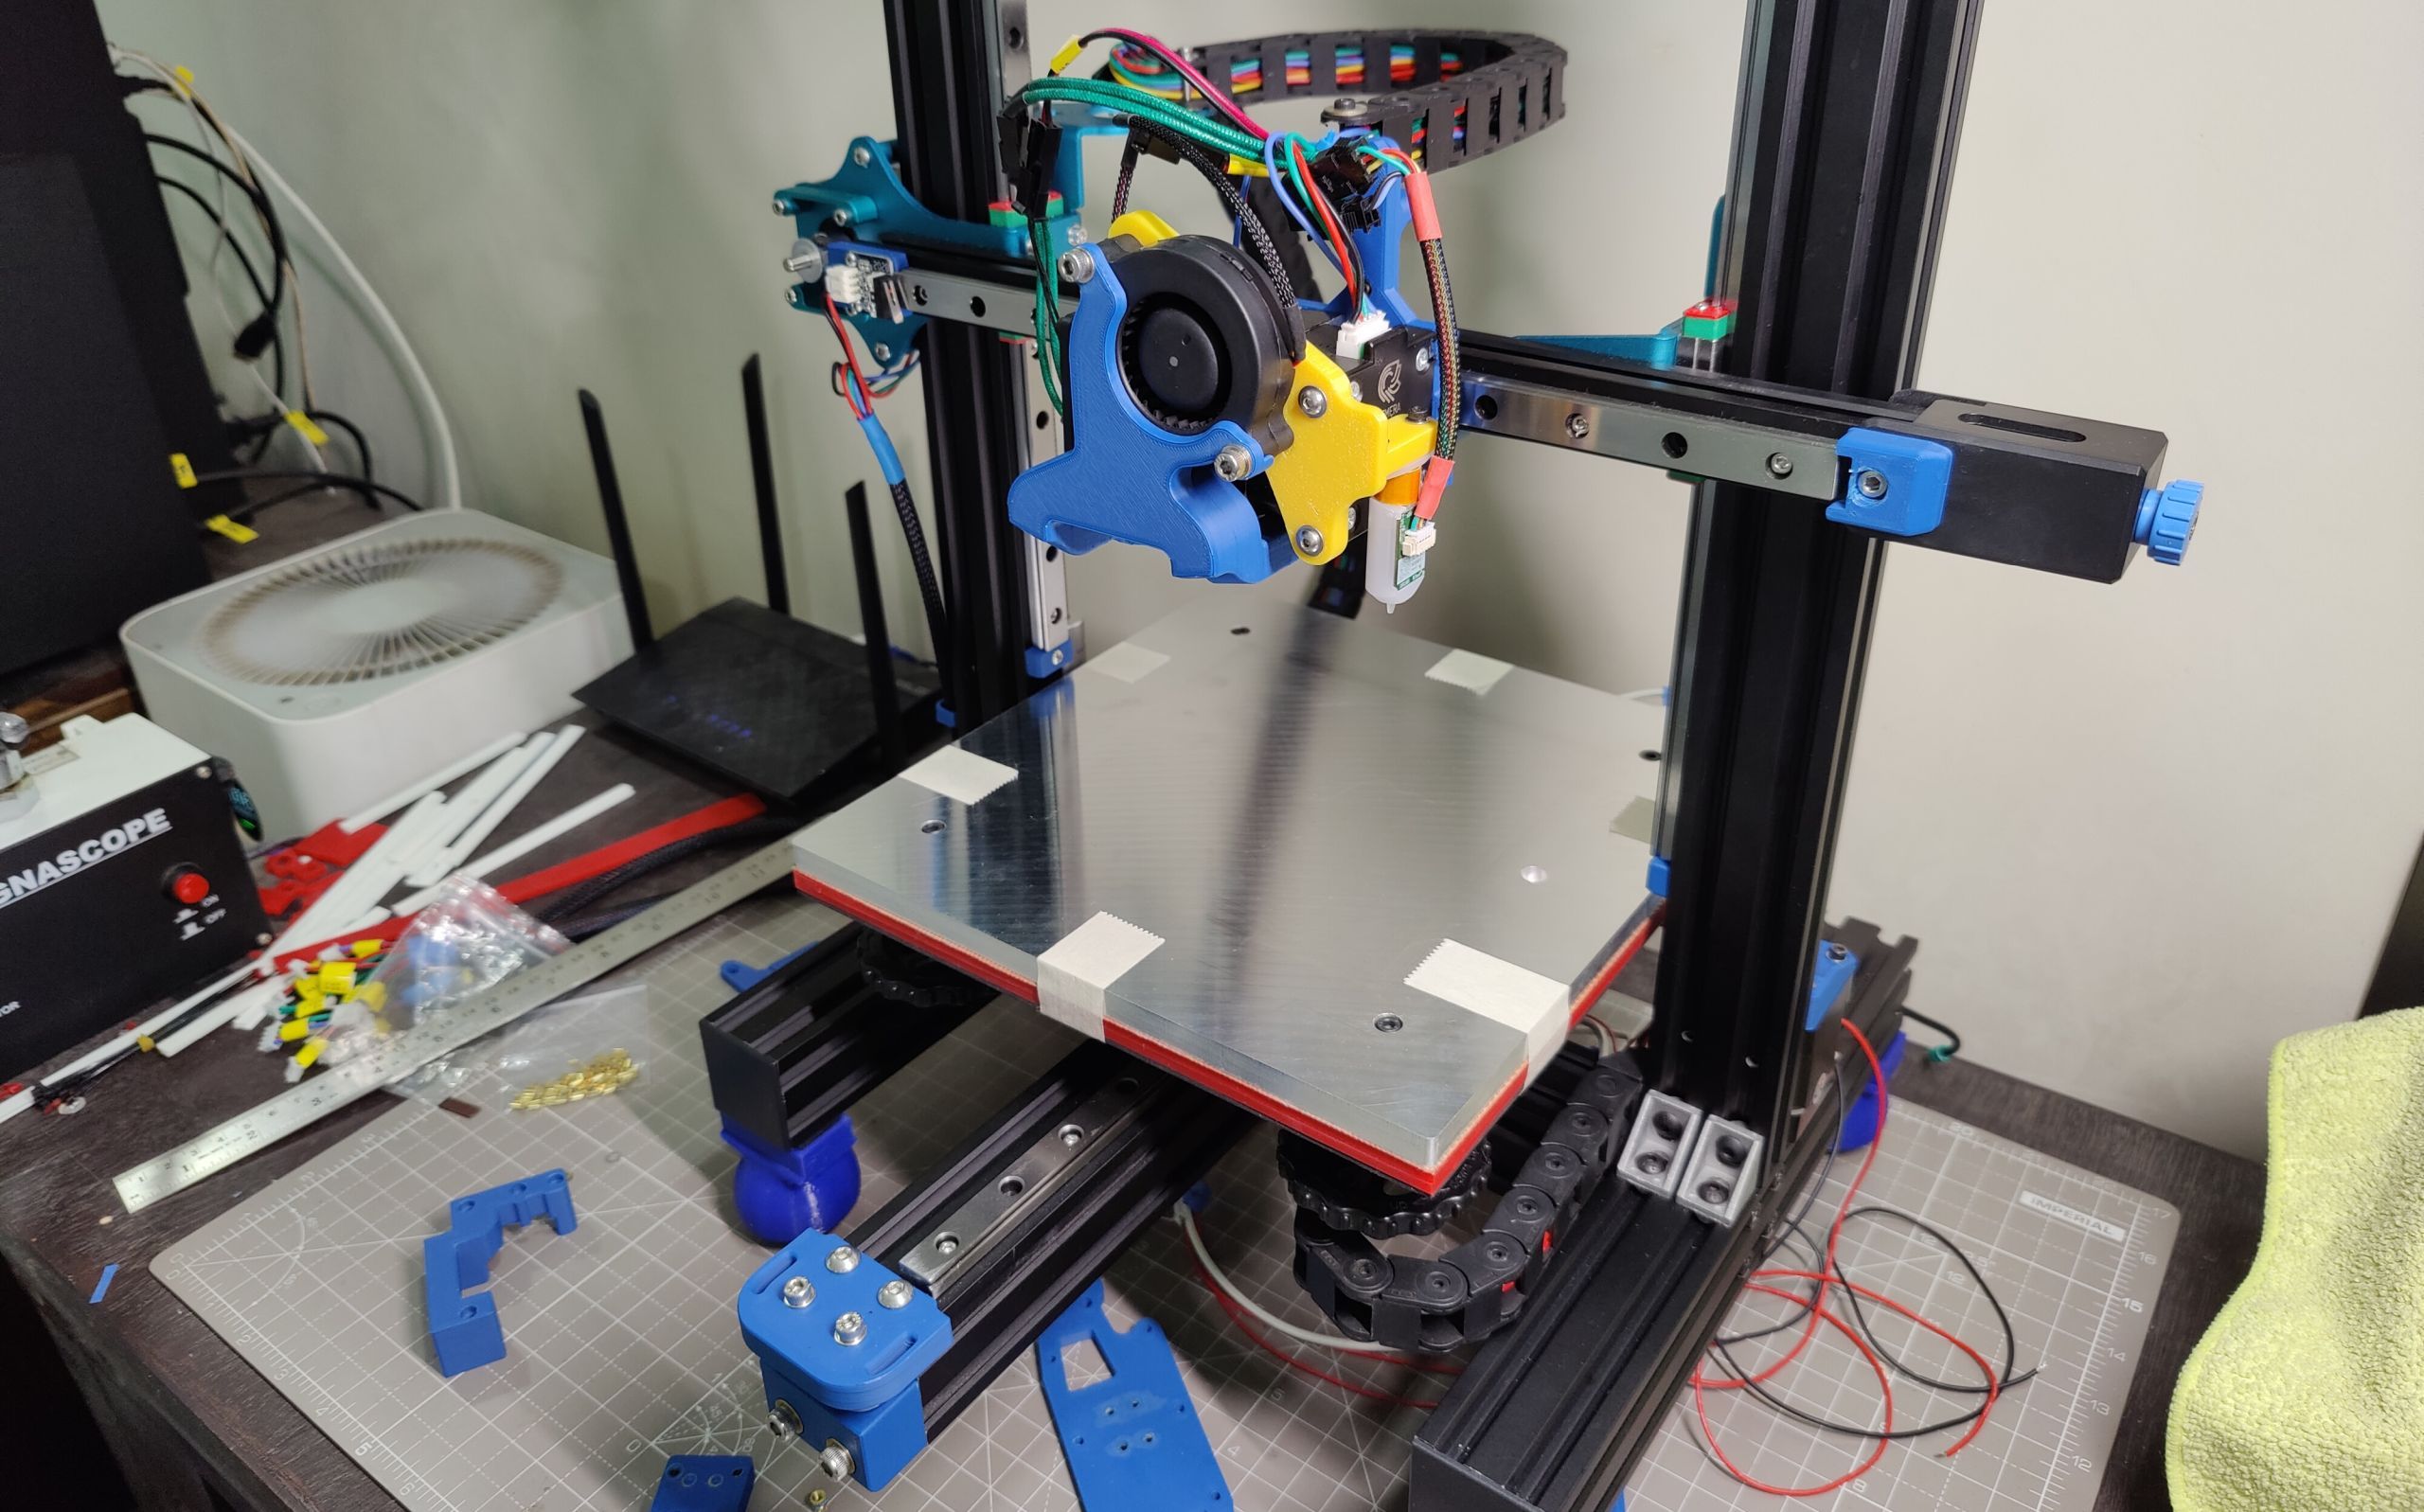
Step 1: Take away the Construct Platform
The precise steps range in keeping with the make and mannequin of your 3D printer, however the course of is roughly the identical for Ender-3 or different variants of the Prusa i3 “bed-flinger” design. Step one invariably includes eradicating the construct platform in any other case referred to as the printer mattress.
Your 3D printer’s meeting guide could have detailed directions, but it surely usually includes these steps:
- Powering the printer off.
- Eradicating the facility plug from the wall socket.
- Detaching the mattress heater and mattress thermistor wires.
- Unscrewing the mattress adjustment knobs.
- And eventually lifting the mattress off the 3D printer chassis.
Maintain the mattress apart for now, and transfer onto the following step.
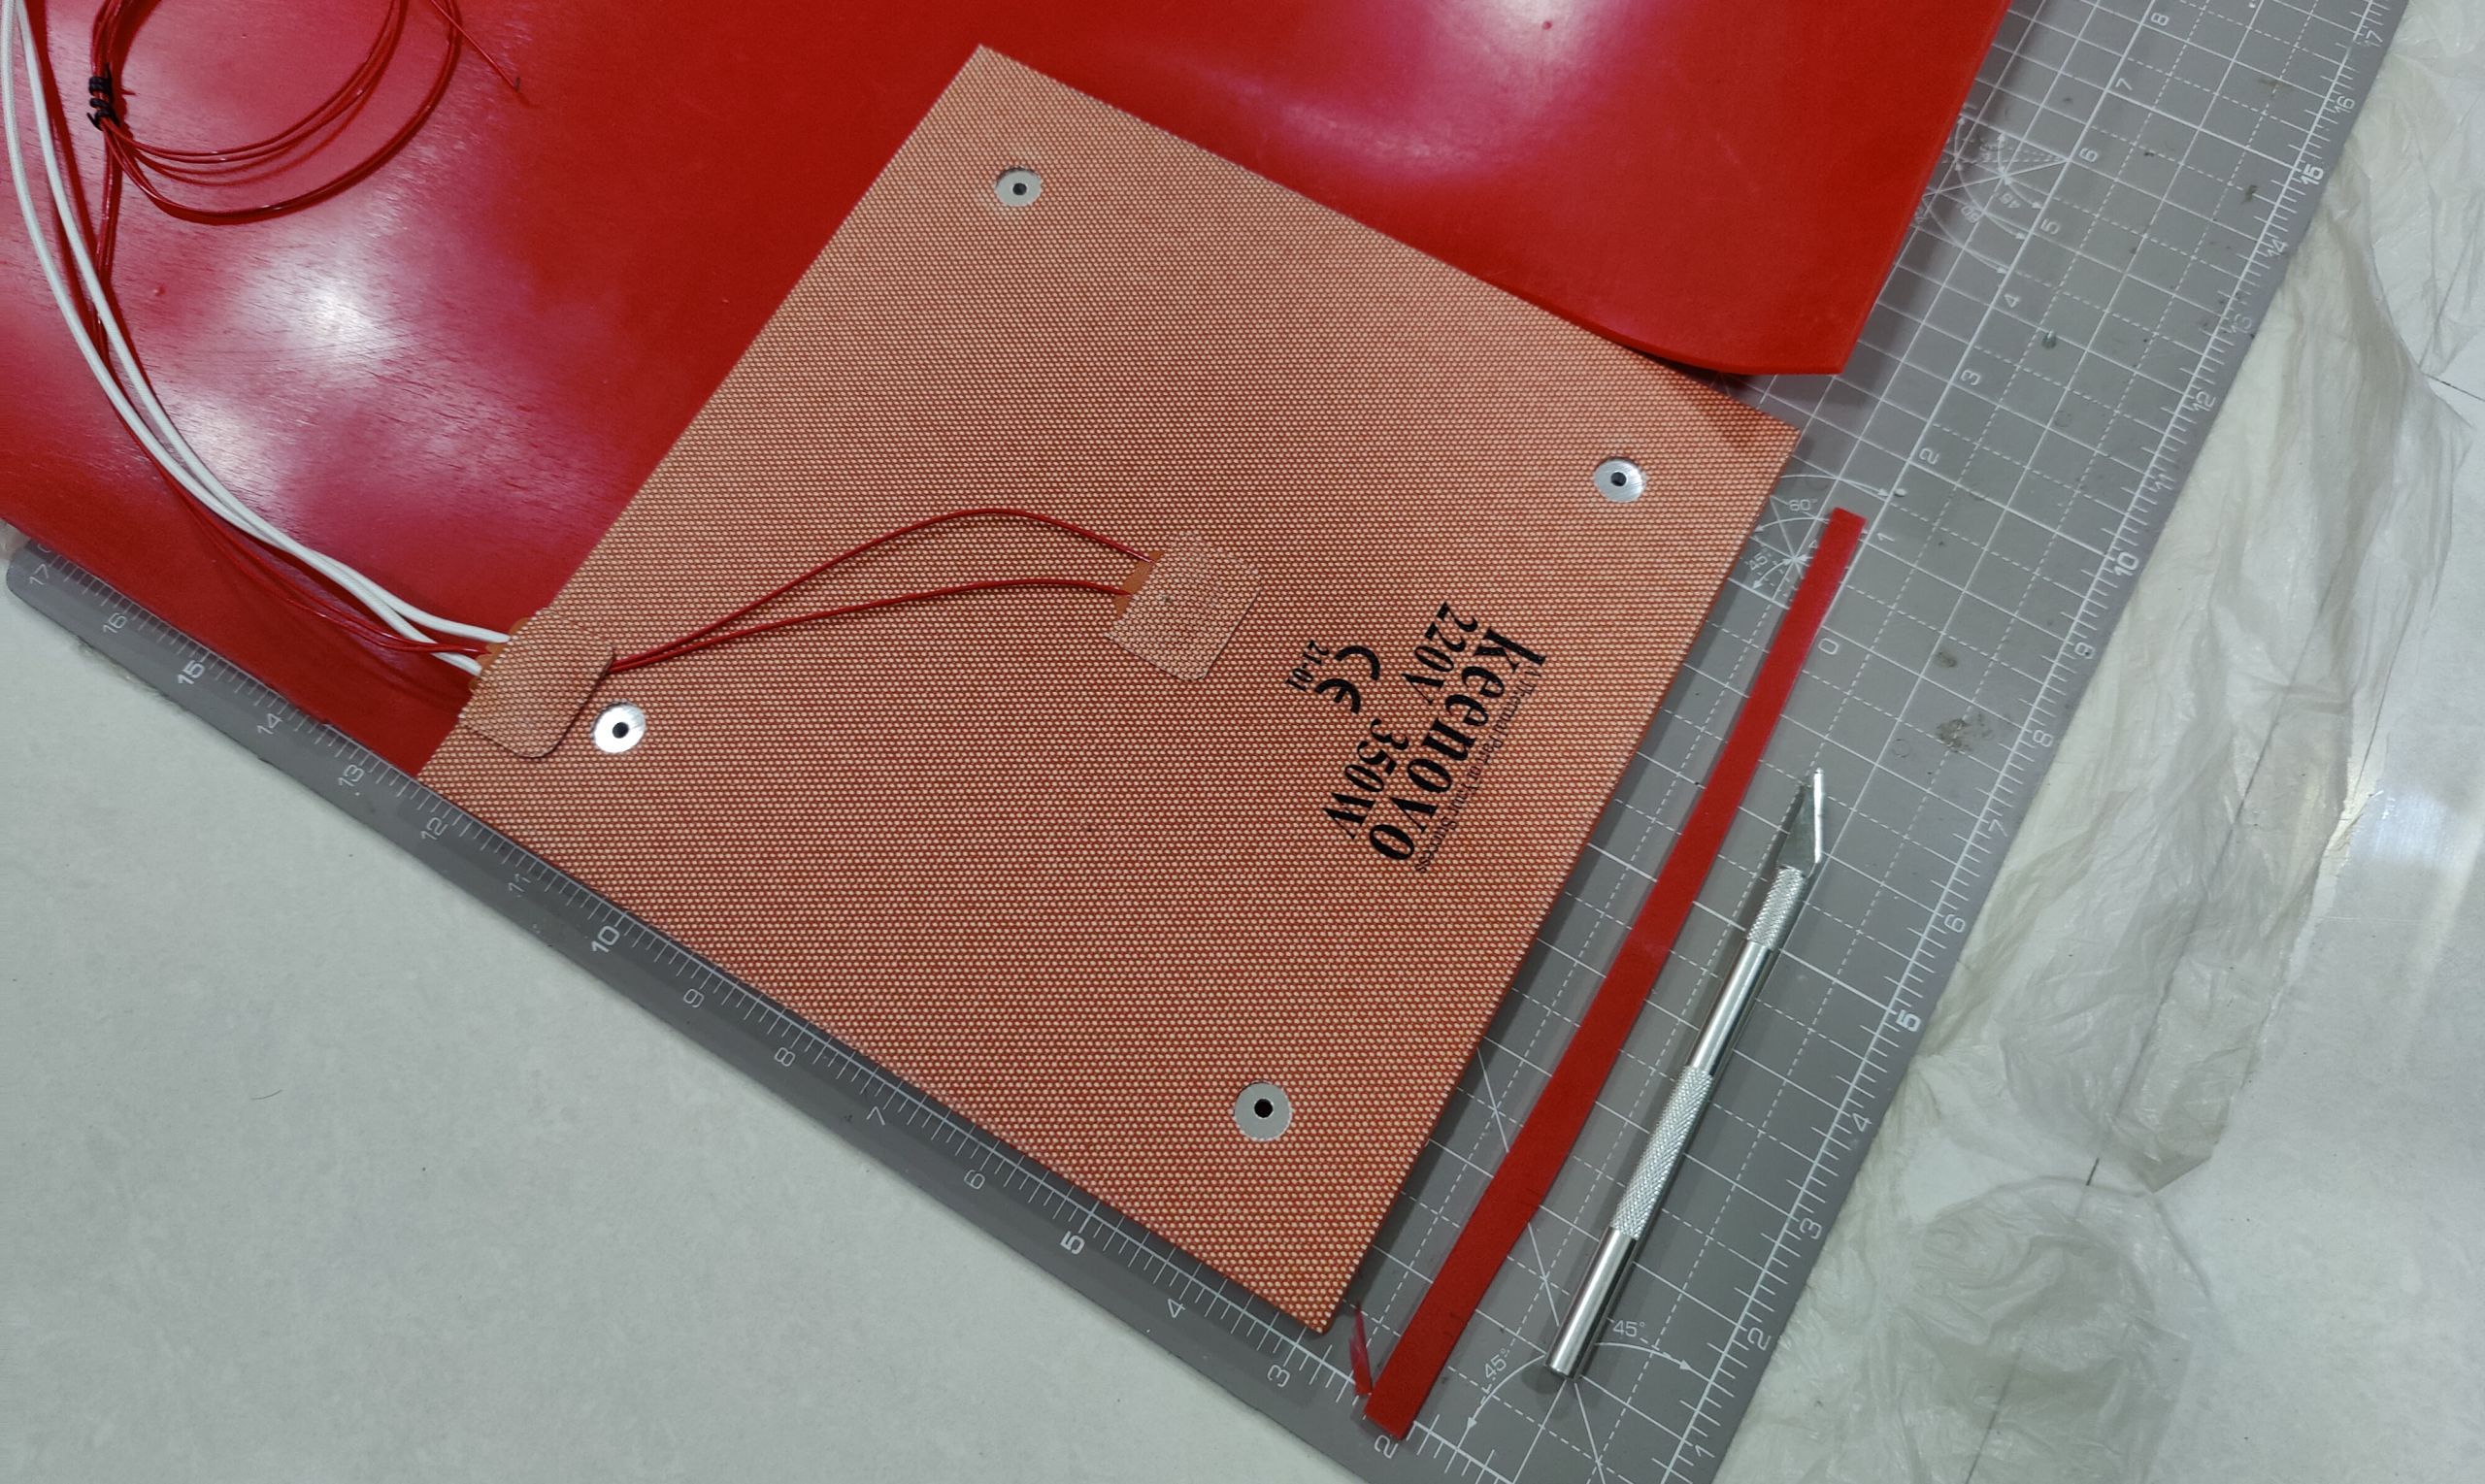
Step 2: Minimize the Insulating Materials to Dimension
Lay your thermal insulation sheet down on the reducing floor and place the mattress on high. Use a field cutter or an X-Acto knife to chop the sheet to the precise dimensions of the mattress. A uninteresting blade will make the duty painfully gradual and tedious, so you should definitely use a recent, sharp blade.
A thicker insulating layer retains warmth higher, however high-density supplies equivalent to silicone add a substantial quantity of weight. It isn’t advisable to go overboard with insulation thickness for printers equivalent to Prusa i3 and Creality Ender-3 that make use of shifting beds.
It’s completely vital that the thickness of the insulating sheet shouldn’t exceed the size of the mattress springs when they’re compressed. For instance, in case your 20mm lengthy mattress springs are compressed to 10mm upon tuning, it’s wiser to restrict the insulation thickness to 6mm or much less.
Step 3: Minimize Out Holes for Mattress Screws
Place the mattress on the insulation sheet and mark out the holes meant for the mattress screws. You may both use a gap punch software to chop a round gap of acceptable diameter, or use a chisel and hammer to chop out clear squares.
Talking of acceptable gap measurement, they need to be massive sufficient to accommodate the mattress springs with out touching or snagging on them.
You may as well resort to a field cutter or X-Acto knife in a pinch, when you don’t have entry to the aforementioned instruments. Nevertheless, the cuts received’t be as clear or exact.
Step 4: Does Your Mattress Have a Flat Underside?
The heated beds on nearly all 3D printers make use of PCB heaters. Such beds are likely to have flat undersides. If that’s the case along with your 3D printer, chances are you’ll skip this step.
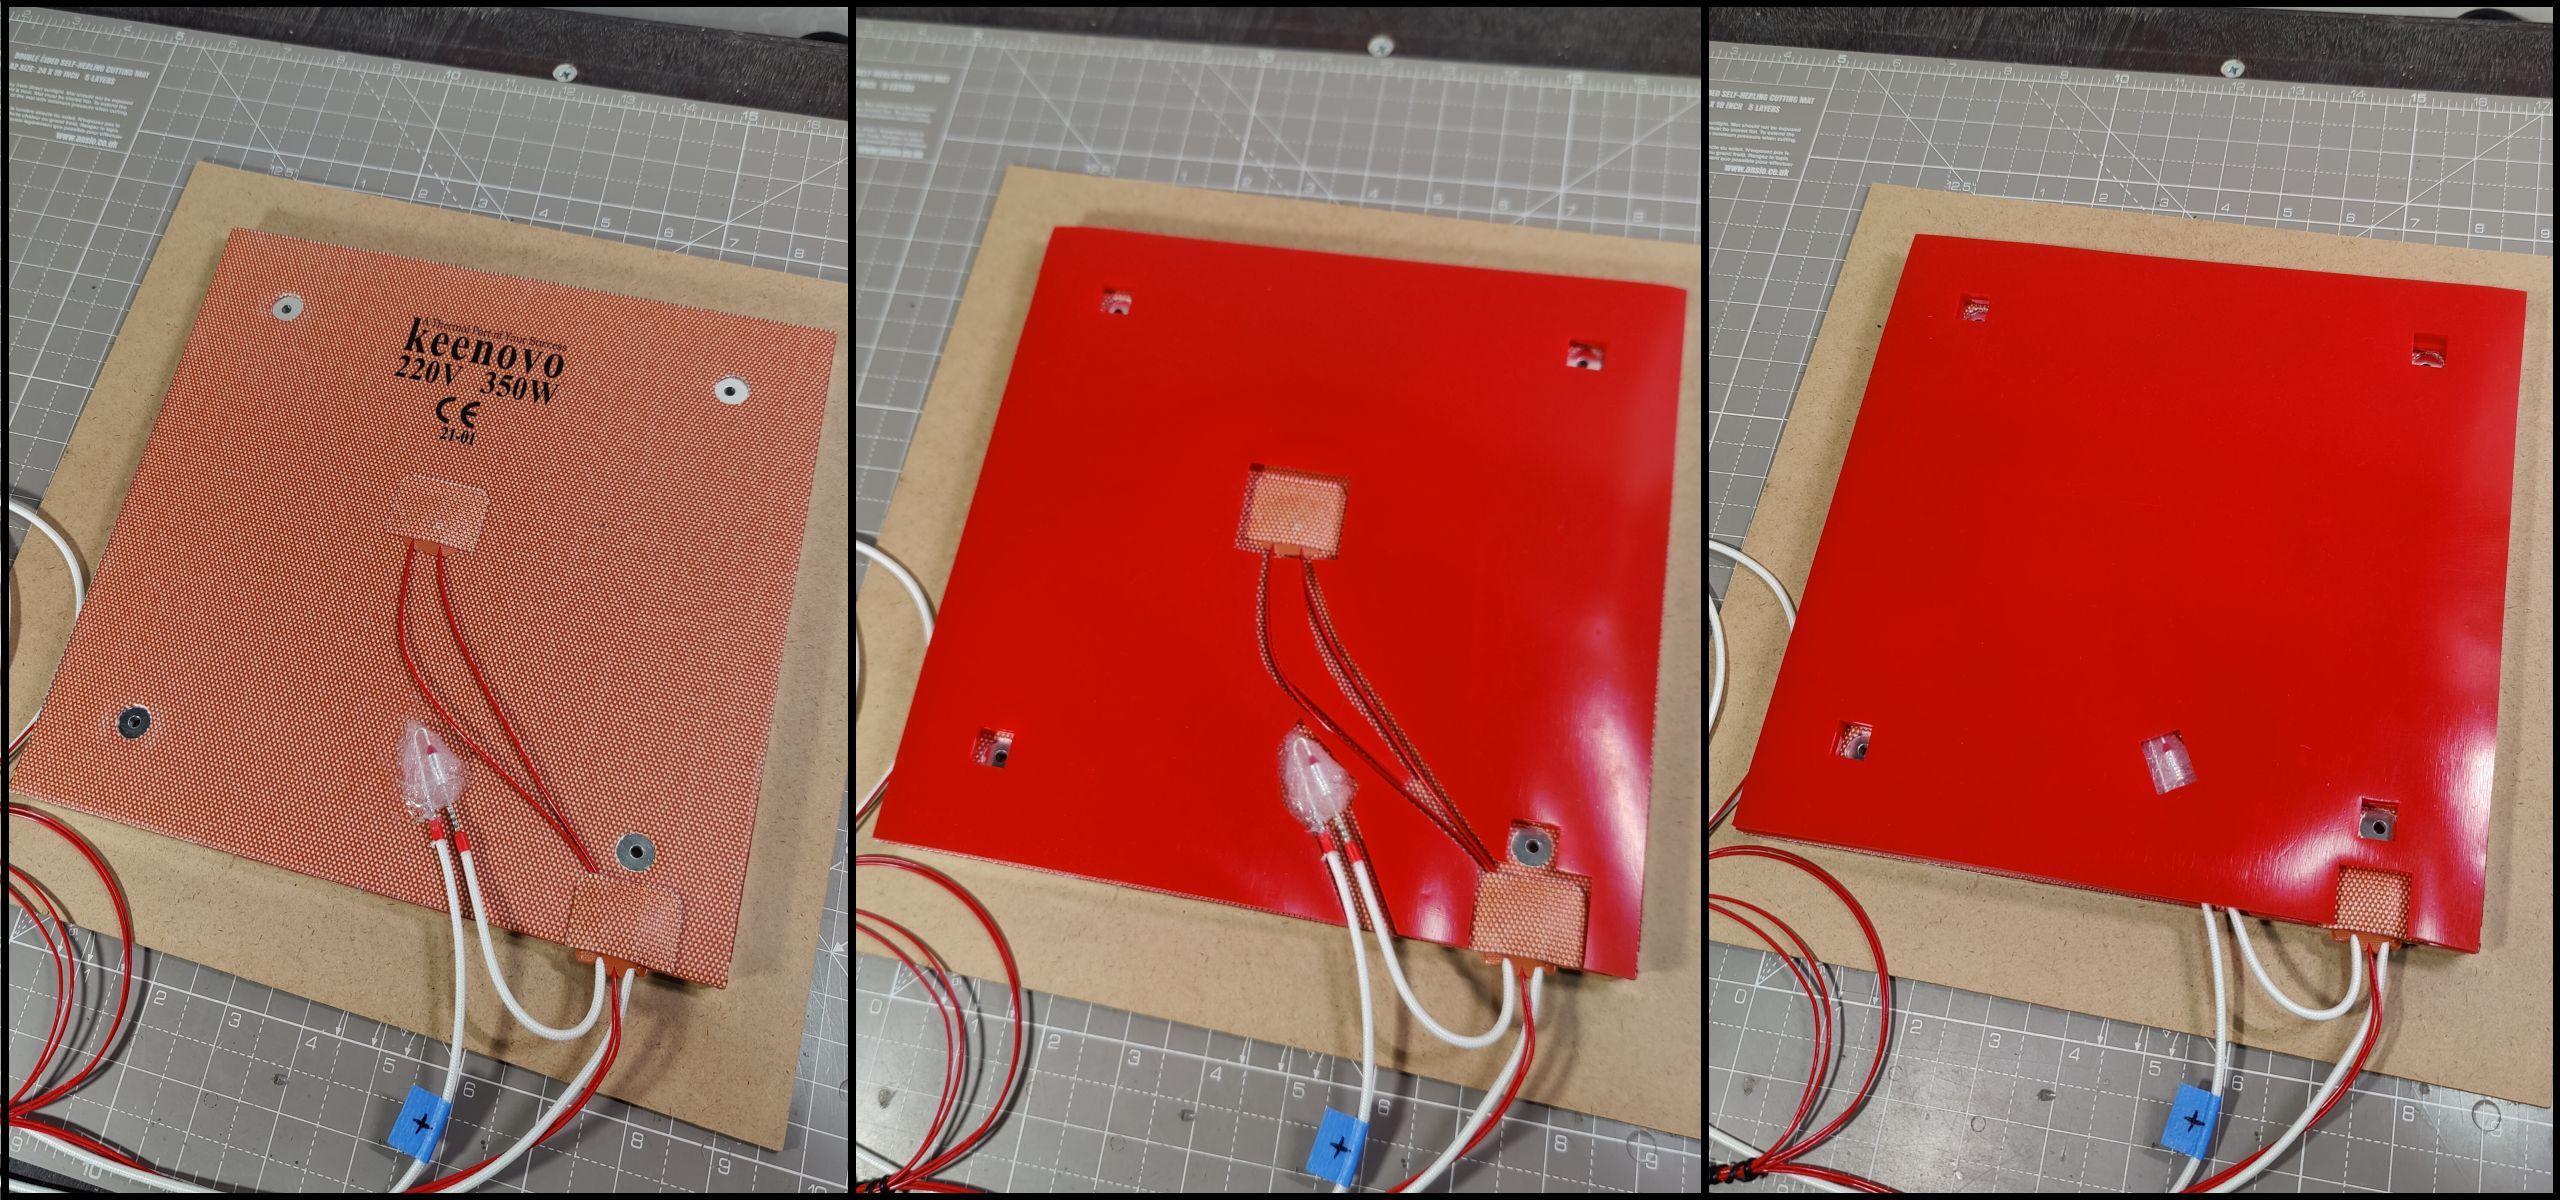
Nevertheless, those that have constructed their very own DIY 3D printers, equivalent to Voron (study extra in our Voron newbie’s information) or Rat Rig, should cope with uneven backside surfaces on their DIY beds, on account of further parts equivalent to thermal fuses, mattress thermistors, and cabling.
Utilizing a number of thinner insulation sheets with cutouts to accommodate these protruding parts does the trick, adopted by a last layer of insulation to cowl up any gaps.
Step 5: Put together the Mattress Floor
Earlier than we will stick the insulating sheet to the underside of the mattress, the mating surfaces should be completely cleaned of oils and impurities for dependable adhesion. Heat distilled/filtered water and a drop of dish cleaning soap works for cleansing the mattress, however isopropyl alcohol is a better option.
We advocate sporting non-powdered latex or nitrile rubber gloves, as a result of your naked fingers and palms can depart oil and dirt on the cleaned surfaces. Should you used water to wash the mattress, you should definitely wait not less than 15 to twenty minutes for it to dry out earlier than shifting onto the following step.
The insulating materials should be cleaned as nicely. Keep away from water when you’ve opted for a porous materials, equivalent to cork or foam, that may soak up or in any other case retain water. These are greatest cleaned utilizing a brush to take away mud and contaminants. Nevertheless, waterproof supplies equivalent to silicone might be cleaned with a tissue moistened with distilled/filtered water.
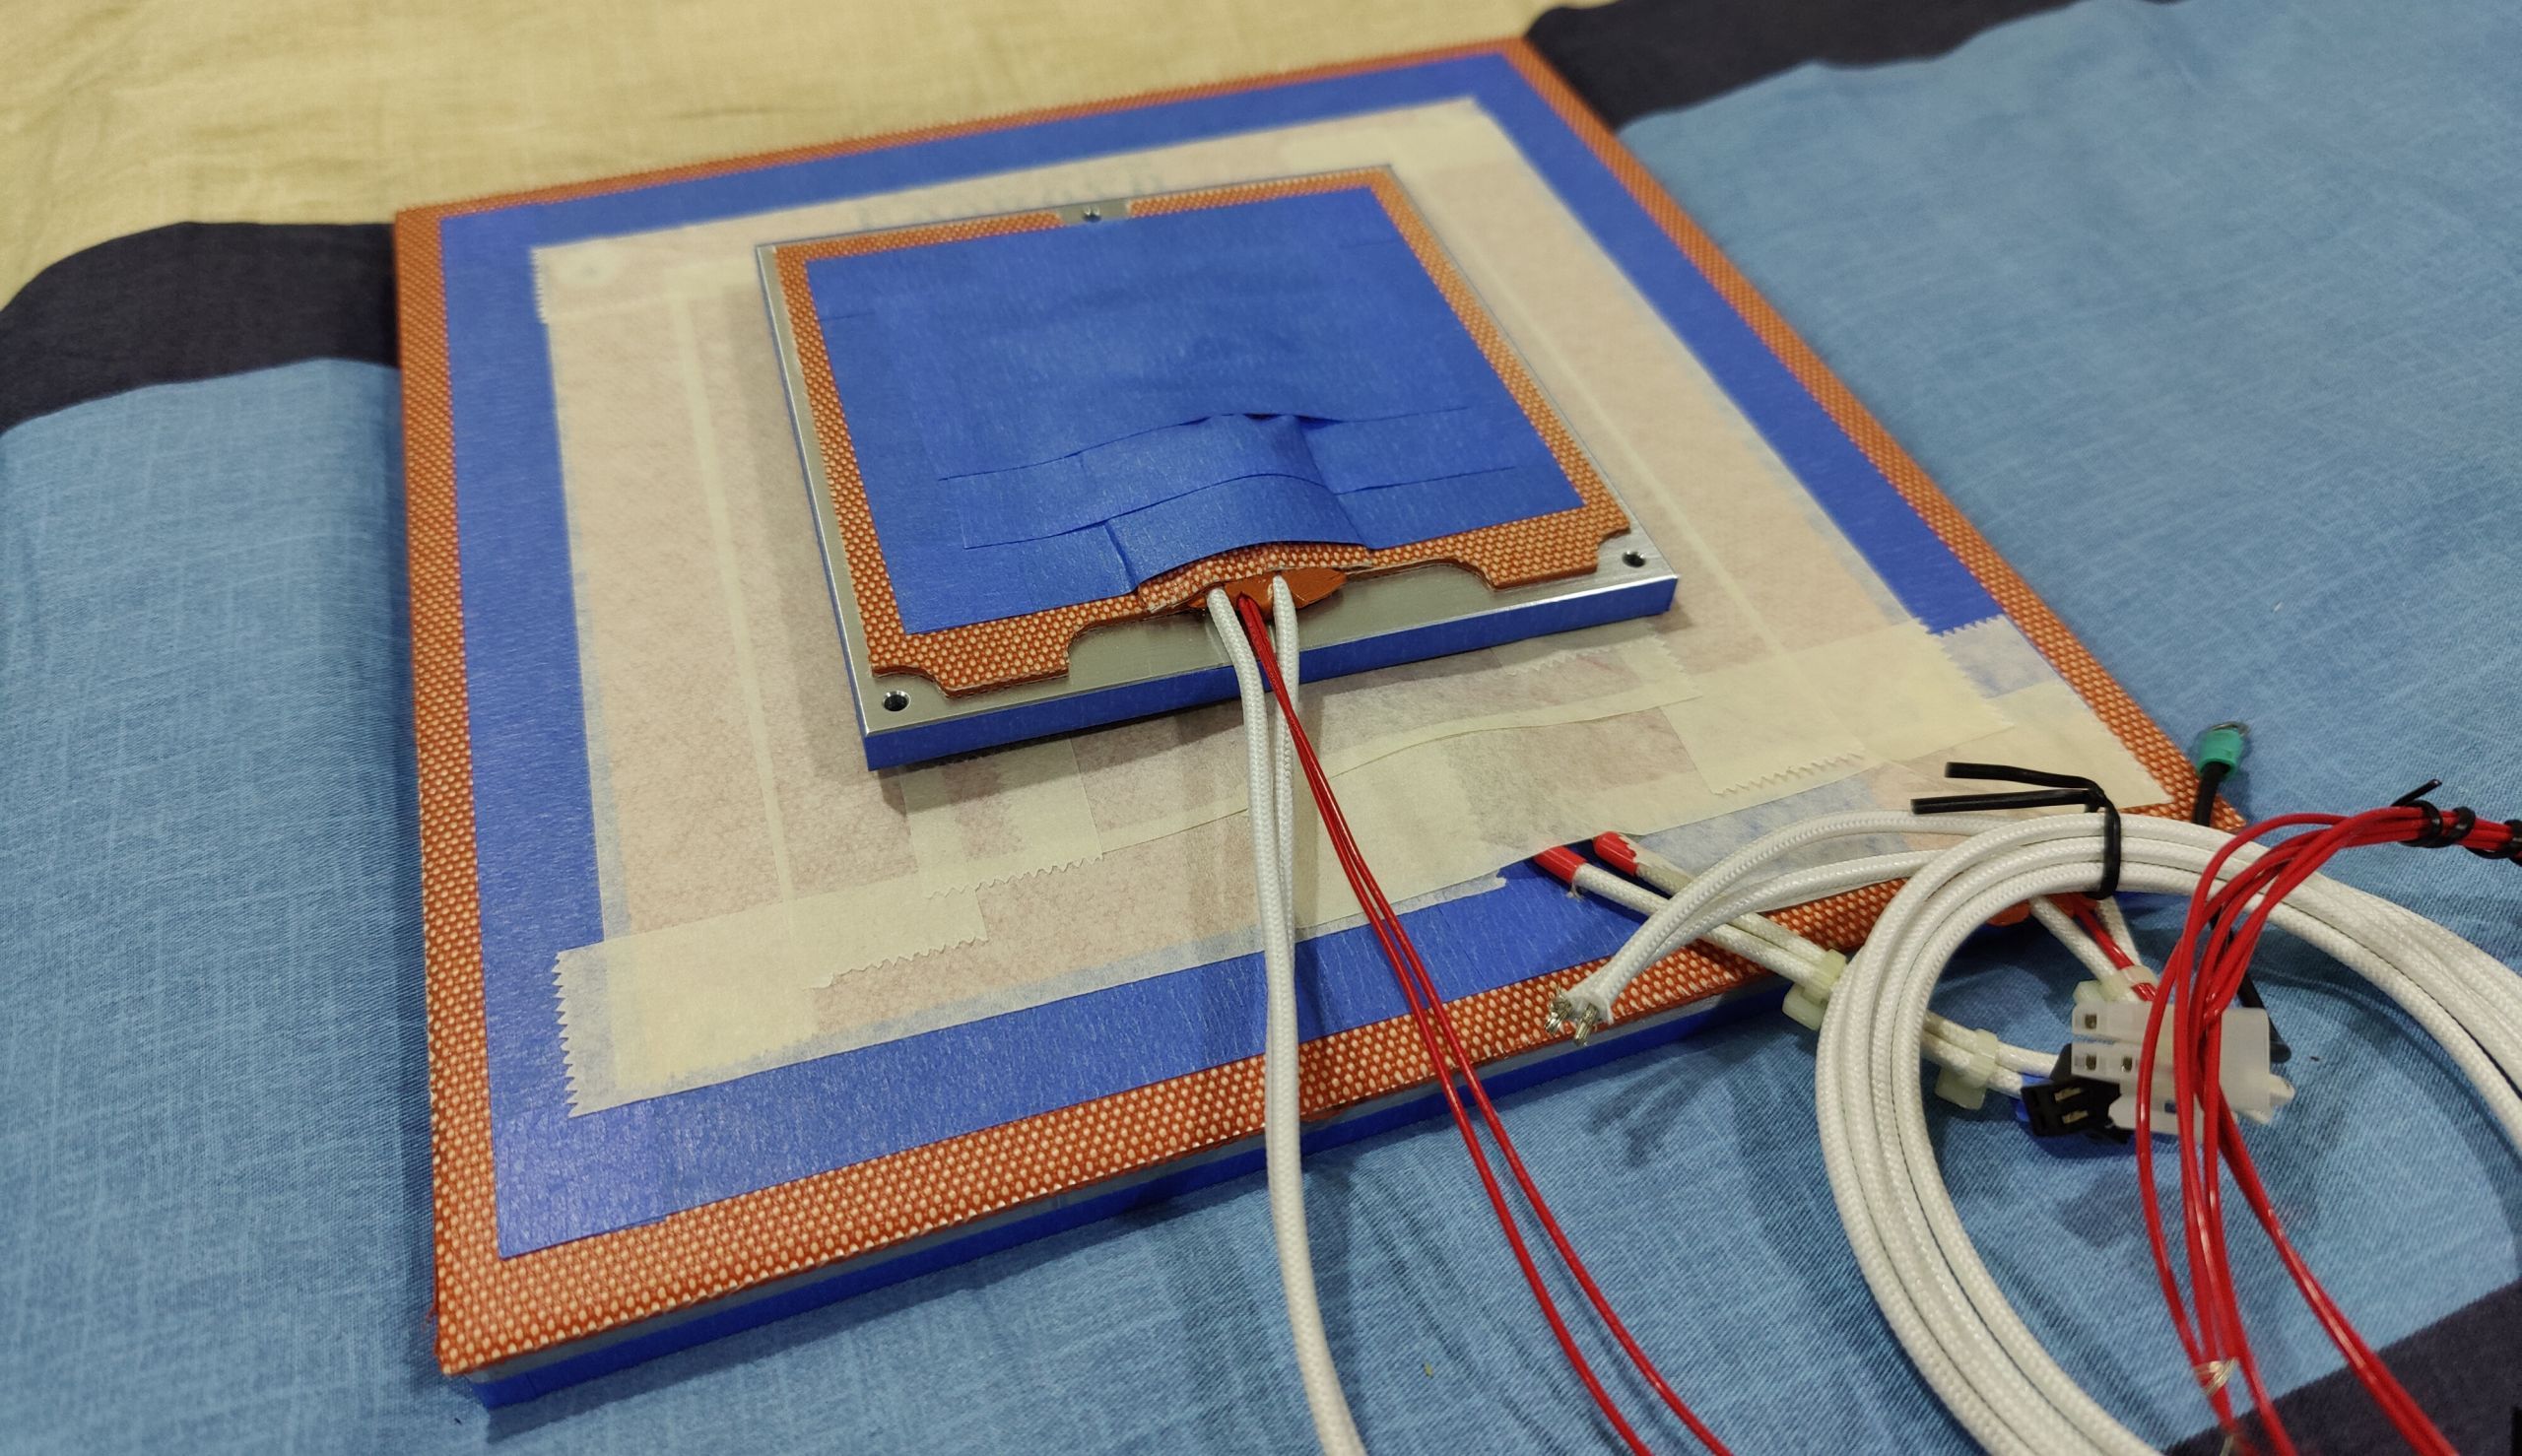
As soon as the mattress floor is clear, chances are you’ll optionally apply masking tape to forestall the silicone adhesive from migrating contained in the perimeter.
Step 6: Sticking It All Collectively
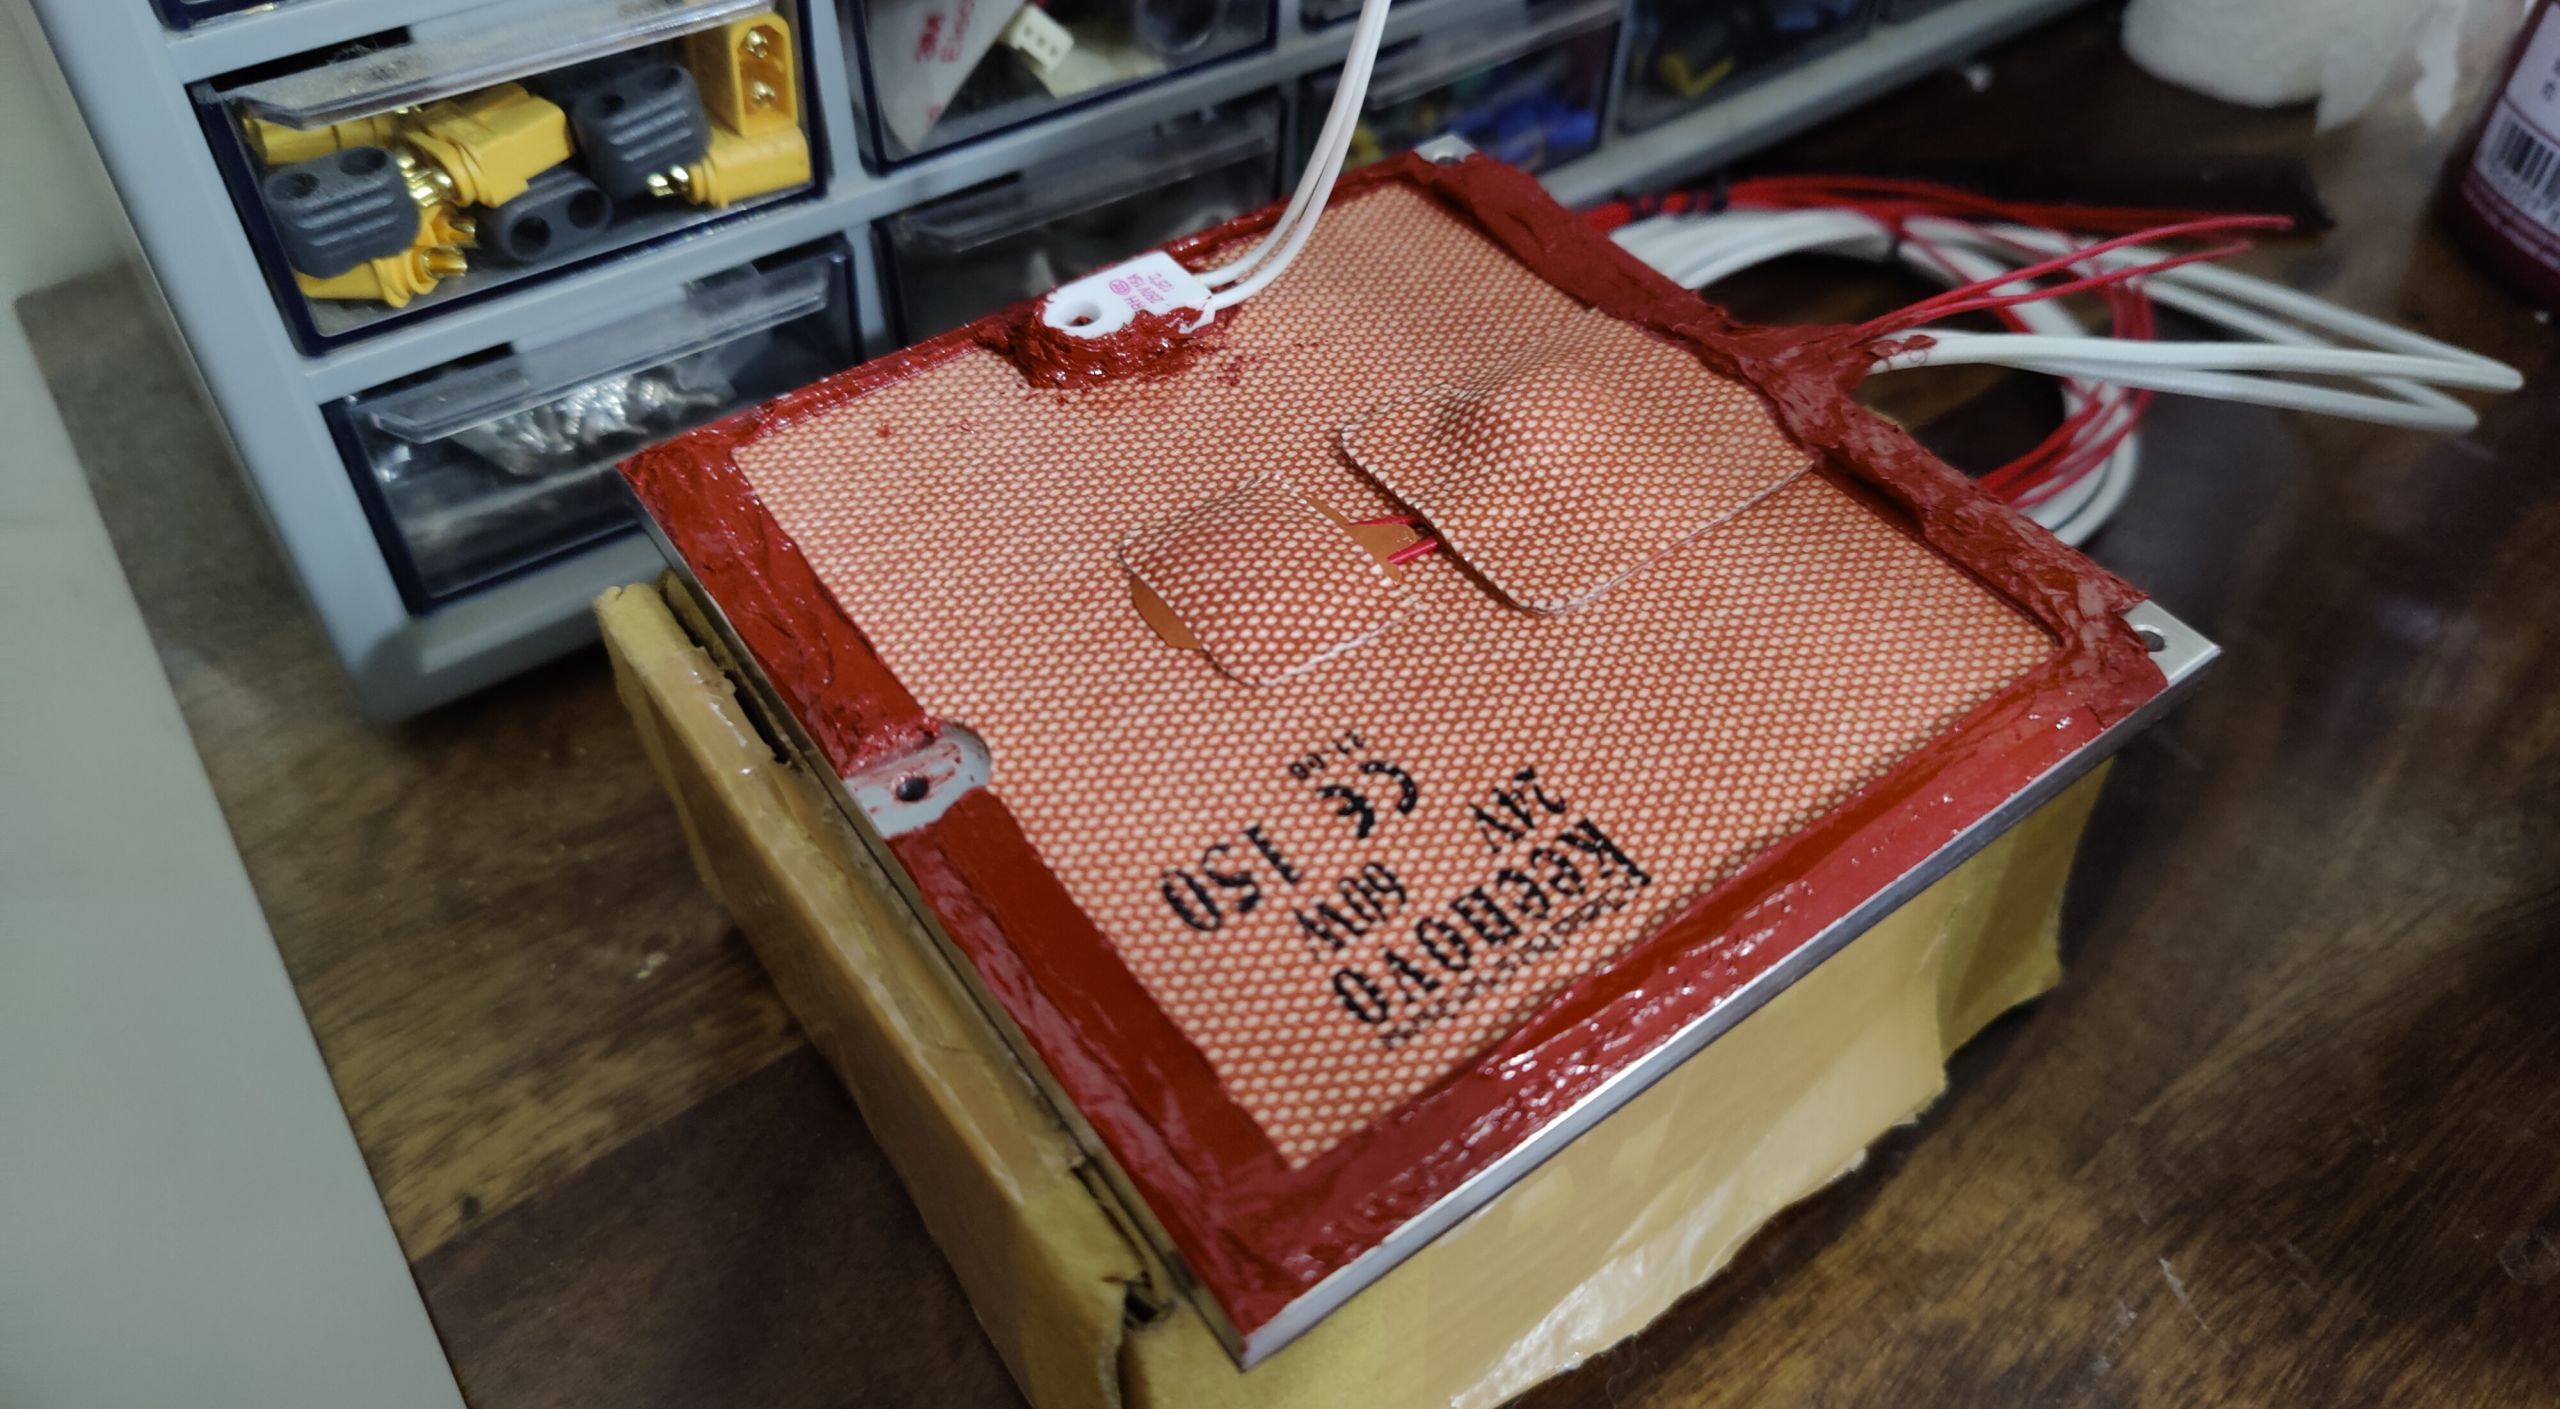
Apply a skinny however constant layer of excessive temperature RTV silicone sealant to the underside of the mattress. You may both select to use the adhesive all over the place or simply to the perimeter. The latter is completely advantageous as a result of even when an air hole had been to type within the middle, that may solely enhance thermal insulation.
Rigorously align the thermal insulating sheet and stick it onto the mattress. Silicone adhesive begins to remedy instantly after being uncovered to air, however most formulations enable adjustment for 10-Quarter-hour. In case you are utilizing a number of insulation sheets, repeat the method for all sheets.
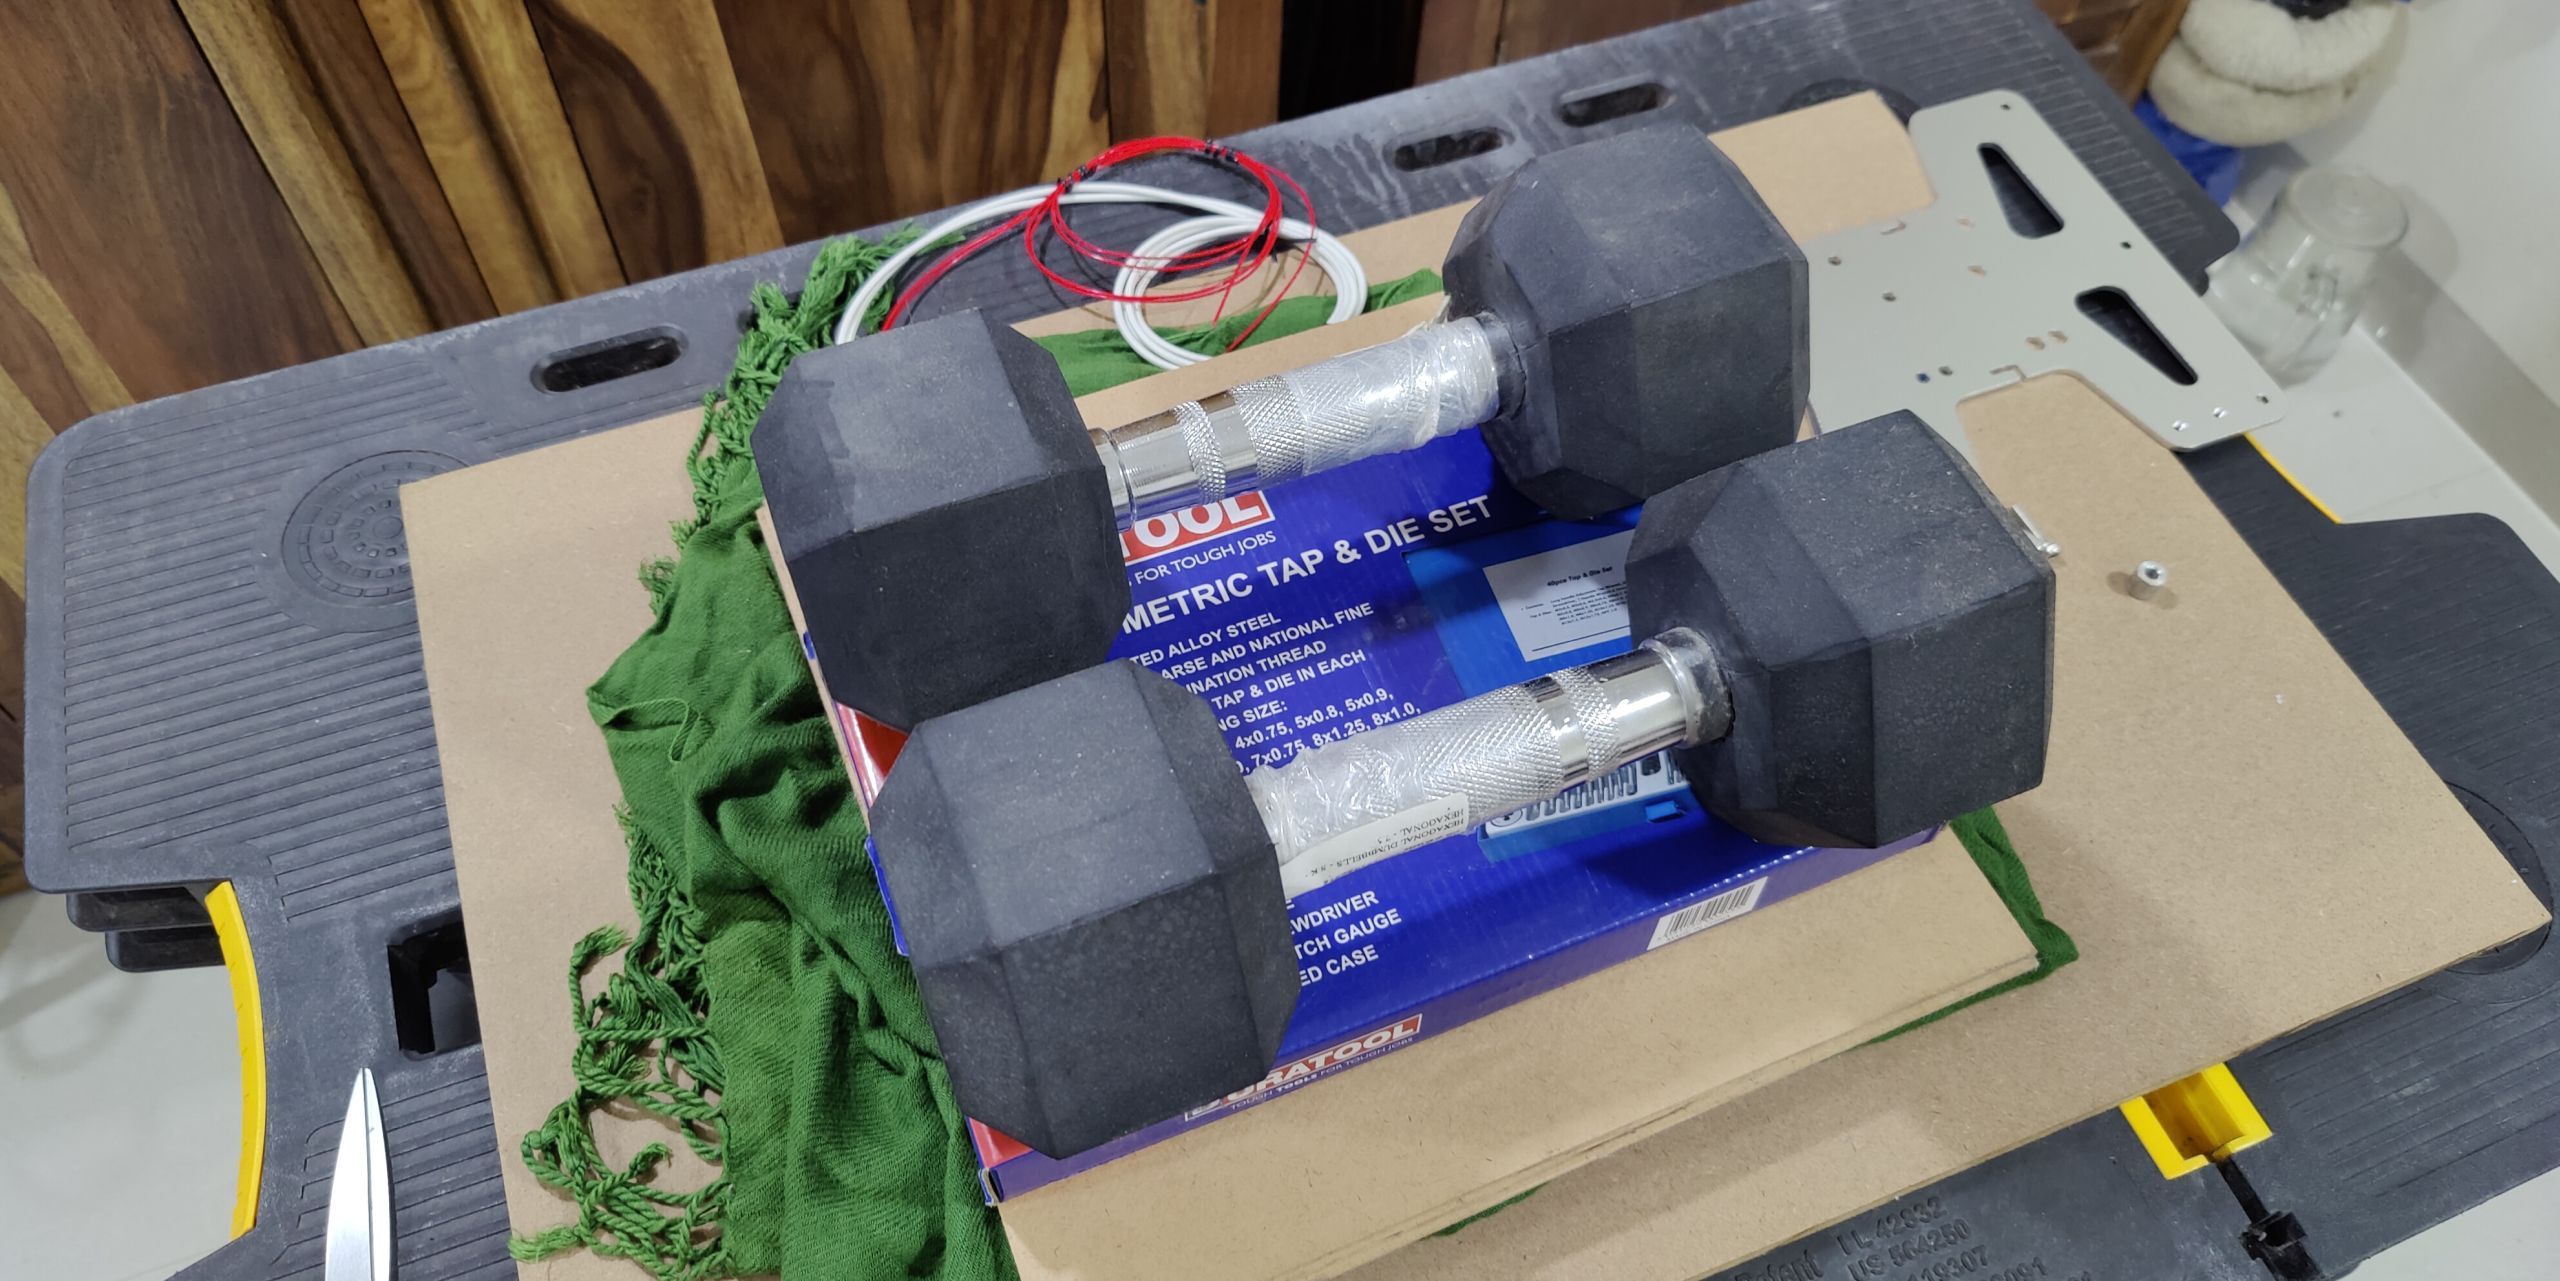
Place some weight on the mattress, whereas resting it on a flat floor the place it may possibly lie undisturbed. Most silicone adhesives take anyplace between 24 and 48 hours to remedy. Nevertheless, reaching full adhesive energy could take as much as every week relying on the adhesive formulation. Please check with the producer’s directions for readability. Ideally, keep away from eradicating the burden or in any other case disturbing the mattress for not less than two days.
Step 7: Reinstall the Mattress
Along with your mattress adequately insulated, now you can reassemble the mattress screws and comes, and reinstall the mattress onto the printer. Meeting is the reverse of the disassembly course of you adopted earlier.
Benefit from the Energy Financial savings
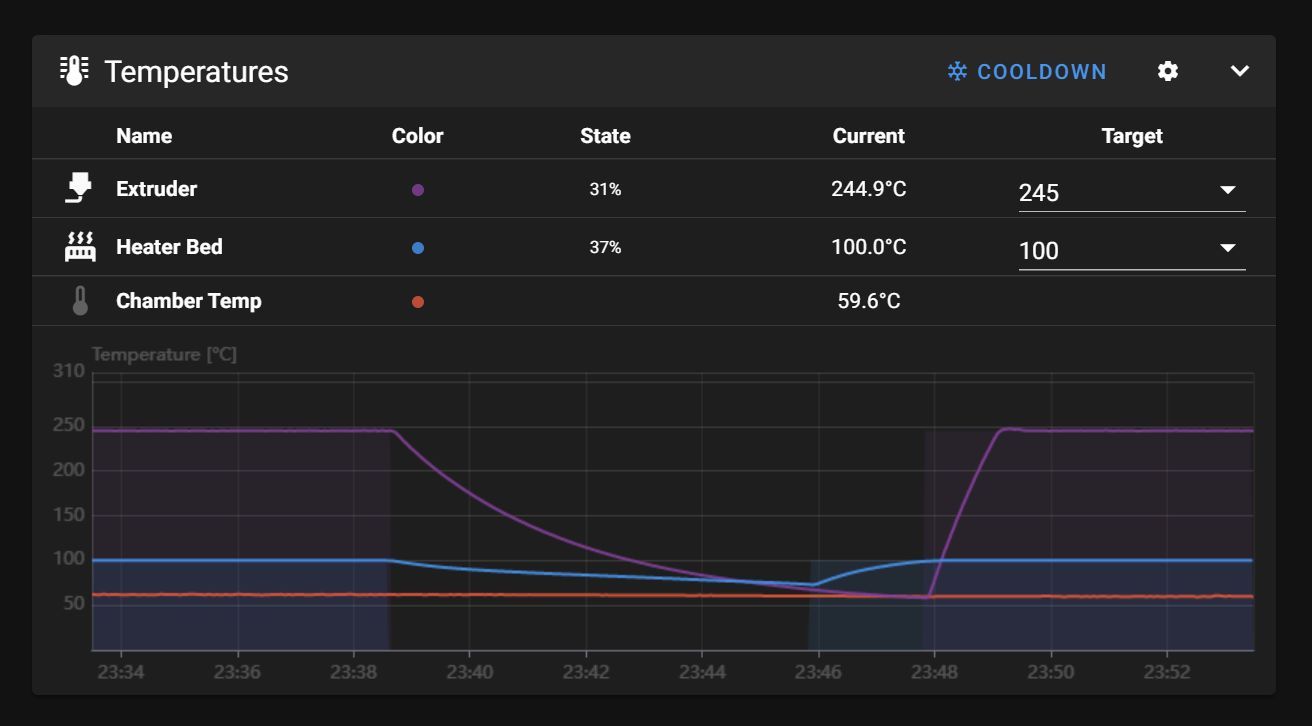
A well-insulated 3D printer mattress not solely heats up sooner, but it surely additionally considerably reduces energy consumption. That is all of the extra obvious on longer prints, the place warmth loss tends to compound to a better diploma over time.
The facility financial savings are much more pronounced on trendy 3D printers that use the PWM (pulse-width modulation) approach to regulate mattress heater energy.
Learn Subsequent
About The Creator
